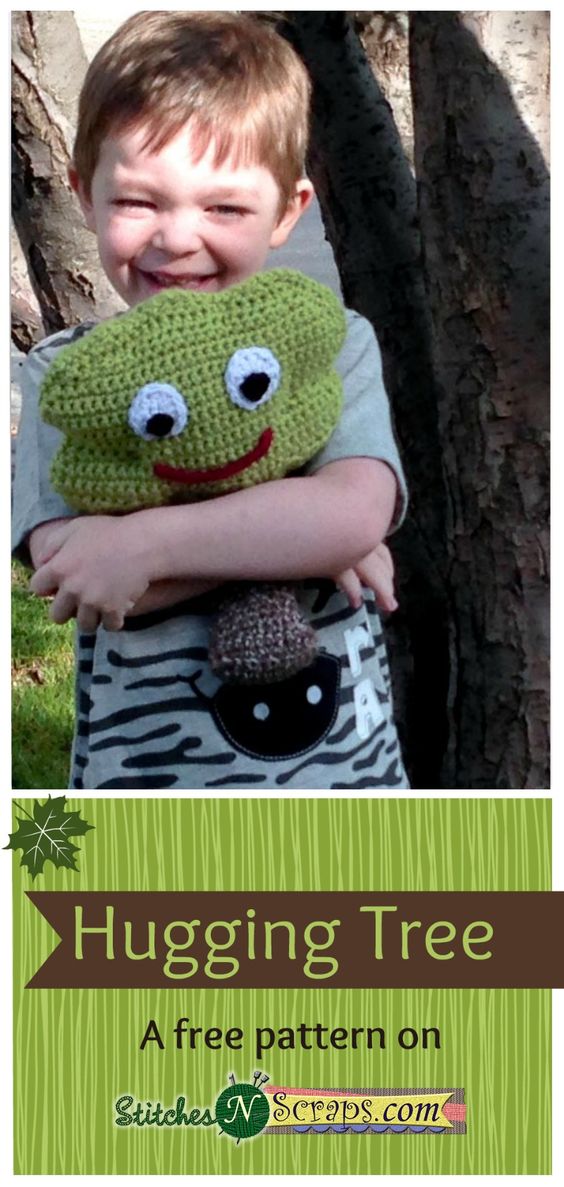
Crochet Hugging Tree
Create a cozy tree hugger using the art of crocheting. Choose a soft, durable yarn in earthy tones to blend seamlessly with the natural surroundings. You can customize the design by adding intricate patterns or colorful accents to make your crochet hugging tree truly unique. This creative project allows you to combine your love for crafting with your appreciation for the environment. Whether you're a seasoned crocheter or a beginner looking for a fun challenge, the crochet hugging tree is a delightful way to showcase your skills and spread joy to all who encounter it. Let your imagination run wild as you transform a simple tree into a work of art that will be admired by all who pass by.
Materials:
- Lion Brand Vanna’s Choice worsted weight yarn:
- 125 yds each of Fern (green) and Taupe Mist (brown)
- 10-20 yds each of White, Black and Scarlet (red)
- OR Lion Brand 24/7 Cotton worsted weight yarn:
- 125 yds each of Grass (green) and Cafe Au Lait (brown)
- 10-20 yds each of White, Black, and Red.
- Size I / 9 (5.5 mm) hook
- Yarn or tapestry needle
- Stuffing / fiber fill
Difficulty:
Easy – Basic stitches with some shaping.
Size:
About 12-13 inches tall.
Gauge:
14 sc x 16 rows = 4 inches. Gauge is not critical for this project, as long as it is tight enough so that stuffing doesn’t fall out.
Abbreviations used:
- ch = chain
- sc = single crochet
- sc2tog = single crochet 2 stitches together
- dc2tog = double crochet 2 stitches together
- dc3tog = double crochet 3 stitches together
- st(s) = stitch(es)
- sl st = slip stitch
- sk = skip
- sp(s) = space(s)
- RS = Right Side
- WS = Wrong Side
Notes:
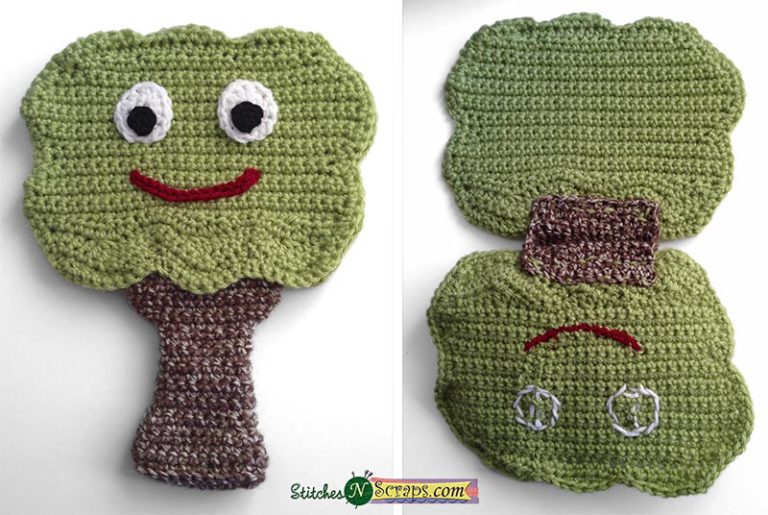
- The tree tops and trunk are purposely not symmetrical. Make sure the tree tops are both facing the same direction when you sew them together. What is the right side on one will be the wrong side on the other.
- If you leave long tails, you can use them for sewing pieces together.
Instructions:
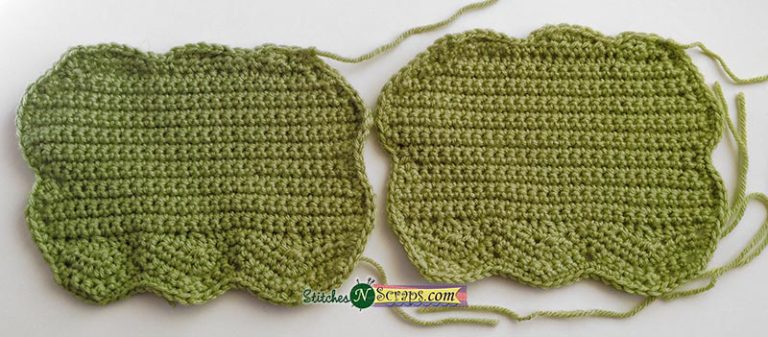
Tree tops (make 2):
Chain 28 loosely.
Row 1: Sc in second ch and in next ch, sc2tog, sc in next 3 chs, 3 sc in next ch, sc in next 3 chs, sc2tog, sc in next 3 chs, 3 sc in next ch, sc in next 4 chs, sc2tog, sc in last 4 chs. (28 sts)
On first tree top, mark row 1 as RS. On 2nd tree top, mark row 2 as RS.
Row 2: Ch 1, turn, 2 sc in first st, sc in next 3 sts, sc2tog, sc in next 4 sts, 3 sc in next st, sc in next 3 sts, sc2tog, sc in next 4 sts, 3 sc in next st, sc in next 3 sts, sc2tog, sc in next st, 2 sc in last st. (31 sts)
Row 3: Ch 1, turn, 2 hdc in first st, hdc in next st, dc3tog, hdc in next st, sc in next 5 sts, hdc in next 2 sts, dc3tog, hdc in next st, sc in next 4 sts, hdc in next 3 sts, dc3tog, hdc in next 3 sts, 2 hdc in last st (27 sts)
Row 4: Ch 1, turn, 2 sc in first st, sc in next st, hdc in next 2 sts, dc2tog, hdc in next 2 sts, sc in next 2 sts, 2 sc in next st, sc in next st, hdc in next st, dc2tog, hdc in next 2 sts, sc in next 2 sts, 2 sc in next st, sc in next st, hdc in next st, dc2tog, hdc in next 2 sts, 2 hdc in last st. (28 sts)
Row 5: Ch 1, turn, 2 sc in first st, sc in each st across to last st, 2 sc in last st. (30 sts)
Rows 6-8: Ch 1, turn, sc in each st across.
Row 9: Ch 1, turn, sc2tog, sc in each st across, sc2tog. (28 sts)
Row 10: Ch 1, turn, sc2tog, sc in each st across to last 2 sts, sc2tog. (26 sts)
Row 11: Ch 1, turn, 2 sc in first st, sc in each st across. (27 sts)
Row 12: Ch 1, turn, sc in each st across to last st, 2 sc in last st. (28 sts)
Row 13: Ch 1, turn, 2 sc in first st, sc in each st across to last st, 2 sc in last st. (30 sts)
Row 14: Ch 1, turn, 2 sc in first st, sc in each st across. (31 sts)
Row 15: Ch 1, turn, sc in each st across to last st, 2 sc in last st. (32 sts)
Row 16: Ch 1, turn, sc in each st across.
Row 17: Ch 1, turn, sc in each st across to last 2 sts, sc2tog. (31 sts)
Row 18: Ch 1, turn, sc2tog, sc in each st across. (30 sts)
Rows 19 – 21: Ch 1, turn, sc2tog, sc in each st across to last 2 sts, sc2tog. (24 sts)
Row 22: Ch 1, turn, sc2tog, sc in next st, hdc in next 3 sts, sc in next st, hdc in next 8 sts, sc in next st, hdc in next 5 sts, sc in next st, sc2tog. (22 sts)
Row 23: Ch 1, turn, sc in first 2 sts, hdc in next 4 sts, sc in next 3 sts, hdc in next 6 sts, sc in next 2 sts, hdc in next 2 sts, sc in next st, sc2tog. (21 sts)
Row 24: Ch 1, turn, sc2tog, hdc in next st, sc in next st, sl st in next 3 sts, sc in next st, hdc in next 3 sts, sc in next st, sl st in next 3 sts, sc in next st, hdc in next 2 sts, sc in next st, sc2tog. (13 sts, 6 sl sts)
Edging: Ch 1, do not turn, work 23 sc evenly spaced in sides of rows across to the foundation chain. Ch 1, sc in bottom of each ch across foundation chain. Ch 1, work 25 sc evenly spaced in sides of rows up to the top. Ch 1, join with sl st to first st of row 24, fasten off.
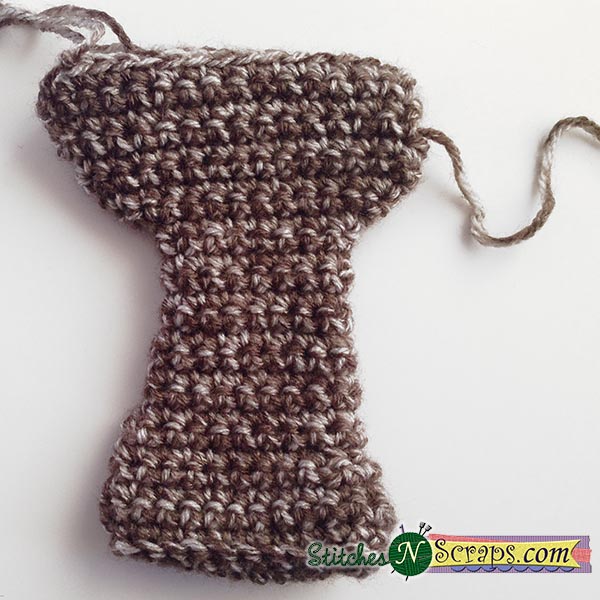
Trunk:
Chain 10.
Rnd 1: 2 sc in 2nd ch from hook, sc in next 7 chs, 3 sc in last ch, working on opposite side of chain, sc in next 8 chs, join. (20 sts)
Rnd 2: Ch 1, turn, 2 sc in first st, sc in next 7 sts, 2 sc in each of next 3 sts, sc in next 7 sts, 2 sc in each of next 2 sts, join. (26 sts)
Rnd 3 (RS): Ch 1, turn, working in back loops only, sc in each st around, join.
Rnd 4: Ch 1, turn, sc in each st around, join.
Rnd 5: Ch 1, turn, (sc2tog, sc in next 11 sts) twice, join. (24 sts)
Rnd 6: Ch 1, turn, sc in next 2 sts, sc2tog, sc in next 16 sts, sc2tog, sc in last 2 sts, join. (22 sts)
Rnd 7: Ch 1, turn, sc in first st, sc2tog, sc in next 16 sts, sc2tog in next 2 sts, sc in last st, join (20 sts)
Rnd 8: Ch 1, turn, sc in next 7 sts, sc2tog twice, sc in next 9 sts, join. (18 sts)
Rnds 9-12: Ch 1, turn, sc in each st around, join.
Rnd 13: Ch 1, turn, (sc2tog, sc in next 7 sts,) twice, join. (16 sts)
Rnds 14-18: Ch 1, turn, sc in each st around, join.
Rnd 19: Ch 1, turn, sc in first st, 3 sc in next st, sc in next 7 sts, 3 sc in next st, sc in last 6 sts, join. (20 sts)
Rnd 20: Ch 1, turn, sc in first 6 sts, 2 sc in next st, 3 sc in next st, 2 sc in next st, sc in next 8 sts, 3 sc in next st, sc in last 2 sts, join. (26 sts)
Rnd 21: Ch 1, turn, sc in first 3 sts, 3 sc in next st, sc in next 12 sts, 3 sc in next st, sc in next 10 sts, join. (30 sts)
Rnds 22 – 23: Ch 1, turn, sc in each st around, join, fasten off.
Now we need to divide the trunk into 2 flaps, to make it easier to attach it to the tree top later.
Row 24a: Turn, sk first 10 sts from end of last rnd, join Taupe with sl st in next st (this should be at one of the side edges), ch 1, sc in same st and in next 14 sts, leaving remaining 15 sts unworked.
Row 25a – 27a: Ch 1, turn, sc in each st across. Fasten off at end of row 27a.
Row 24b: Do not turn, join taupe in first unworked st from row 23, ch 1, sc in same st and in next 14 sts.
Rows 25b – 27b: Repeat rows 25a – 27a. Fasten off.
Weave in ends
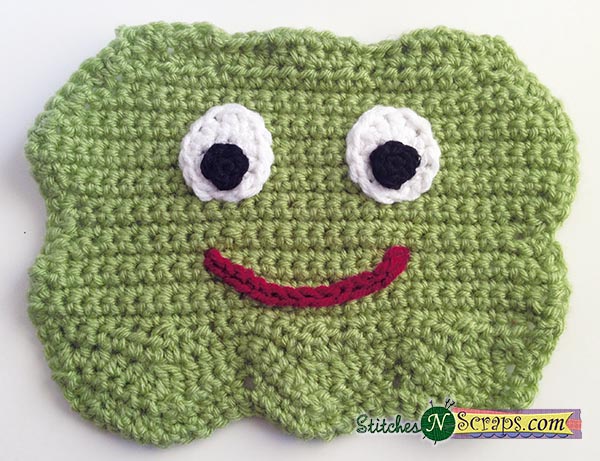
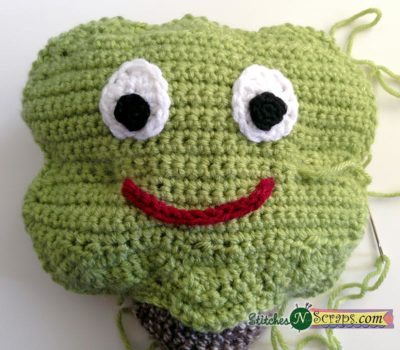
Face:
Pupils (make 2): Make a magic circle, work 6 sc inside the circle, pull circle closed, fasten off, use seamless join. (see Recommended Resources)
Whites of eyes (make 2):
Rnd 1 (WS): Make a magic circle, work 6 sc inside the circle, pull circle closed and join with a sl st to first st.
Rnd 2: Ch 1, turn, 2 sc in first st, 2 hdc in next st, 3 dc in next st, 2 hdc in next st, 2 sc in each of next 2 sts, use seamless join. (13 sts)
Sew pupils to whites of eyes, weave in black ends.
Mouth: With red, ch 15, fasten off.

Assembly / Finishing:
(use main image as a guide)
- Sew eyes and mouth to RS of first tree top securely (so little fingers can’t rip them off!). You may find it helpful to pin them in place first.
- With green yarn, sew top flaps of trunk to wrong side of each tree top as shown below. Be sure the edges of the tree tops line up with each other. The separate trunk flaps will allow for a little movement, but it’s important to get it lined up as closely as possible. To do this, sew one flap onto one tree top piece, then line up the other piece and pin or baste the other flap into place before sewing. I sewed 2 seams on each flap, just to be sure they were secure.
- Weave in all ends and stuff trunk
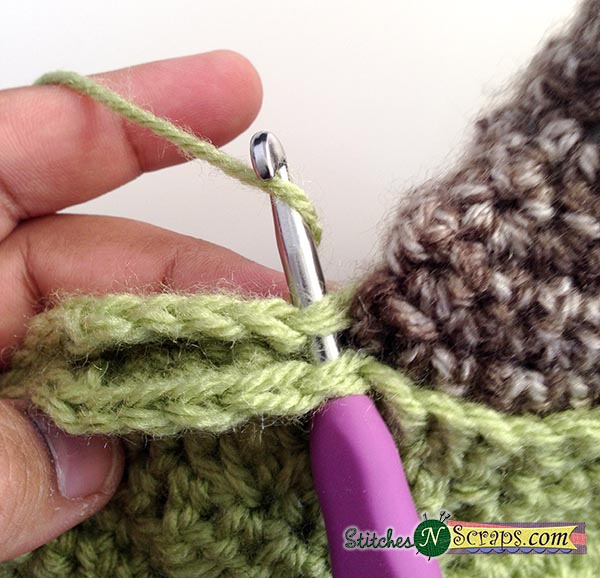
- Hold tree tops together so that the front (face side) is facing you, and edging stitches line up. Working through both pieces, join yarn with sl st in the stitch closes to the right edge of the trunk, (ch 1, sl st) in each st around, stuffing as you go.
- Make dimples: Secure a length of yarn near where the first dimple should be, by weaving in one end. Insert your needle through the stuffing, across to the other side of the face where the 2nd needle should be. Pull GENTLY – the harder you pull, the deeper the dimple will be. Now insert your needle in the next stitch over, and go back through to the starting point. Weave in the end, cut it with a little bit of a tail, and tuck the tail into the stuffing (I like to sew it through to the other side, pull gently, and cut the yarn so it gets sucked back inside when it is cut.)

- Weave in remaining ends the same way, using them to sew up any gaps.
- HUG your tree! (No really, it helps to distribute the stuffing more evenly).