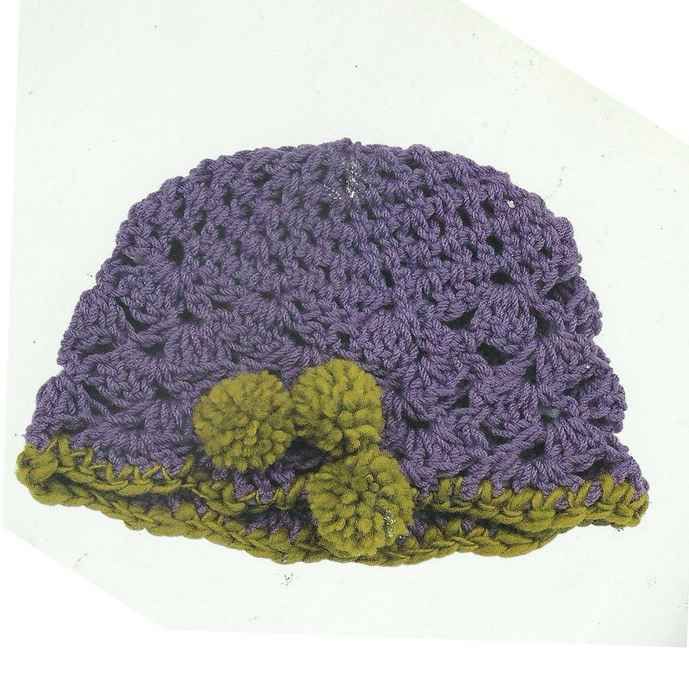
Angled Shell Hat
The Angled Shell Crochet Hat is a fashionable and cozy accessory that showcases the beauty of crochet design. This hat pattern features an angled shell stitch pattern, which creates a visually appealing texture and structure. The pattern includes a list of materials, detailed instructions, and step-by-step guidance to help you create this eye-catching hat. By following the pattern and choosing suitable yarn and hook sizes, you can craft a custom-made, comfortable, and stylish angled shell crochet hat to suit your preferences.
Size
The hat is designed to fit most adult heads
You will need
- 100 yd of worsted weight yarn in lavender (A)
- 35 yd of worsted weight yarn in medium green (B)
- Hook: 10 mm or size needed to obtain gauge
- Yarn needle 1 1/2 / 4 cm pompom maker
Stitches used
- Chain (ch)
- Double crochet (dc)
- Single crochet (sc)
- Slip stitch (sl st)
- Angled shell: (4dc,ch 2,dc) in indicated space.
Gauge
Take time to check your gauge.
First 3 rnds = 4″/10 cm diameter
10 dc = 4″/ 10 cm
2 angled shells = 4″/ 10 cm
Pattern notes
In Rnds 2-7, double crochet stitches are worked in the spaces between stitches, not in the top of stitches, the first space is between the beginning chain of the previous round and the next double crochet.
In Rnds 1-7,the work is not turned before starting each round.
In Rnds 8-11, the work is turned before starting each round
HAT
with A, ch3: join with sl st in first ch to form a ring
Rnd 1: ch3 (counts as first dc here and throughout), work 8 more dc in ring; join with sl st in top of beginning ch-3 (9 dc)
Rnd 2: ch3, dc in first space between sts, 2 dc in next space between sts; repeat from around; join with sl st in top of beginning ch-3 (18 dc)
Rnd 3: ch 3, dc in first 2 spaces between sts; 2 dc in next space between sts, dc in next space between sts;repeat from around; join with sl st in top of beginning ch-3 (27 dc)
Rnd 4: ch 3, dc in first 3 spaces between sts, 2 dc in next space between sts,dc in next 2 spaces between sts; repeat from around; join with sl st in top of beginning ch-3 (36 dc)
Rnd 5: ch 3 ,dc in first 4 spaces between sts, 2 dc in next space between sts,dc in next 3 spaces between sts;repeat from around; join with sl st in top of beginning ch-3 (45 dc)
Rnd 6: ch3,dc in each space around; join with sl st in top of begining ch-3.
Rnd 7: ch 6, skip first 4 spaces between sts, (4 dc,ch2,dc) in next space between sts (angled shell made),skip 3 spaces: repeat from 3 more times:(4 dc,ch2,dc) in next space between sts;skip 4 spaces;(4 dc,ch2,dc)in next space between sts,skip 3 spaces; repeat from 4 more times; join with sl st in 4 th ch of beginning ch-6 (10 ch-2 spaces)
Note: turn work to start Rnds 8-11.work is completed in ch-2 spaces only,skip all stitches between the ch-2 spaces.
Rnds 8-11: ch3, turn,(4dc,ch2,dc) in next ch-2 space;repeat from around; join with sl st in top of beginning ch-3 fasten off.
Rnd 12: join B with sl st in any st. of Rnd 11, ch 1 ,Sc in same st,Sc in each dc and ch around;join with sl st in first sc fasten off
Finishing:
With B, and you pompom maker make 3 pompoms.with B, using photograph as a guide, sew pompoms in a cluster to lower side edge of hat