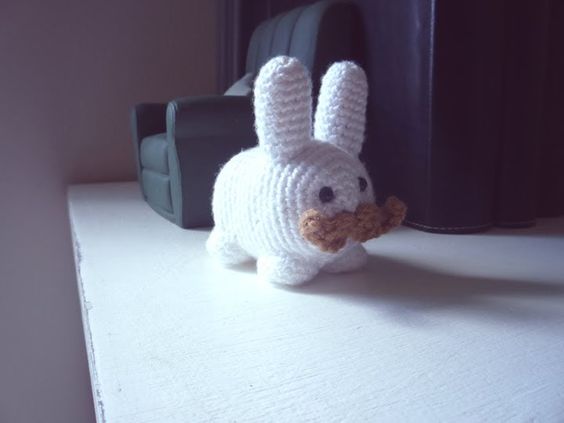
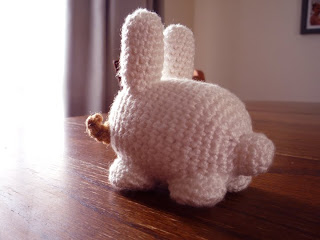
Crochet Beautiful Mr. Bunny
Create your very own adorable Mr. Bunny by mastering the art of crocheting. With just a few simple tools and some colorful yarn, you can bring this charming character to life. Crocheting allows you to customize every detail of Mr. Bunny, from his fluffy tail to his floppy ears. Whether you're a beginner or an experienced crocheter, this project is sure to bring a smile to your face as you watch your creation take shape. Whether you're making him as a gift for a friend or simply as a fun project for yourself, crocheting Mr. Bunny is a delightful way to express your creativity and spread a little joy.
Materials;
Yarn
Crochet F hook
Ears (make two)
Rnd 1: 6 sc in a circle
Rnd 2: 2 sc in each sc around (12)
Rnd 3-10: sc around
Stuff
Tail
Rnd 1: 6 sc in a circle
Rnd 2: 2 sc in each sc around (12)
Rnd 3-4: sc around
Doesn't need to be stuffed
Feet (make four)
Rnd 1: 8 sc in a circle
Rnd 2: 2 sc in each sc around (16)
Rnd 3-4: sc around (16)
To give weight and flatness to the feet I put small decorative glass stones in them before sewing them to the body.
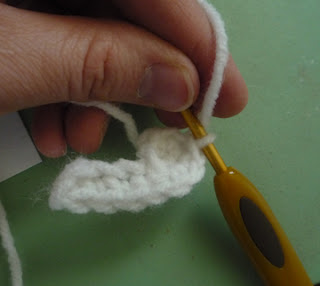
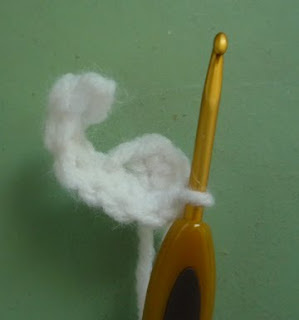
Mustache (make two)
Rnd 1: 4 sc in a circle
Rnd 2: sc in next st then ch 5
sc in 2nd ch from hook
sc 6 along ch and into round, sl st in next st
Body
Rnd 1: 6 sc in a circle
Rnd 2: 2 sc in each st around (12)
Rnd 3: *sc then sc twice in next st* repeat around (18)
Rnd 4: *sc in next two st then sc twice in next st* repeat around (24)
Rnd 5: *sc in next three st then sc twice in next st* repeat around (30)
Rnd 6: *sc in next four st then sc twice in next st* repeat around (36)
Rnd 7-21: sc around
Rnd 22: *decrease then sc in next four st* repeat around (30)
Rnd 23: *sc in next three st then decrease* repeat around (24)
Rnd 24: *decrease then sc in next two st* repeat around (18)
Put in eyes, sew on mustache and ears. Stuff.
Rnd 25: *sc then decrease* around (12)
Rnd 26: decrease around (6)
Rnd 27: decrease once more then break thread and sew up hole.
Sew on tail and feet.
Update: I have had a few questions about the mustache. I took a few pictures to help clarify what each half of the mustache will look like. I used white yarn because it was the nearest to me at the time. The first photo is of the mustache before I let the yarn curl naturally into a curve and the second one is after the curve. You make two of these and sew them close together and touching edges on the face.