Crochet Leaf Halter Top
If you're looking to add a touch of bohemian charm to your wardrobe, the Crochet Leaf Halter Top is a must-have piece! With its intricate leaf design and flattering halter neckline, this top is perfect for summer outings or music festivals. The handcrafted crochet detail adds a unique and whimsical touch to any outfit. Whether paired with high-waisted jeans or a flowy skirt, this halter top will make you feel beautiful and stylish. Get ready to turn heads and receive compliments wherever you go with this lovely and playful piece!

Materials
- Crochet hook: 2.5 mm
- Yarn: Light yarn, preferably from “Or More” brand or any comparable lightweight yarn
- Scissors
- Tapestry needle: To weave in ends
- Stitch markers (optional): For marking key areas
- Measuring tape (optional)
Abbreviations
Here’s a list of crochet abbreviations used in this pattern:
- ch = chain
- sc = single crochet
- dc = double crochet
- hdc = half double crochet
- sl st = slip stitch
- yo = yarn over
- st = stitch(es)
- rep = repeat
Crochet Pattern – Step-by-Step Instructions
Part 1 – Creating the Leaf Pattern
Row 1:
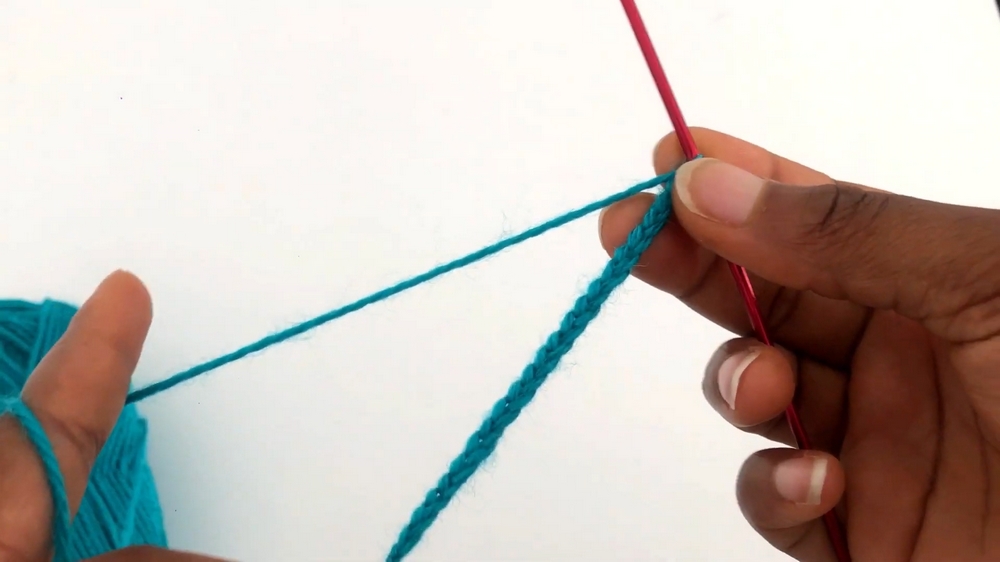
Start with a foundation chain of 22:
ch 22: (1, 2, 3… until you have 22 chains).
Begin working into the chain:
Skip the first 3 chains from the hook.
1 dc into the 4th chain.
ch 4, then skip 7 stitches in the chain.
3 dc in the next stitch.
ch 3, 3 dc in the next stitch.
ch 4, skip 7 stitches again.
In the last two stitches: 1 dc in each of the last two stitches.
You should have the first row complete.
Row 2:
Ch 3 (counts as the first dc), then turn.
Work across:
Place 1 dc in the first dc st from Row 1.
In the next dc: 2 dc into the stitch.
Place 1 dc in the next stitch.
2 dc in the last stitch.
You should have 5 dc total in this row.
Ch 2, then place 1 dc in the chain space from Row 1.
Repeat the grouping (2 dc + 1 dc + 2 dc) to build symmetry on the other side.
Finish the row by placing 1 dc in the final two stitches.
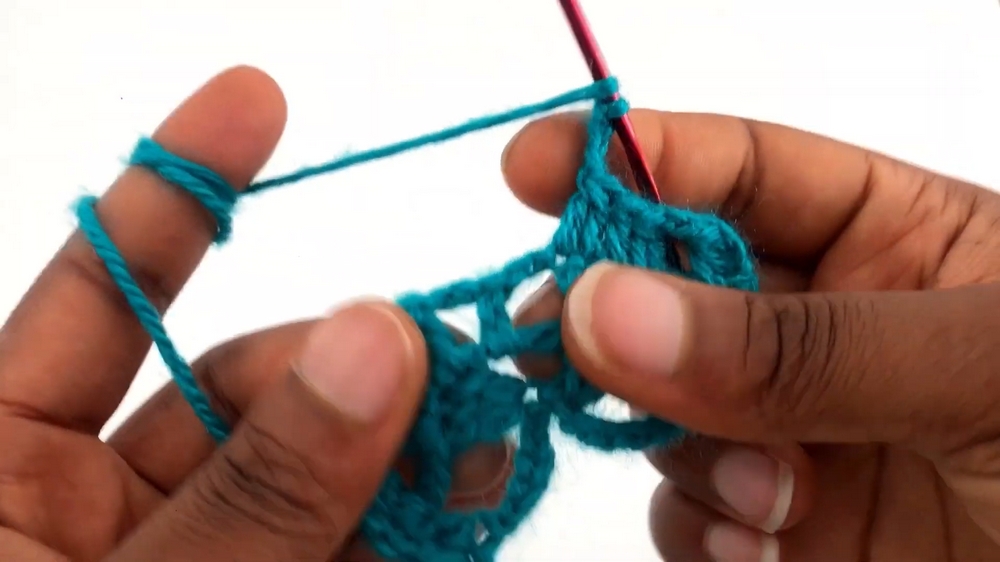
Row 3:
Ch 3, turn over.
Place 1 dc in the next stitch.
Ch 2, then decrease by using dc2tog:
yo, insert hook into the first st, pull through (3 loops on hook), yo and pull through 2 loops (2 loops left).
yo, insert hook into the next st, pull through (4 loops on hook), yo, pull through 2 loops (3 loops left).
yo, pull through all remaining loops on hook.
Continue pattern with dc2tog across two more stitches, followed by:
Ch 3, and place 3 dc in the next dc st.
Repeat all steps symmetrically on the other side
Row 4:
Ch 3, turn over.
Place 1 dc in the next stitch.
Ch 1, then decrease by crocheting dc3tog to complete the row:
Start decreasing across the next 3 stitches.
Place precise dc stitches according to pattern symmetry.
Row 5:
Ch 3, turn.
Ch 4 and skip the leaf stitches below.
Place 3 dc in the designated stitch from the previous row.
Ch 3 and repeat as before to complete the second leaf section.
Repeat Rows 2–5
Repeat Rows 2 through 5 until you achieve the desired number of leaf sections for the front and back of the top. For the example in the tutorial, 7 leaf sections were created.
Part 2 – Adding Panels
For each side panel:
Mark off two leaf sections on each side of the top.
Attach yarn at the edge of the third leaf pattern.
Work 1 sc in each stitch across.
Repeat rows of dc stitches for the height needed to fit your body. For the example, 36 rows were created.
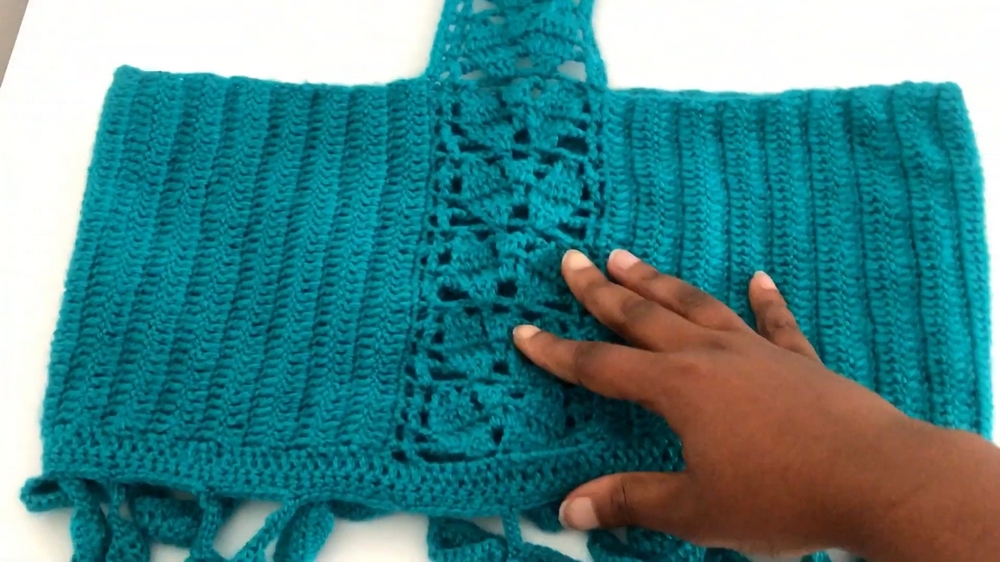
Part 3 – Hanging Leaves
For decorative hanging leaves:
Ch 18, then create:
9 sc: Place 1 sc into the first 9 stitches.
6 dc: Place 1 dc into each of the next 6 stitches.
2 sc: 1 sc into each remaining stitch.
Turn and repeat the steps symmetrically to complete the leaf.
Attach using sl st along the chains at intervals to create a hanging effect.
Repeat until you’ve attached hanging leaves around the top.
Part 4 – Straps
Decide on the placement of your straps on both sides for the neck.
Crochet simple straps using chains and sc stitches to desired length.