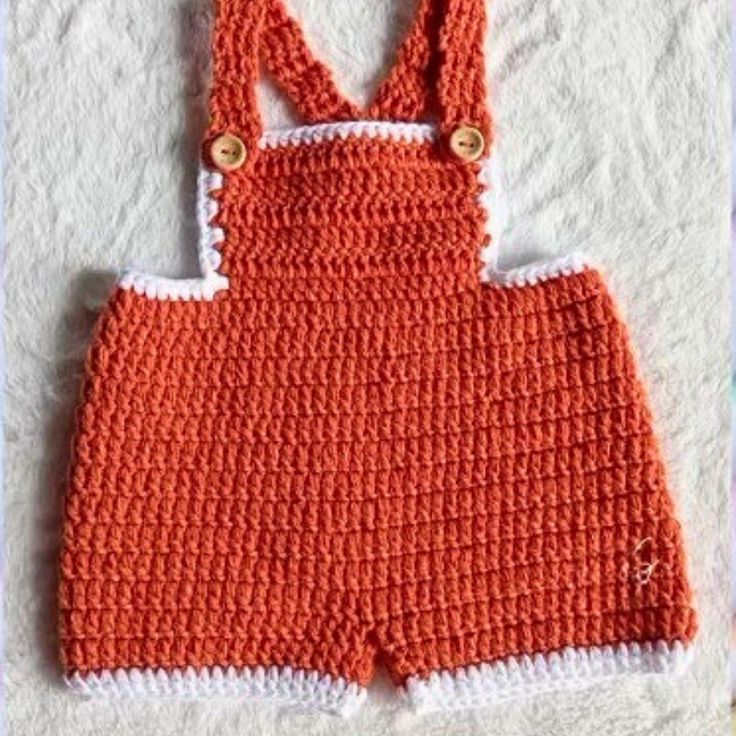
Crochet Baby Jumper
Crochet baby jumpers are not only adorable but also incredibly cozy for your little one! This handmade garment adds a touch of warmth and charm to your baby's wardrobe. With a variety of colors and patterns to choose from, you can personalize the jumper to suit your baby's style perfectly. Plus, the soft yarn used in crochet makes it gentle on your baby's delicate skin. Whether you're looking for a thoughtful gift or a special piece for your own baby, a crochet baby jumper is sure to be a cute and practical addition to any little wardrobe.
Materials and Preparation
To make your crochet jumper for a baby, gather the following materials:
- Yarn: Lightweight (e.g., DK or worsted weight; soft cotton or acrylic recommended for baby items)
- Hook Size: 4.0mm (G/6 hook) or as required to meet gauge
- Additional Tools: Yarn needle, stitch markers, scissors
Yarn Weight: DK (Double Knitting) to keep it gentle on baby skin
Optional: Choose yarn colors based on preference to make your jumper more unique!
Abbreviations and Notes
Here’s a list of crochet abbreviations used in this pattern:
- CH: Chain
- SC: Single Crochet
- HDC: Half Double Crochet
- DC: Double Crochet
- SL ST: Slip Stitch
- INC: Increase (work two stitches into one)
- DEC: Decrease (combine two stitches into one)
Notes Before Starting:
- Keep stitch tension consistent to avoid uneven sections.
- If this is your first project, make a gauge swatch to ensure proper sizing.
- Baby projects require soft, durable yarn; avoid wool or fibers that may irritate the skin.
Gauge, Approximate Size, and Pattern Notes
Gauge: 4” x 4” = 16 sc stitches x 20 rows using 4.0mm hook (adjust hook size until gauge is achieved).
Finished Dimensions: Approx. 12” (width) x 14” (length) for a 3-6 month baby size.
Special Techniques: Basic crocheting tools are needed, plus slip stitching for certain sections like edging.
If desired, create a gauge swatch before starting to ensure the correct size and fit!
Step-by-Step Pattern
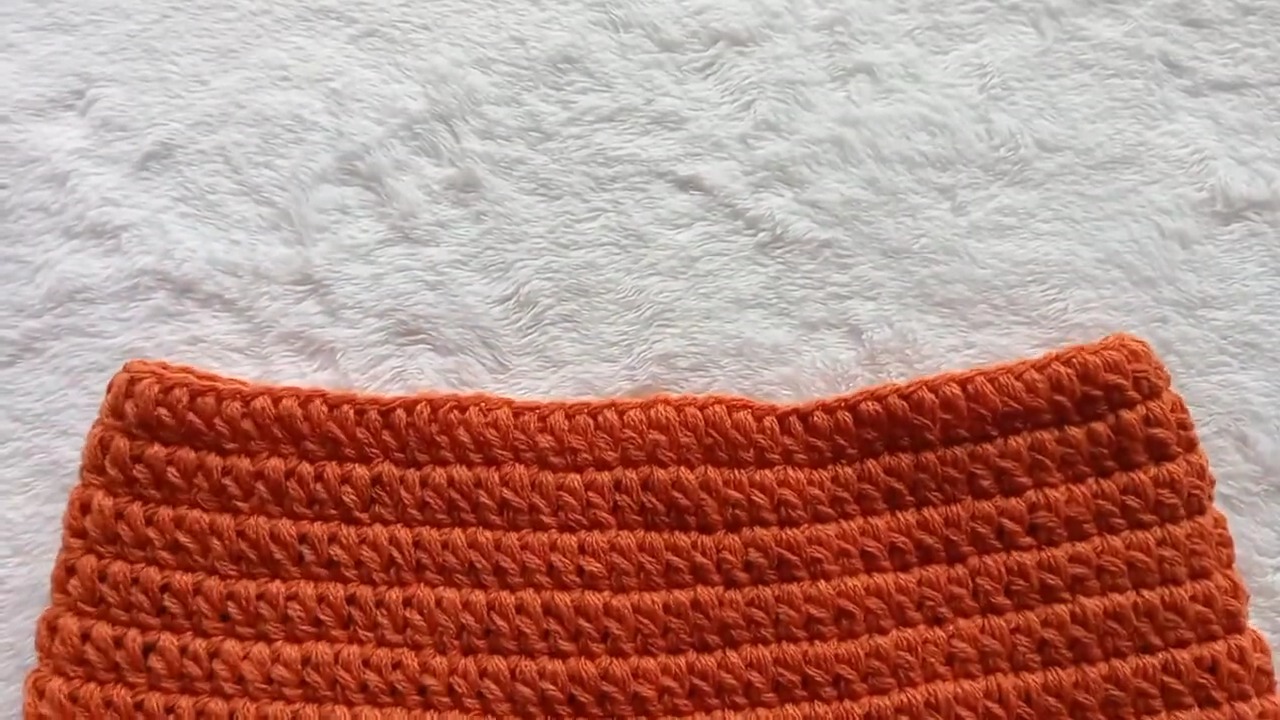
1. Foundation
Start with CH 50 (or more based on desired width).
SC in the second chain from the hook, and SC in each chain across.
CH 1, turn. Repeat this row for 10 rows (this forms the ribbed bottom hem).
2. Body
Switch to HDC for the main body section.
Work HDC across each row, chaining 1 and turning after every row.
Continue for 12 inches or until desired body length.
3. Armhole Sections
Divide stitches into three sections: front, back, and sleeves.
Front: Work HDC across half the stitches.
Sleeves: CH 10 from the edges to form arms (adjust to fit baby size).
Back: Repeat the same steps from the front, creating matching edges.
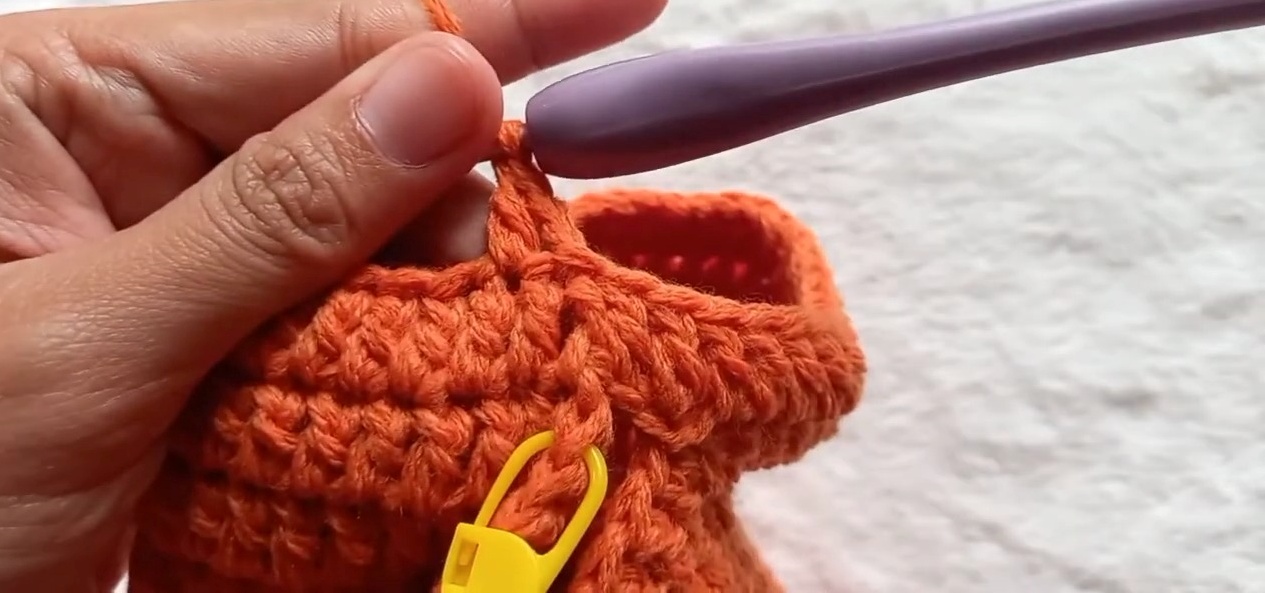
4. Seaming
Use slip stitches or a yarn needle to seam together the sides of the jumper neatly.
Attach sleeves to the armholes using SC for durability and a clean look.
5. Neckline Edging
Join yarn at neckline and work 2 rows of SC to form a simple and neat finish.
Finishing Details
Weave in all loose ends using a yarn needle and trim excess yarn.
Add decorative buttons, appliqués, or embroidery for extra visual appeal.