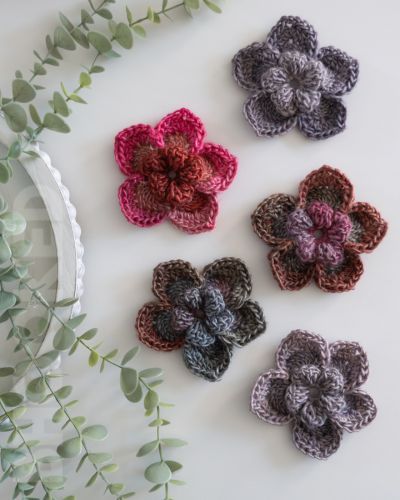
Crochet Adorable Flower
Crocheting adorable flowers is a delightful way to add charm and creativity to your projects. Whether you're a seasoned crocheter or a beginner looking to try something new, creating these charming blooms is both rewarding and relaxing. With just a hook, some yarn, and a few simple stitches, you can bring these colorful blossoms to life. The best part? They can be used to embellish anything from hats and scarves to bags and blankets, adding a touch of handmade beauty to your life. So grab your supplies, embrace your creativity, and enjoy the meditative rhythm of crocheting these sweet little flowers that are bound to put a smile on your face and brighten up your day!
Supplies:
- About 25 yds; Medium-weight (#4) Yarn
- 5 mm Crochet Hook
- Yarn needle
- Scissors
- Bead/button (optional)
Abbreviations:
This pattern is written using standard US crochet terminology.
- BLO Back Loop Only
- Ch Chain
- Dc Double Crochet
- FLO Front Loop Only
- Hdc Half Double Crochet
- Rep Repeat
- Sc Single Crochet
- Sk Skip
- Slst Slip Stitch
- Sp Space
- St(s) Stitch(es)
Pattern Notes:
This 3D crochet flower is crocheted in rounds like many of the free flower patterns, but it takes it one step further than a simple flower might. This flower uses the front and back loops of the initial stitches to create the three dimensional layers.
I’ve included pictures of each round and step below to help you figure out exactly how to turn the flower, and where to work the stitches.
Gauge: Use the finished size to check your gauge, but don’t stress if yours isn’t the same size exactly. They’ll still look beautiful!
Finished Size: About 3″ diameter
Instructions:
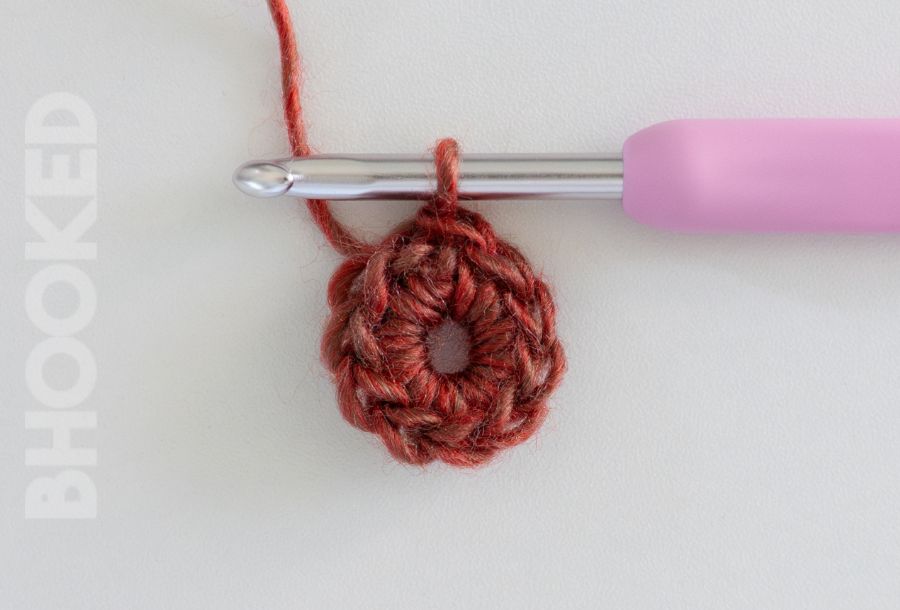
Round 1: Ch 4 and slst to the first ch to form a ring. Ch 1 (doesn’t count as a st). Then make 10 sc in the center of the ring. Slst to the BLO of the first sc to join the round. (10 sts)
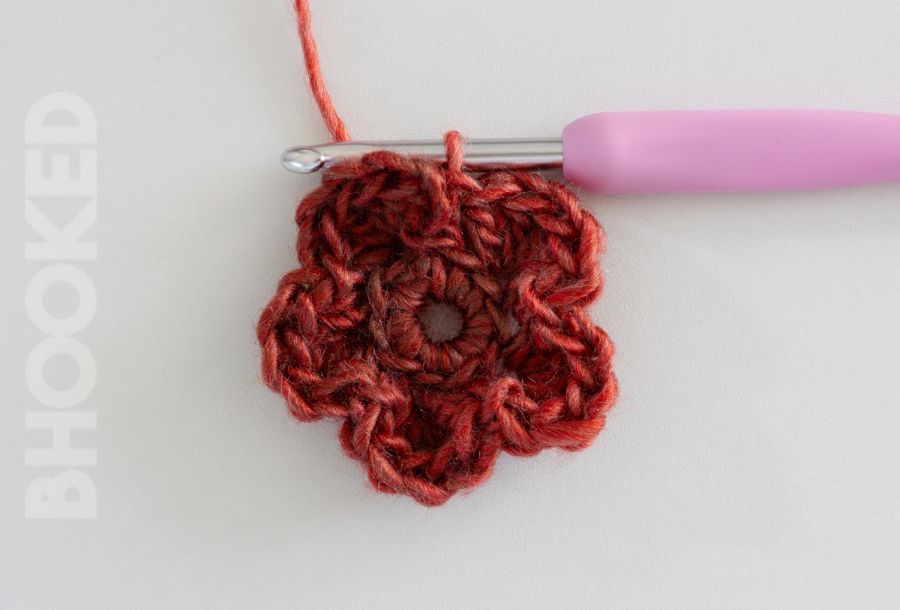
Round 2: Ch 3 (counts as a dc). Make 4 dc in the same back loop as the ch 3. Then sc in the BLO of the next st. *Make 5 dc in BLO of the next st. Then sc in the BLO of the next st. Rep from * three more times. (Five petals created)
Note: the next round stitches will be worked in the remaining front loop (FLO) of the stitches from round 2.
Round 3: Slst in FLO of the first sc. *Ch 3. Sk 1 st, and slst in the FLO of the next st. Rep from * to end of round. (5 chain spaces created). Ch 3 (counts as a dc for the next round), and turn the work so you’re looking at the reverse side and working in the opposite direction.
Round 4: Make 9 dc in the same ch 3-sp. *Slst in the next ch-3 sp. Ch 3 (counts as a dc), and make 9 dc in the same ch-3 sp. Slst in the next slst. Rep from * three more times. Slst to the 3rd ch of the first petal.
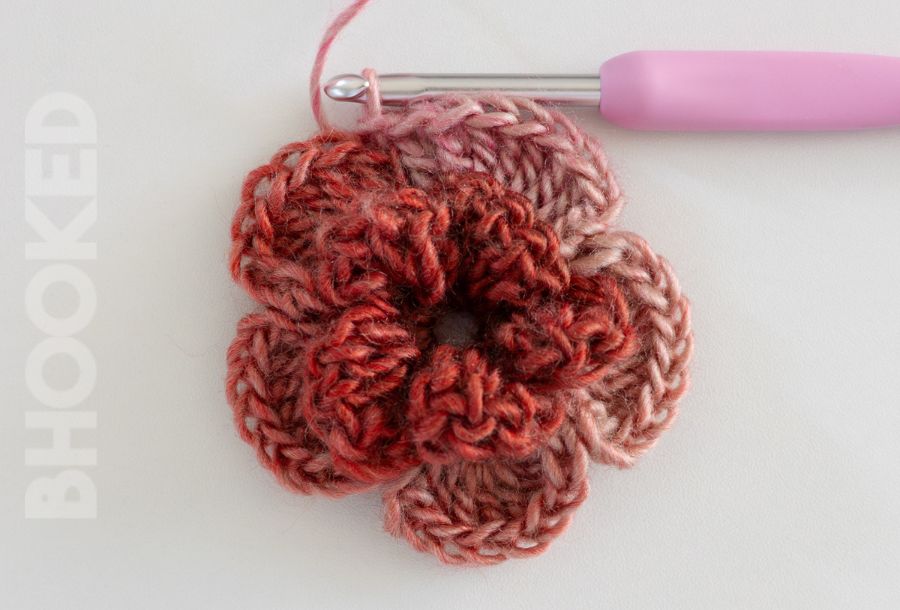
Round 5: Ch 1 (doesn’t count as a st), and sc in the same st. *Hdc in the next st. Dc in the next 2 sts. Then in the next stitch, make [2 dc, ch 2, 2 dc]. Then dc in the next 2 sts. Hdc in the next st, and sc in the next st. Slst in the next 2 sts. Then sc in the 3rd ch of the next petal. Rep from * four more times. Slst to the first ch of the first petal (from the previous row) to join the round.
Finishing the 3D Crochet Flower
Once you’re done with the fifth round, fasten off and weave in those loose ends. If your flower doesn’t seem perfect right away, no worries. It might look a bit scrunched up from being held while you crocheted it. Just use your hands to flatten it out and do some finger blocking.

LEFT: 3D crochet flower right off the hook; RIGHT: After finger blocking.