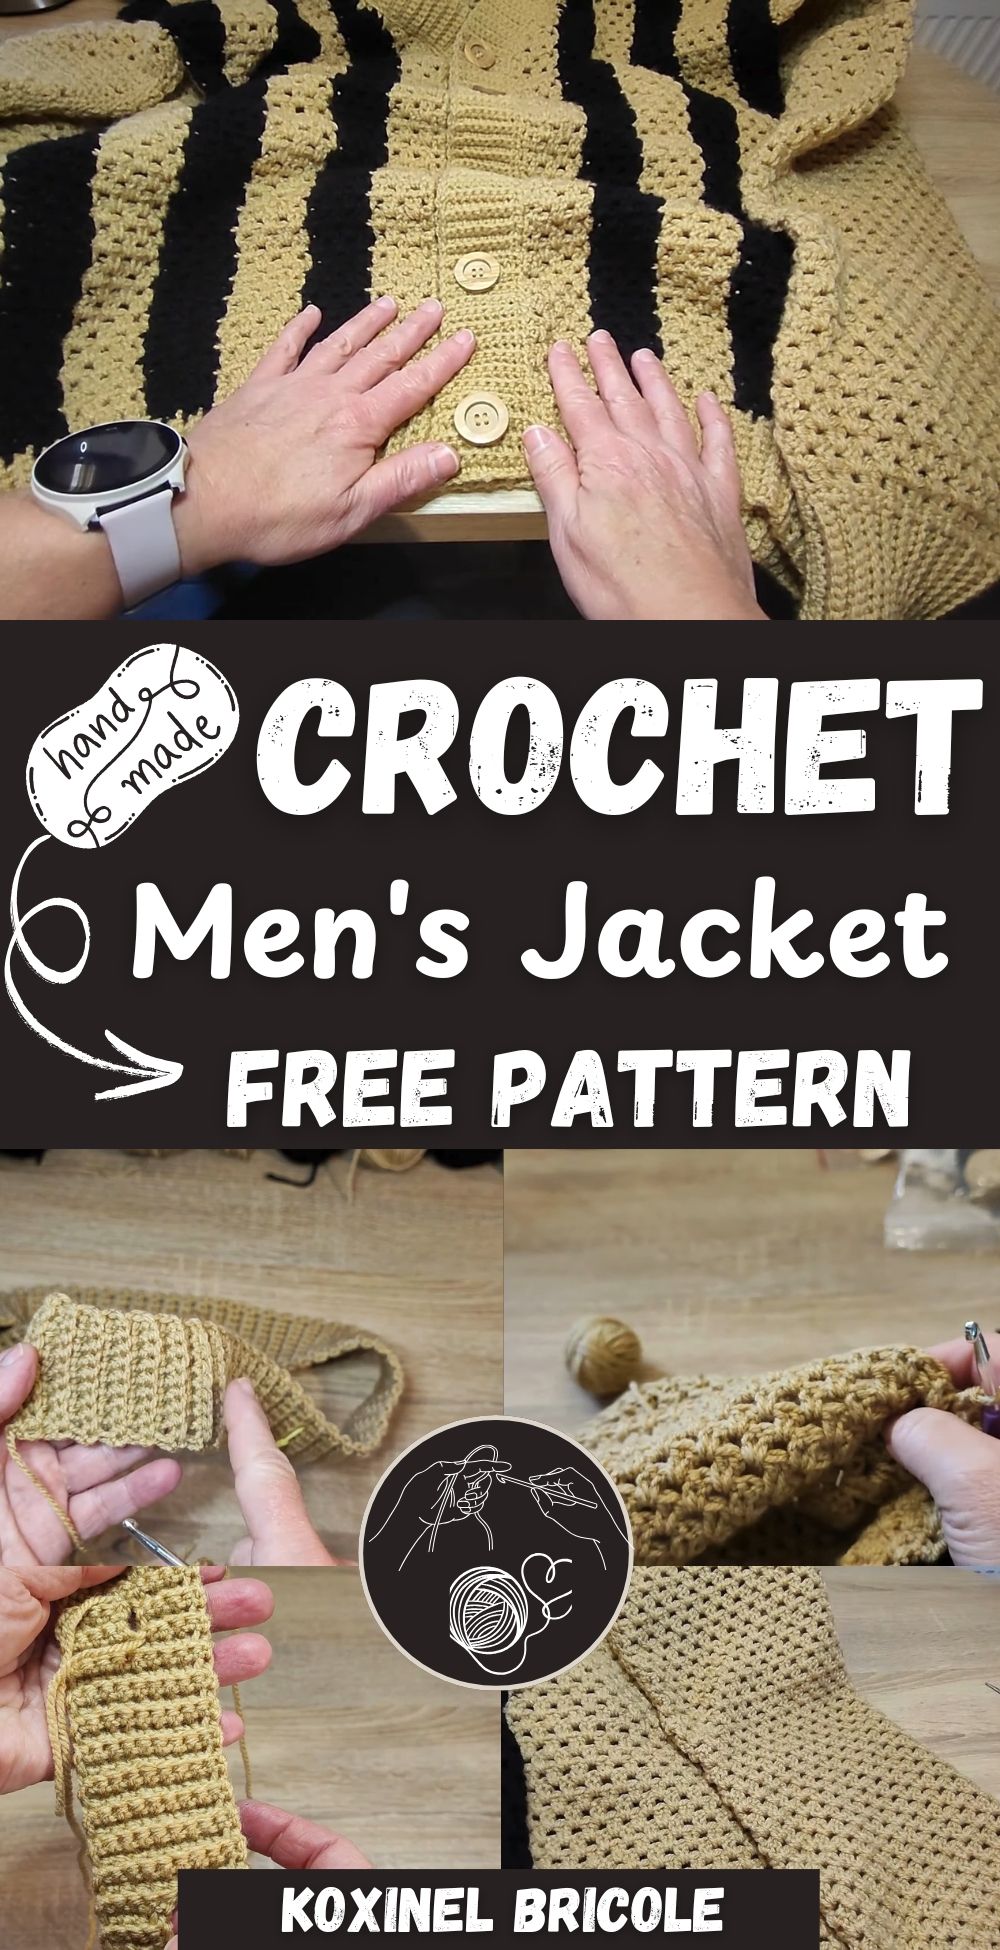
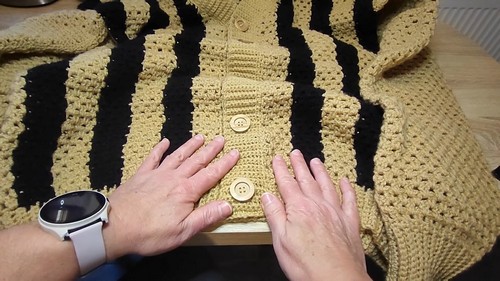
Crochet Men's Jacket With Colorful Stripes
Crochet Men's Jackets with colorful stripes are a fantastic way to add a pop of style and individuality to any outfit. These jackets combine the classic sophistication of a traditional men's jacket with the fun and vibrant touch of colorful stripes, making them a unique and eye-catching fashion statement. Whether you're looking to stand out at a casual gathering or simply want to inject some personality into your everyday wardrobe, a crochet men's jacket with colorful stripes is sure to do the trick. The versatility of these jackets allows you to pair them with a range of outfits, from jeans and a t-shirt for a laid-back look to dress pants and a button-down shirt for a more polished ensemble. Embrace your style and make a statement with a crochet men's jacket with colorful stripes that will turn heads and showcase your personality in a friendly and fashionable way!
Materials
- Black yarn (200g total)
- Beige yarn (200g total)
- 4mm crochet hook (ribbing)
- 5mm crochet hook (main body)
- Scissors
- Tapestry needles (large and small)
- Stitch markers or alternatives (safety pins, paper clips)
- Wooden buttons (5 total)
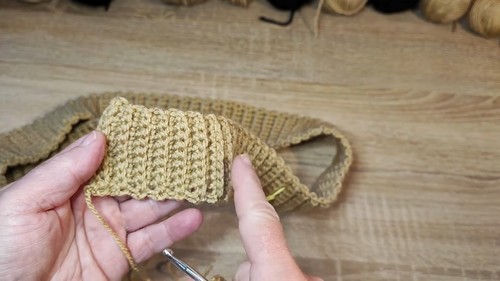
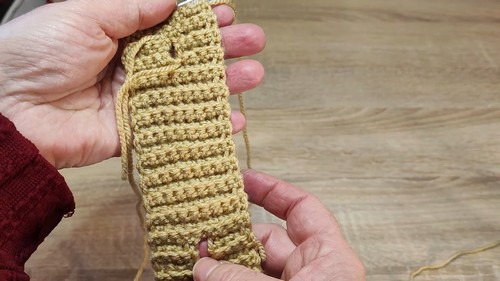
Starting the Ribbing
Using the 4mm crochet hook, create a slip knot and chain 10 stitches.
First Row: Chain 1 (replaces first single crochet).
Work single crochet into the back loop only of each chain, starting from the third chain from the hook.
You'll have 10 stitches.
Subsequent Rows: Turn your work, chain 1, and work single crochet into the back loop only for each stitch.
Always count to maintain 10 stitches per row.
Continue until you have 82 ribs (cotes), approximately 46-50 cm wide.
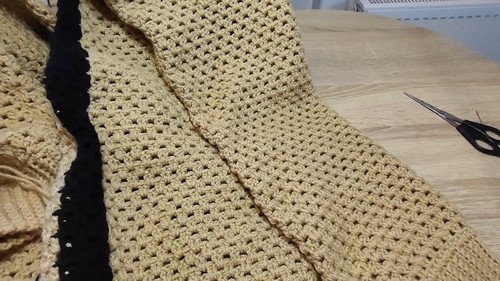
Dividing for Fronts and Back & Adding Stripes
Marking: Count 18 ribs from each end, place stitch markers. The section between the markers is the back of the jacket.
Stripes: Use the 5mm crochet hook.
Each stripe is 3 ribs wide.
For each stripe, pick up 6 stitches: one on the top, one in the middle, and so on.
Stripe Pattern: Start with a beige stripe, alternating black and beige across the front and back panels. The back will be all beige.
For color changes, don't cut yarn, carry it along the back.
Work each stripe with 6 stitches per color change.
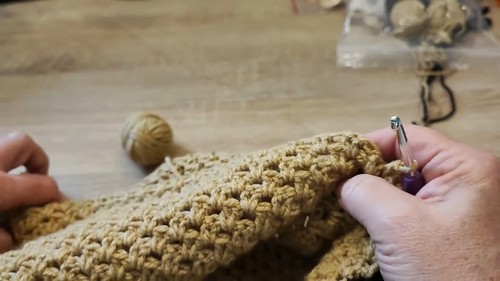
Main Body
Row 1: Replace the first double crochet with 3 chain stitches. Work 2 double crochets together in the same stitch. Skip one stitch, and repeat.
Row 2: Replace first double crochet with 3 chain stitches. Work 2 double crochets together, offsetting the motif.
Repeat rows 1 and 2 until the piece measures 50 cm from the bottom of the ribbing.
Working the Back Separately
Once 50 cm tall, stop working on the front stripes.
Continue with the «point fantaisie» using only beige yarn for the back.
Work until the back measures 80 cm in height.
Front Halves (Decreases for Neckline)
Work each front half separately, stopping at the armhole height (30 cm).
Decreases: On the neckline side, leave the last two stitches unworked at the end of each row. Skip the first two stitches on the next row. Repeat for a total of 6 decreases.
After decreases, continue until reaching 30 cm height for the armhole.
Sewing Shoulders
Use a tapestry needle to sew the front shoulder panels to the back.
Sleeves
Cuff Ribbing: Using the 4mm hook, chain 15 stitches. Work single crochet into the back loop only for 24 ribs.
Main Sleeve: Change to the 5mm hook. Pick up 48 single crochet stitches along the cuff edge. Work the «point fantaisie» stitch pattern.
Increases: After 26 cm, make increases on both sides of the sleeve every 6 rows. Continue until the sleeve measures 60 cm.
Sewing Sleeves
Fold the sleeve in half lengthwise and sew the seam.
Attach each sleeve to the armholes of the jacket, using the appropriate color yarn for each side.
Finishing Touches
Weave in Ends: Weave in all loose ends.
Button Placket and Collar: Pick up 54 stitches for each front placket and 92 stitches around the collar. Work single crochet stitches and create buttonholes every 9 ribs.
Sew Buttons: Position and sew buttons using a tapestry needle, ensuring proper alignment with the buttonholes.