Crochet Picot Edge Coaster
Crochet Picot Edge Coasters are a delightful and practical addition to any home décor. These charming coasters not only protect your surfaces from unwanted water rings but also add a touch of handmade charm to your living space. The picot edge gives them a dainty and elegant finish, making them perfect for tea parties, cozy gatherings, or everyday use. Crocheting these coasters can be a fun and relaxing way to tap into your creative side while also creating something useful for your home. So grab your crochet hook, choose your favorite yarn colors, and let's get crafting these adorable coasters that will surely be a conversation starter next time you have guests over!
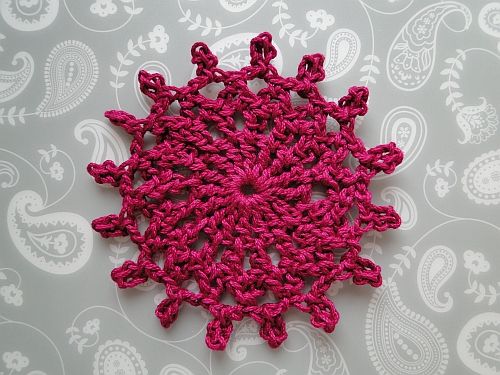
My Picot Edge Coaster is crocheted in 4 rounds and works up nice and quickly!
This one is worked in Lion Brand 24/7 Cotton® Yarn, worsted weight, with a 4.00 mm hook.
It measures exactly 5 inches or 12.5 cm across:
Picot Edge Coaster Pattern
Stitches:
- sc = UK dc
- tr = UK dtr
Round 1: Make a magic ring (see how to crochet the magic ring here.)
Ch 4; work 15 tr into the ring.
Tighten ring gently, ensuring the stitches look neat; ss into top of 4 ch.

End of Round 1
Round 2: I don't chain one at the start of this round by the way, to keep things neat :)
So: sc into space between 4 ch and 1st tr of previous round:
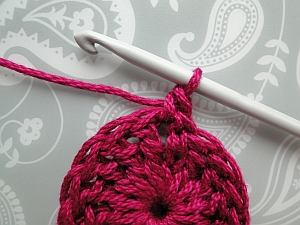
Sc worked in space between 4 ch and 1st tr of last round
(Ch 4, sc in between next 2 stitches) 15 times, working your last sc between the last tr and the 4 ch.
Ch 4, ss into 1st sc. (16 loops worked.)
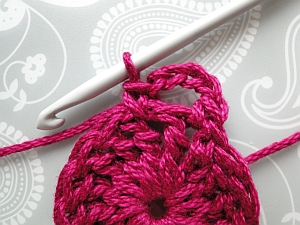
4 ch and sc worked into next space
End of Round 2
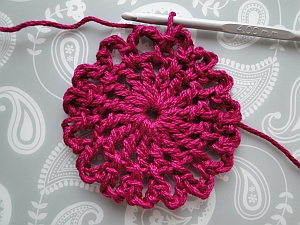
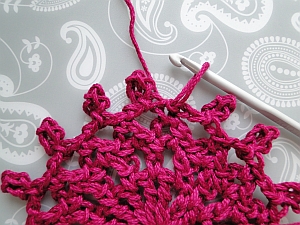
Round 3: ss into 1st 4-ch loop; ch 1. (sc, ch 3, sc) into same loop.
(sc, ch 3, sc) into each of next 15 loops.
Join with a ss into 1st sc.
Round 4: Ss into 1st 3-ch loop, ch 1, sc into same loop.
(ch 6; ss into 6th ch from hook; ch 2, sc into next 3-ch loop) 15 times.
Last picot: ch 6, ss into 6th ch from hook; ch 2, ss into 1st sc.
Ss into the 1st sc to join — all done!
Now weave in your ends, working the tail end down the back to the center of the piece so that I can sew it in more easily; then make sure your starting end from the magic ring is sewn in securely around the middle too.