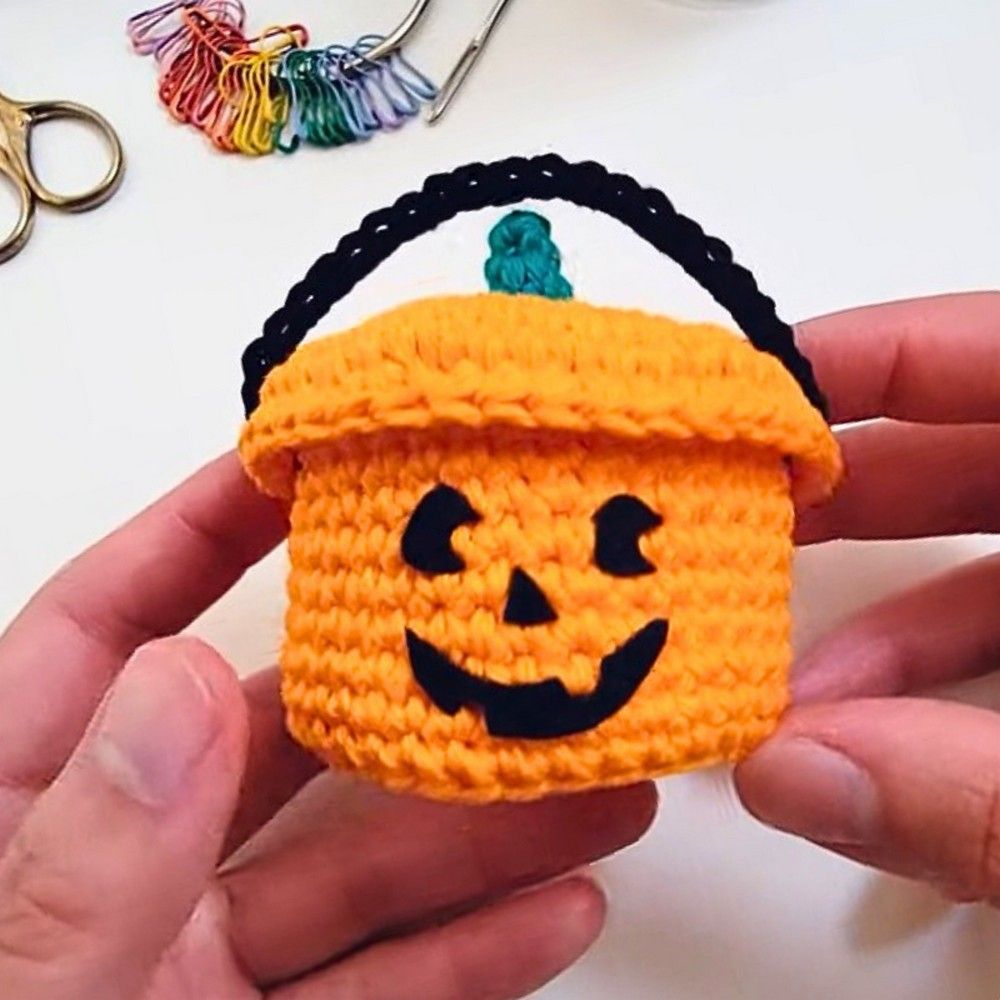
Crochet Mini Boo Bucket for Treats and Decor
How adorable are Crochet Mini Boo Buckets for storing treats and adding a touch of charm to your home decor! These pint-sized buckets are perfect for holding candies, trinkets, or even small plants with a spooky flair. Their compact size makes them versatile for decorating shelves, mantels, or as party favors. Handcrafted with love and attention to detail, they make for a delightful addition to any Halloween-themed displays. Embrace the whimsical spirit of the season and bring a touch of handmade warmth into your home with these Crochet Mini Boo Buckets!
Materials and Preparation
To crochet a mini Boo Bucket, you’ll need the following:
- Yarn: Worsted weight yarn (#4) in colors of your choice. Suggested colors: orange, black, and white for a Halloween theme.
- Hook: Size G/4 mm crochet hook.
- Additional Tools:
- Stitch marker (optional)
- Yarn needle for weaving in ends
- Scissors
Yarn Weight Requirements: Ensure you’re choosing medium-weight yarn to maintain sturdy bucket sides.
Abbreviations and Notes
Here’s a list of common abbreviations used in this pattern:
- CH: Chain
- SC: Single Crochet
- SL ST: Slip Stitch
- INC: Increase (2 SC into the same stitch)
- DEC: Decrease (SC two stitches together)
Notes:
This pattern is worked in rounds (often continuous rounds). Use a stitch marker to mark the first stitch of each round.
Ensure your tension is consistent for a sturdy bucket shape.
Gauge, Approximate Size, and Pattern Notes
Gauge: Approx. 8 SC x 8 rows = 2 inches. Adjust hook size if needed to achieve this gauge.
Finished Size: Approx. 4 inches tall and 3.5 inches wide, depending on your tension.
Special Techniques:
Magic Circle: The bucket base is started with a magic circle to create a tight round. If you are unfamiliar with this, it’s worth practicing beforehand.
Stiffening: If the bucket doesn’t hold its shape, consider using thicker yarn or lightly stiffening it with diluted glue.
Gauge Swatch: Not strictly necessary for this project since exact sizing is flexible, but check your tension if your bucket looks loose or floppy.
Step-by-Step Pattern
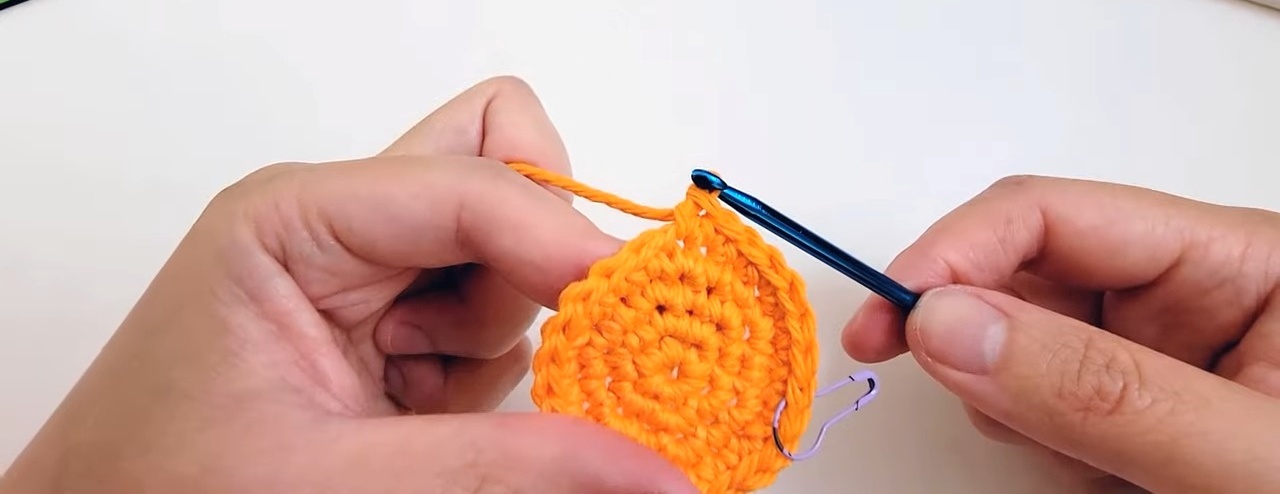
Step 1: Starting the Base
Begin with a magic circle.
Round 1: CH 1, work 6 SC into the magic circle. Tighten the circle and SL ST to the first SC. (6 SC)
Round 2: CH 1, INC in each SC around. SL ST to join. (12 SC)
Round 3: CH 1, [INC, SC] around. SL ST to join. (18 SC)
Round 4: CH 1, [INC, SC in next 2 stitches] around. SL ST to join. (24 SC)
Continue increasing until the base measures approx. 3.5 inches across.
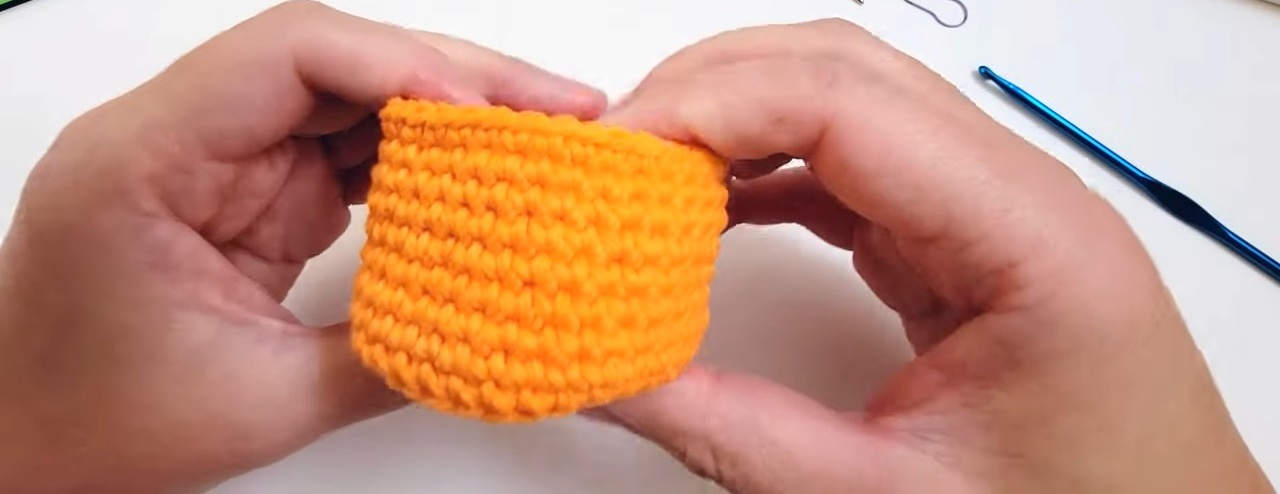
Step 2: Building the Bucket Walls
Change to a contrasting color (if desired).
Work one round of SC in the back loops only to create a sharp edge for the sides.
Round 1: CH 1, SC in each stitch around. Do NOT join; continue working in a spiral for approx. 3.5–4 inches tall.
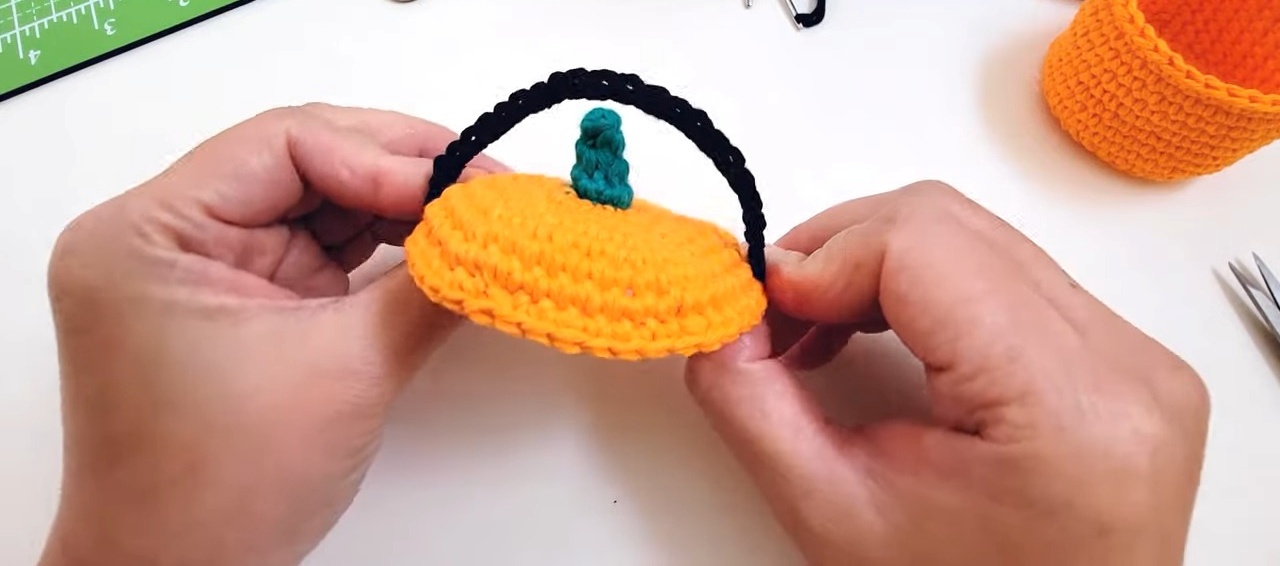
Step 3: Creating Handles
At the desired height, create small handles for the bucket.
SC to your desired position for the first handle, then CH 6–8 (depending on handle size). Skip the next 6–8 stitches and continue SC around. Repeat for the second handle.
Ensure both handles are evenly spaced.
Step 4: Adding Details
Use black or white yarn to create spooky faces or designs:
Embroider eyes and a mouth onto the bucket using a yarn needle.
Alternatively, crochet small shapes (like triangles or circles) and stitch them onto the bucket.
Step 5: Finishing
SL ST to finish the last round. Fasten off and weave in all ends using a yarn needle.
If desired, lightly block or stiffen your bucket for extra sturdiness.
Key to Success
Choose high-quality yarn for durability.
Follow the pattern slowly for clean and even stitches.
Use contrasting colors to highlight the bucket’s design.
Practice basic crochet stitches before starting the bucket.
Pay close attention to shaping for a polished look.
This pattern is not complete or correct. There is only one handle, instructuons are for 2 short handles and there are NO INSTRUCTIONS FOR THE TOP!