

Pedro the Amigurumi Panda — Complete Crochet Pattern (7"–10.5")
Meet Pedro, a cuddly amigurumi panda you can make at home. This pattern walks you through crocheting a small black-and-white panda using basic amigurumi techniques (magic ring, continuous rounds, and simple increases/decreases). The sample shown was made with two strands of local crochet thread on a 2.5mm hook (finished height ~7 inches). Using Red Heart Super Saver with an F/3.75mm hook yields a larger panda about 10.5 inches tall. Suitable for intermediate beginners comfortable with shaping and sewing pieces together.
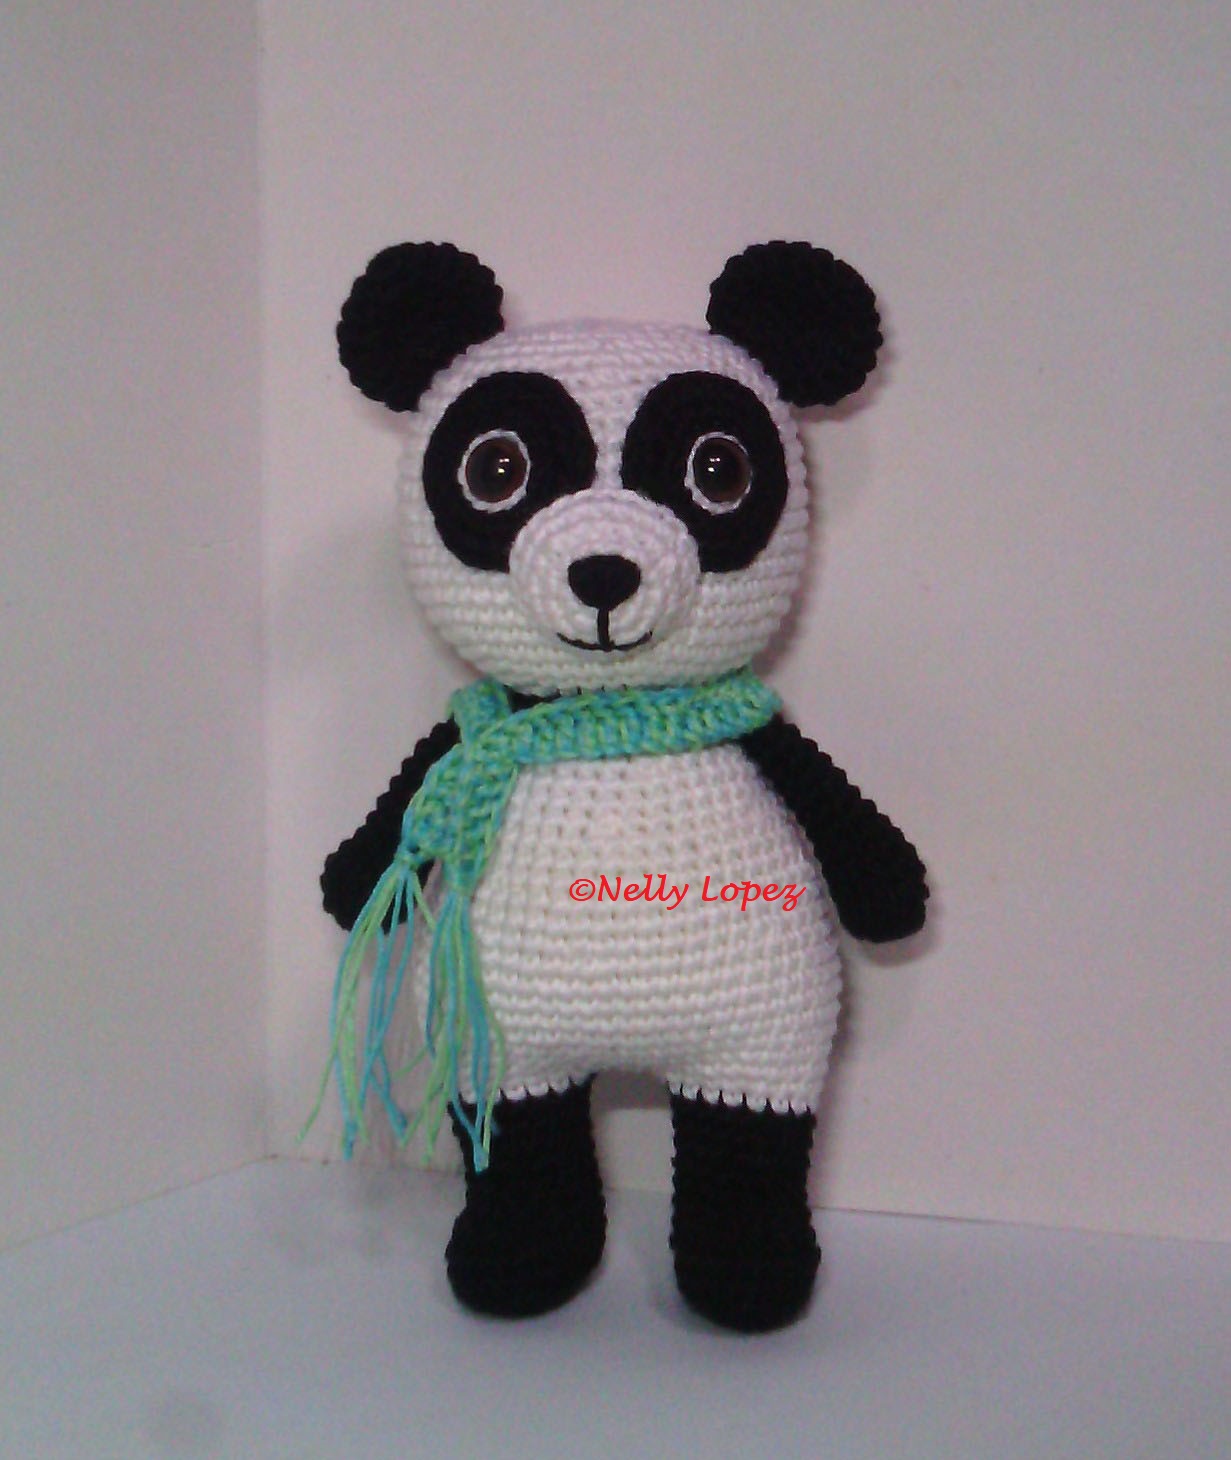
Caption: Finished Pedro amigurumi panda — made with black and white yarn. Sample size: ~7 inches with 2.5mm hook; ~10.5 inches with 3.75mm hook.
Materials: I used 2 strands of local crochet thread with a 2.5mm crochet hook and the size of my finished Panda is 7 inches. You can use any yarn and hook size with this pattern to make a panda of your desired size.
— When made with Red Heart Super Saver with size F /3.75mm crochet hook the finished panda stands 10 and a half inches tall.
Notes: A small piece of white felt fabric is needed for the eye detail. Gauge isn't critical for this pattern, but try to make similar pieces (arms, legs) in the same sitting for matching size. This pattern is written in US Terminology.
Abbreviations:
Ch — chain
Sc — single crochet
Inc — increase
Dec — decrease
St — stitch
Sts — stitches
ScDec — single crochet decrease
HdcDec — half double crochet decrease
Pattern start:
EARS (make 2) — With Black yarn. Crocheted in continuous round. Use a stitch marker to mark the beginning of the round.
Round 1: 6 Sc in magic ring (or Ch 2, 6 Sc in 2nd chain from hook).
Round 2: Inc in each st around (12).
Round 3: (Sc in next st, Inc in next) repeat around (18).
Round 4: (Sc in next 2 sts, Inc in next) repeat around (24).
Round 5-6: Sc in each st around (24).
Round 7: (Sc in next 2 sts, Dec) repeat around (18).
Round 8: (Sc in next st, Dec) repeat around (12). Finish off, leaving a long tail for sewing ears to the head.
SNOUT — Use White yarn. Crocheted with join at the end of every round. Use contrasting color for the snout.
Round 1: 6 Sc in magic ring, Join (6).
Round 2: Ch 1, Inc in each st around, Join (12).
Round 3: Ch 1, (Sc in next st, Inc in next) repeat around, Join (18).
Round 4: Ch 1, (Sc in next 5 sts, Inc in next st) repeat around, Join (21).
Round 5: Ch 1, Sc in each stitch around, Join (21). Finish off and leave long tail for sewing later. Using black yarn, embroider nose and mouth. The line that connects the nose and mouth is made on top of the seam created when joining at the end of the round so the yarn will cover the seam.
EYE PATCH — Crocheted in continuous round.
Round 1: 6 Sc in magic ring (leave a small central hole to insert safety eye).
Round 2: Inc in each st around (12).
Round 3: (Sc in next st, Inc in next) repeat around (18).
Round 4: (Sc in next 2 sts, Inc in next) repeat around (24).
Round 5: (Sc in next 3 sts, Inc in next) repeat around (30). Finish off, hide tail. Prepare safety eyes by inserting each in a small piece of white felt, then insert the detailed safety eye into the center of the eye patch.
TAIL — Crocheted in continuous round. Use a stitch marker to mark the beginning of the round.
Round 1: 6 Sc in magic ring (or Ch 2, 6 Sc in 2nd chain).
Round 2: Inc in each st around (12).
Round 3: Sc in each stitch around (12).
Round 4: Dec x6 (6). Finish off. Leave a long tail for sewing tail to body.
ARMS (make 2) — With Black yarn. Crocheted in continuous round. Stuff the arms as you go.
Round 1: 6 Sc in magic ring.
Round 2: Inc in each st around (12).
Round 3: (Sc in next 3 sts, Inc in next st) repeat around (15).
Round 4: Sc in next 3 sts, 3Dc Bobble in next st, Sc in next 11 sts (15).
Round 5: (Sc in next 3 sts, Dec) repeat around (12).
Round 6: Sc in next 2 sts, Dec, Sc in next 4 sts, Dec, Sc in next 2 sts (10).
Round 7-14: Sc in each st around (10).
Round 15: (Sc in next 3 sts, Dec) x2 (8). Finish off. Arms are made ahead for later attachment using the crochet-as-you-go method; otherwise leave a long tail for sewing.
LEG 1 — Use Black yarn.
Round 1: Ch 5, Sc in 2nd chain from hook and next 2 sts, 3 Sc in next st, on the other side of chain Sc in next 2 sts, Inc in next st (10).
Round 2: Inc in next st, Sc in next 2 sts, Inc in next st, 3 Sc in next st, Inc in next st, Sc in next 2 sts, Inc in next st, 3 Sc in next st (18).
Round 3: Sc in next st, Inc in next st, Sc in next 2 sts, Inc in next st, (Sc in next st, Inc in next st) x3, Sc in next 2 sts, Inc in next st, (Sc in next st, Inc in next st) x3 (26).
Round 4: Sc in each st around working in back loops only (26).
Round 5: Sc in each st around (both loops) (26). Stuff the leg as you go.
Round 6: Sc in next 6 sts, HdcDec x4, Sc in next 12 sts (22).
Round 7: Sc in next 4 sts, ScDec x4, Sc in next 10 sts (18).
Round 8: Sc in next 4 sts, ScDec x2, Sc in next 10 sts (16).
Round 9: Sc in next 4 sts, Inc in next 2 sts, Sc in next 10 sts (18).
Round 10-12: Sc in each st around (18). Finish off. Place stitch marker in 4th st.
LEG 2 — Follow instructions for Rounds 1–12. Finish off and place a stitch marker in 11th stitch.
If the marked stitches are not centered, you can move your slip stitch; it will not affect stitch counts for the following rounds. Placing both legs together facing you will help align the center stitches.
To join both legs together: Attach white yarn in the marked stitch of 1st (right) leg, work 3 chains, slip stitch in the marked stitch of 2nd (left) leg. Start crocheting the body.
Round 13: Ch 1, Sc around 1st leg, Sc along Ch 3, Sc around 2nd leg, Sc along Ch 3 (42). — Do not join, continue to work in continuous spiral.
Round 14: (Sc in next 6 sts, Inc in next st) repeat around (48).
Round 15: (Sc in next 7 sts, Inc in next st) repeat around (54).
Round 16-22: Sc in each st around (54).
Round 23: (Sc in next 7 sts, Dec) repeat around (48).
Round 24-25: Sc in each st around (48).
Round 26: (Sc in next 6 sts, Dec) repeat around (42).
Round 27-28: Sc in each st around (42).
Round 29: (Sc in next 5 sts, Dec) repeat around (36).
Round 30-31: Sc in each st around (36).
Round 32: (Sc in next 4 sts, Dec) repeat around (30). Change to Black yarn.
Round 33: Slip stitch in each stitch around for a neat color change.
Round 34: Work in back loops only. Sc in each st around, joining the arms as you go (30).
Round 35: Sc in each st around (30).
Round 36: (Sc in next 3 sts, Dec) repeat around (24).
HEAD — Continue without joining.
Round 37: (Sc in next 3 sts, Inc in next st) repeat around (30).
Round 38: (Sc in next 4 sts, Inc in next st) repeat around (36).
Round 39: (Sc in next 5 sts, Inc in next st) repeat around (42).
Round 40: (Sc in next 6 sts, Inc in next st) repeat around (48).
Round 41: (Sc in next 7 sts, Inc in next st) repeat around (54).
Round 42-52: Sc in each st around (54). Place safety eyes between Rounds 49 and 50. You might want to sew the snout before proceeding to close the head. Sew the snout between Rounds 41 to 48 at the center of the face. Stuff the snout before closing.
Round 53: (Sc in next 7 sts, Dec) repeat around (48).
Round 54: (Sc in next 6 sts, Dec) repeat around (42).
Round 55: (Sc in next 5 sts, Dec) repeat around (36).
Round 56: (Sc in next 4 sts, Dec) repeat around (30).
Round 57: (Sc in next 3 sts, Dec) repeat around (24).
Round 58: (Sc in next 2 sts, Dec) repeat around (18).
Round 59: (Sc in next st, Dec) repeat around (12).
Round 60: Dec around (6). Cut yarn leaving a long tail. Using a yarn needle, thread through each stitch and pull tight to close the head.
SCARF: Chain 57, Dc in 3rd chain from hook and each stitch across. Finish off and add fringe on both ends of the scarf.
ASSEMBLY:
- If you didn't crochet the arms as you go, sew arms between Rounds 33 and 34.
- Sew arms and ears aligned to the panda's body/feet.
- Sew the ears below Round 56 of the head.
- Sew the tail at the back of the body between Round 16 and 17.
Finishing tips: Weave in all ends neatly on the inside. Use safety eyes with felt backing for extra security if the toy will be given to children. Adjust stuffing to achieve the desired firmness.