

Cute Crochet Kitten Pencil Box — Step-by-Step Pattern
Make a charming kitten-shaped pencil box with this easy crochet pattern. This project combines simple amigurumi shaping with a practical zipper pouch to create a whimsical desk accessory or a thoughtful handmade gift for cat lovers. Follow the materials list and round-by-round instructions below — take your time with the increases and decreases to keep the shape neat, and finish with sewn-in zipper and glued or safety eyes for a secure, tidy result.
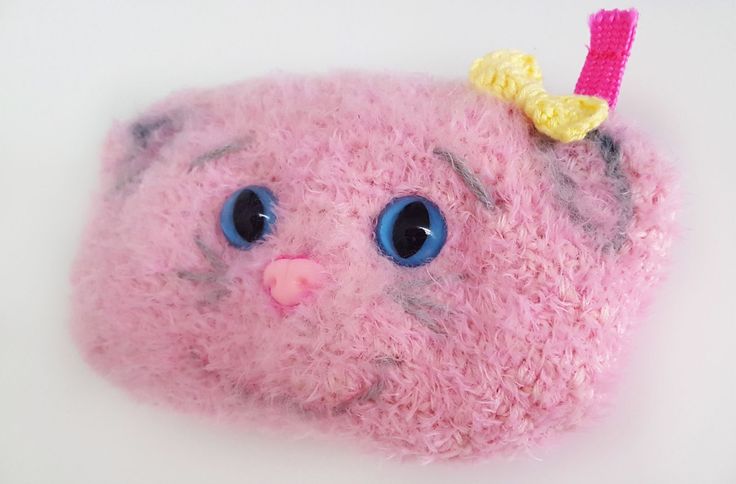
The Crochet Pencil Box Kitten is an adorable and fun DIY project that brings whimsy to organizing your stationery. With its cute design and practical use, this craft is perfect for adding some charm to your desk or gifting to a fellow cat lover. As you work on creating this sweet little kitty, you'll not only enjoy the soothing process of crochet but also end up with a delightful companion to keep your pencils in check. So gather your yarn, hooks, and creativity, and let's crochet our way to a purr-fectly charming pencil box kitten!
Materials:
- Crochet yarn approx 40gr, 130m / 50g
- Crochet Hook 2,75 mm UK 11 US C
- Pet eyes 20 mm, nose 18 mm
- Fiberfill
- Sewing needle
- Zipper 18 cm
Abbreviations: st — stitch, sc — single crochet, hdc — half double crochet, dc — double crochet, sl st — slip stitch, ch — chain.
Box (outer):
We will crochet the bag in rounds; each round begins with 3 CH and ends with a sl st. The 3 CH doesn’t count as a stitch.
Chain 24,
1. From the 3rd CH from the hook crochet 21 DC, 5 DC in 1, 21 DC, 5 DC in 1 (52)
2. 21 DC, 5x inc, 21 DC, 5x inc (62)
3. 21 DC, (1 DC, 1 inc) х 5, 21 DC, (1 DC, 1 inc) х 3 (72)
4. 21 DC, (2 DC, 1 inc) х 5, 21 DC, (2 DC, 1 inc) х 3 (82)
5. 30 DC, 3 DC tog, 38 DC, 3 DC tog, 8 DC (78)
6. 28 DC, 2 dec, 35 DC, 2 dec, 7 DC (74)
7. (8 DC, 1 dec)x7, 4 DC (67)
8-12. 67 DC
Cut the yarn and hide the end.
Sew the zipper in along the top opening.
Stitch the ears in place with sl st where indicated.
Glue or attach the eyes (around 7-8 rnds down from the top).
Nose: Find the middle between the eyes, go about 2.5 rows down and attach the nose there. You can also embroider eyebrows (a few rows above the eyes) and whiskers to add character.
Bow (crochet):
Chain 14,
1. From the 3rd CH from the hook crochet 10 DC
2. Turn, 1 CH, 10 SC
3. Turn, 3 CH, 10 DC
Fold the piece in half and sew the two ends together to form the bow; attach to the kitten as desired.
Inner side of the box (lining):
We will crochet the inner part in rounds; each round begins with 3 CH and ends with a sl st. The 3 CH doesn’t count as a stitch.
(gray) Chain 24,
1. From the 3rd CH from the hook crochet 21 DC, 5 DC in 1, 21 DC, 5 DC in 1 (52)
2. 21 DC, 5x inc, 21 DC, 5x inc (62)
3. 21 DC, (1 DC, 1 inc) х 5, 21 DC, (1 DC, 1 inc) х 3 (72)
Change the color to the pink.
4-11. 72 DC
Place the inner part you just crocheted into the outer box and join the two parts along the top edge to secure the lining. Finish any loose ends and hide yarn tails inside.
The box is ready! Add final touches like a sewn bow, embroidered whiskers, or a small loop for hanging if you like.