

How to Crochet a Little Genie Toy — Complete Amigurumi Pattern & Step-by-Step Guide
Bring a touch of magic to your crochet projects with this detailed amigurumi pattern for a Crochet Little Genie Toy. This guide includes a full materials list, abbreviations, step‑by‑step rounds and assembly instructions so you can create a charming little genie complete with turban, jacket and lamp. Suitable for crocheters familiar with basic amigurumi techniques (magic ring, sc, inc, dec), the pattern uses smooth yarn and a small hook for fine detail.
The Crochet Little Genie Toy is a delightful creation known for its whimsical charm and intricate design. Handcrafted with love and attention to detail, this enchanting genie toy brings a touch of magic to any setting. Its tiny size makes it a perfect companion for both children and adults alike, adding a sprinkle of joy to your day. Whether you're a crochet enthusiast or simply looking for a unique gift, this little genie toy is sure to bring a smile to your face and warmth to your heart. Crafted with care and meant to be cherished, the Crochet Little Genie Toy is a tiny treasure waiting to brighten your world with its irresistible charm.
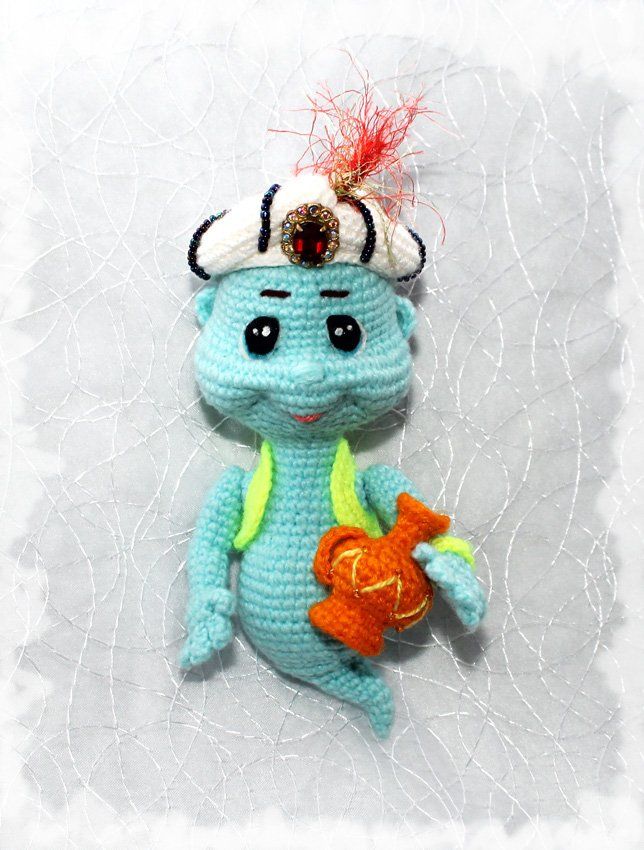
Finished Crochet Little Genie Toy — a tiny amigurumi genie with turban, jacket and lamp.
Materials:
- Smooth yarn the same thickness (I have 100 g – 400 m)
- for body — blue color – 20 g;
- for turban – white color;
- for lamp – yellow or light brown color;
- for jacket – as you wish;
- A hook for your yarn (I have 1,25);
- Filler;
- Eyes – ready or pieces of felt;
- Wire – 2 pieces for 5 cm;
- Glue;
- Needle, thread for contractions;
- Beads, sequins, beautiful button;
- A little brown, pink and yellow moulinet.
Abbreviations:
ch – chain
st — stitch
sl st – slip stitch
sc – single crochet
inc – increase (2 sc in 1 st)
dec – decrease (single crochet two stitches together)
hdc – half double crochet
3 in 1 — 3 sc in 1 loop
(...) x N times – repeat instructions in brackets N times
Head — body
Stuff firmly but do not overstuff.
1 Rnd: 6 sc in magic ring
2 Rnd: 6 inc (12)
3 Rnd: (1 sc, inc)х 6 times (18)
4 Rnd: 1 sc (inc, 2 sc)х 5 times, inc, 1 sc (24)
5 Rnd: (3 sc, inc)х 6 times (30)
6 Rnd: 2 sc (inc ,4 sc)х 5 times, inc, 2 sc (36)
7 Rnd: (inc ,5 sc) х 6 times (42)
8-12 Rnd: 42 sc (42)
13 Rnd: 42 sc (42) mark 14-th st. The middle.
14 Rnd: 3 sc, (inc, 1 sc)х5 times, 1 sc, (1 sc, inc) х5 times, 18 sc (52)
15 Rnd: 5 sc, (inc, 2 sc) х4 times, inc, 1 sc, inc, (2 sc, inc) х4 times, 20 sc (62)
16-18 Rnd: 62 sc (62)
19 Rnd: 4 sc, (dec ,1 sc) х14 times, 16 sc (48)
20 Rnd: 31 sc, (dec ,3 sc) х3 times, dec (44)
21 Rnd: 3 sc, (dec ,2 sc) х7 times, dec, 4 sc, dec, 3 sc, dec (34)
22 Rnd: (6 sc, dec ,7 sc, dec)х2 times (30)
23 Rnd: (3 sc, dec) х6 times (24)
24 Rnd: (2 sc, dec) х6 times (18)
25-26 Rnd: 18 sc (18)
27 Rnd: 4 sc, dec, 7 sc, dec, 3 sc (16)
28 Rnd: 16 sc (16)
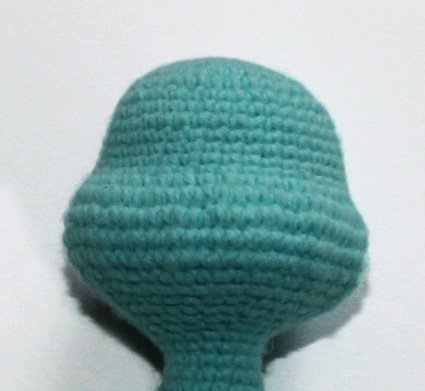
Head and upper body shaping — stuffing the head and continuing the body rounds.
Stuff the head tightly and continue working the body. While working, you will need to keep the work symmetrical.
29 Rnd: 4 sc, ch 5, from the second loop from hook: 4 sc, 8 sc, ch 5, from the second loop from hook: 4 sc, 4 sc (24)
30 Rnd: 4 sc, along the other side of the chain: 3 sc, inc, 12 sc, along the other side of the chain: 3 sc, inc, 8 sc (34)
31-32 Rnd: 34 sc (34)
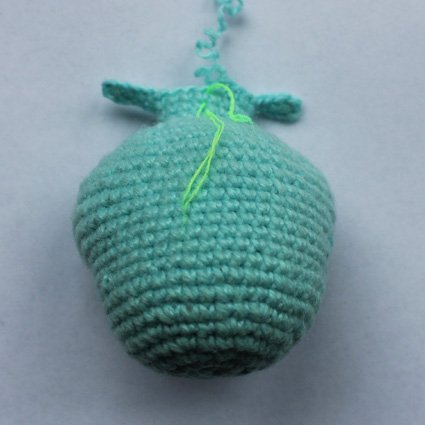
Mid-construction view — rounds for shaping torso and waist.
33 Rnd: 5 sc, dec, 4 sc, dec, 9 sc, dec, 4 sc, dec, 4 sc (30)
34 Rnd: 6 sc, 2 dec, 11 sc, 2 dec, 5 sc, (26)
35 Rnd: 2 sc, inc, 3 sc, dec, 2 sc, (inc ,1 sc) х 3 times, inc, 2 sc, dec, 3 sc, inc, 1 sc (30)
36 Rnd: 2 sc, inc, 8 sc, (inc ,2 sc)х 4 times, 6 sc, inc (36)
37 Rnd: 36 sc (36)
38 Rnd: (5 sc, inc) х 6 times (42)
39-42 Rnd: 42 sc (42)
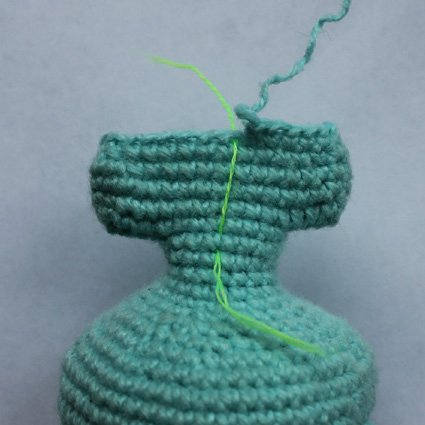
Lower body shaping — continuing decreases and finishing the torso before switching to rows.
43 Rnd: (5 sc, dec) х 6 times (36)
44 Rnd: 36 sc (36)
45 Rnd: (4 sc, dec) х 6 times (30)
46 Rnd: (3 sc, dec) х 6 times (24)
Continue working in rows.
47 Row: 16 sc, dec, ch 1, turn ,
skip 1, 14 sc, dec, ch 1, turn ,
skip 1, (1 sc, dec)х5 times (5th dec is perfomed on bevel), 1 sc, 5 sl st (16)
Continue working in runds.
48 Rnd: on bevel 2 sc together, 16 sc (17)
49 Rnd: 12 sc, 5 sl st (17)
50 Rnd: 2 sc, 3 dec, 9 sc (14)
51 Rnd: 2 sc, 2 dec, 3 sc, 4 sl st, 1 sc (12)
52 Rnd: 2 sc, dec, 8 sc (11)
53 Rnd: 2 sc, dec, 7 sc (10)
54 Rnd: 2 sc, dec, 6 sc (9)
55 Rnd: (dec ,1 sc) х3 times (6)
56 Rnd: (1 sc, dec ) х2 times (4)
Fasten off. Stuff.
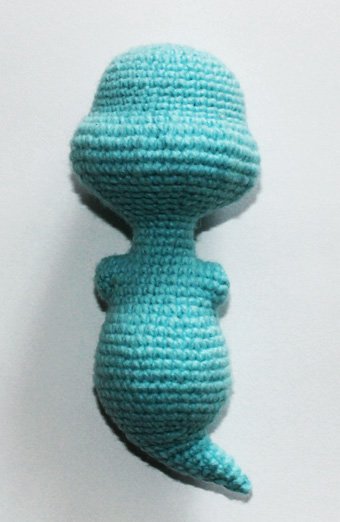
Arms and bracelet — crocheted arms ready for finishing and the bracelet strip for sewing around the wrist.
Arms (make 2)
Stuff firmly but do not overstuff.
1 Rnd: 6 sc in magic ring
2 Rnd: 6 inc (12)
3-5 Rnd: 12 sc (12)
6 Rnd: (4 sc, dec ) х2 times (10)
7-8 Rnd: 10 sc (10)
9 Rnd: 2 sc, 3 hdc in 1 loop, 3 sc, 3 sl st, 1 sc (12)
10 Rnd: 2 sc, 3 hdc together, 7 sc (10)
11 Rnd: 10 sc (10)
12 Rnd: 2 sc, dec, 6 sc (9)
13 Rnd: 9 sc (9)
14 Rnd: 6 sc, dec, 1 sc (8)
15 Rnd: (1 sc, inc) х 4 times (12)
Fingers:
16 Rnd:. 10 sc, thumb: — ch 3, from the second loop from hook: 2 sc, 1 sl st along the arm.
Place a round marker here.
17 Row: Fold the arm in half and crochet 5 sc, taking both cloths. Turn.
18 Row: (ch 3, from the second loop from hook: 2 sc, 1 sl st along the arm) repeat 4 times
Fasten off, cut the yarn.
Bracelet
1 Rnd: ch 13, from the second loop from hook: 12 sc.
Wrap around genie wrist and sew it up.
Turban
Knit with white yarn.
1 Rnd: 6 sc in magic ring
2 Rnd: 6 inc (12)
3 Rnd: (1 sc, inc) х 6 times (18)
4 Rnd: 1 sc (inc, 2 sc) х5 times, inc, 1 sc (24)
5 Rnd: (3 sc, inc) х 6 times (30)
6 Rnd: 2 sc, (inc ,4 sc) х 5 times, inc, 2 sc (36)
7 Rnd: (inc ,5 sc) х 6 times (42)
8 Rnd: 3 sc (inc ,6 sc) х 5 times, inc, 3 sc (48)
9-11 Rnd: 48 sc (48)
12 Rnd: (15 sc, inc) х 3 times (51)
13-15 Rnd: 51 sc (51)
Fasten off, cut the yarn.
Turban lapel
1 Rnd: ch 69, from the second loop from hook: 67 sc, 3 sc in the last loop, along the other side of the chain: 66 sc, inc (138)
2 Rnd: inc, 66 sc, 3 inc, 66 sc, inc, 1 sc (143)
3 Rnd: 4 sc (dec ,4 sc) х10 times, dec, 10 sc, (dec ,2 sc)х16 times, 3 sc (116)
ASSEMBLY
sew the wider edge of lapel to the bottom edge of the cap, while the lateral edges (where the curvature) smoothly lift to the level of the 8th round, make overlap one edge of the part to another. Ahead should get a triangle, where later to glue the decoration. Sew the narrower side, stepping 4 rounds up from the bottom edge of the cap. Add filler to the resulting gap between the cap and the top. Decorate at your discretion (with beads, rhinestones, buttons, feathers)
Jacket
1 Rnd: ch 7, from the second loop from hook: 3 in 1, 4 sc, 3 in 1, along the other side of the chain: 4 sc (14)
2 Rnd: 3 inc, 4 sc, 3 inc, 4 sc (20)
3 Rnd: 1 sc, 3 in 1, 2 sc, 3 in 1, 6 sc, 3 in 1, 2 sc, 3 in 1, 5 sc (28)
4 Rnd: 3 sc, 13 ch, skip 4 sc, 1 sc, inc, 6 sc, inc, 1 sc, 13 ch, skip 4 sc, 4 sc, dec, 1 sc (47)
5 Rnd: dec, 1 sc, along the chain: 1 sc (inc ,2 sc) х 4 times, skip 1 sc, 2 sc, inc, 5 sc, inc, 2 sc, along the chain: (2 sc, inc) х 4 times, 1 sc, skip 1 sc, 5 sl st (54)
6 Rnd: 2 sl st, 6 sc, inc, 4 hdc, 2 hdc in 1 loop, 2 hdc, 1 sc, inc, 2 sc, 11 sl st, 2 sc, inc, 1 sc, 2 hdc, 2 hdc in 1 loop, 4 hdc, inc, 5 sc, 1 sl st
Fasten off, cut the yarn. Decorate as you like.
Genie lamp
Knit with yellow or light brown yarn.
1 Rnd: 6 sc in magic ring
2 Rnd: 6 inc (12)
3 Rnd: (1 sc, inc) х 6 times (18)
4 Rnd: 18 sc into the back loop only (18)
5 Rnd: (1 sc, dec ) х6 times (12)
6 Rnd: 12 sc (12)
7 Rnd: 12 inc (24)
8 Rnd: (3 sc, inc) х 6 times (30)
9-10 Rnd: 30 sc (30)
11 Rnd: (3 sc, dec ) х6 times (24)
12 Rnd: (2 sc, dec ) х6 times (18)
13 Rnd: (dec ) х9 times (9)
14 Rnd: 9 sc (9) Stuff the lamp.
15 Rnd: (1 sc, dec ) х3 times (6)
16 Rnd: 6 sc (6)
17 Rnd: (inc ,1 sc) х 3 times (9)
18 Rnd: (inc ,2 sc) х 3 times (12)
Fasten off, cut the yarn.
Handle
1 Row: ch 8, from the second loop from hook: 7 sc.
Fasten off, cut the yarn, leaving the long thread for sewing.
Sew a handle. To decorate the lamp with embroidery or beads.
Ears (make 2)
1 Row: ch 2, 3 sc in the last loop, ch 1, turn (3)
2 Row: inc, 1 sc, inc (5)
Fasten off, cut the yarn, leaving the long thread for sewing.
Décor
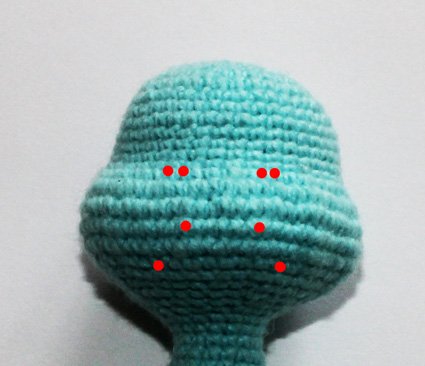
Define the points for pull down.
In the 13th round, mark the 3rd and 4th column from the center to the left, from the 3rd column at the same level, go down 4 rounds, mark, move down 2 more rounds and 2 columns to the left, mark. Symmetrically mark for the right side of the point.
Introduce the needle with a long strong thread in the back of the head, leave a small segment of the thread sticking out. Lead out at the point of the eye, retreating 1 column, insert the needle at another point of the eye, lead out at the upper point of the cheeks, and tighten. Stretching the thread from above, insert the needle into the lower point of the cheeks, lead it out at the first point of the eye, tighten it, repeat. Remove the needle again at the starting point of the head, tie 2 knots, hide the ends inside. Similarly, pull the second side.
Then slightly tighten the nose between the nearest points of the eye, lead out the needle in the back of the head, tie a knot, hide it inside.
Final assembly — attaching arms, embroidering facial features and gluing the eyes.
Attach the arms with the thread fastening.
Embroider the nose with several stitches, grabbing 3 central columns of the 15th round. Embroider mouth with pink thread, eyebrow — with brown.
Sew ears between 10 and 14 rounds, departing from the central loop of 10 columns.
Glue eyes.