


Crochet an Adorable Beret — Easy Step-by-Step Pattern
Add a handmade touch to your wardrobe with this adorable crocheted beret. This pattern uses basic stitches and cluster increases to create a slouchy, textured hat. Suitable for crocheters familiar with basic stitches, the pattern includes materials, gauge, and a round-by-round breakdown so you can follow along easily.

Finished beret in Lion Brand Heartland (Yosemite) — flat view showing overall shape.
Materials
- 5mm hook
- Lion Brand Heartland in the color Yosemite
Stitches
- Ch — Chain
- Sl St — Slip stitch
- Sc — Single crochet
- Dc — Double crochet
- Rep — Repeat
- Sp — Space
Gauge
2 rounds = 2.5 inch
Pattern
Magic ring or ch 4, join with sl st to first ch to form ring.
R1: Ch 3 (counts as dc throughout), dc in ring, ch 1, (2 dc, ch 1) in ring 5 times, sl st to top of ch-3 to join (6 clusters)
R2: Sl st next st & ch-1 sp, ch 3, (dc, ch 1, 2 dc) in same ch-1 sp, ch 1, *(2 dc, ch 1, 2 dc) next ch-1 sp, ch 1, rep from * around, sl st to top of ch-3 to join. (12 clusters)
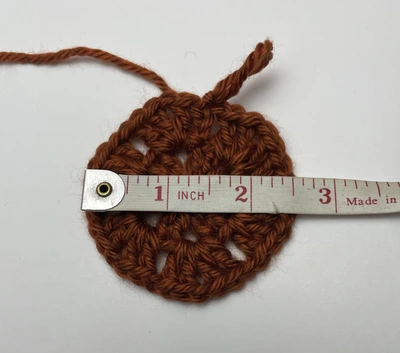
Close-up of the crown showing the cluster stitch texture and early increases.
R3: Sl st next st & ch-1 sp, ch 3, (dc, ch 1, 2 dc) in same ch-1 sp, ch 1, *2 dc next ch-1 sp, ch 1, (2 dc, ch 1, 2 dc) next ch-1 sp, ch 1, rep from * 4 more times, 2 dc next ch-1 sp, ch 1, sl st to top of ch-3 to join (18 clusters)
R4: Sl st next st & ch-1 sp, ch 3, 2 dc in same ch-1 sp, ch 1, *3 dc next ch-1 sp, ch 1, rep from * around, sl st to top of ch-3 to join. (18 clusters)
R5: Sl st next 2 sts & ch-1 sp, ch 3, (dc, ch 1, 2 dc) in same ch-1 sp, ch 1, *(2 dc, ch 1, 2 dc) next ch-1 sp, ch 1, rep from * around, sl st to top of ch-3 to join. (36 clusters)
R6: Sl st next st & ch-1 sp, ch 3, dc in same ch-1 sp, ch 1, *2 dc next ch-1 sp, ch 1, rep from * around, sl st to top of ch-3 to join. (36 clusters)
R7: Repeat Round 6 (36 clusters)
R8: Sl st next 2 sts & ch-1 sp, ch 3, dc in same ch-1 sp, ch 1, *2 dc next ch-1 sp, ch 1, rep from * around, sl st to top of ch-3 to join. (36 clusters)
R9: Repeat Round 6 (36 clusters)
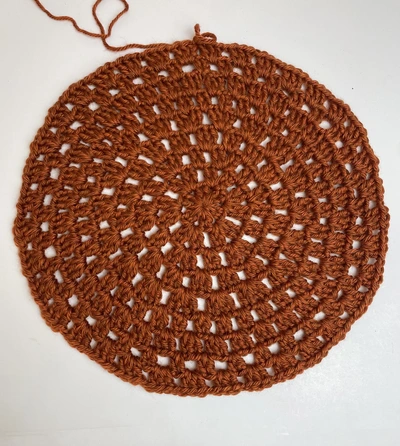
Textured rounds and shaping along the body of the beret.
R10-11: Sl st next st & ch-1 sp, ch 3, dc in same ch-1 sp, ch 1, (2 dc next ch-1 sp, ch 1) 4 times, 3 dc next ch-1 sp, ch 1, *(2 dc next ch-1 sp, ch 1) 5 times, 3 dc next ch-1 sp, ch 1, rep from * around, sl st to top of ch-3 to join. (36 clusters, 114 stitches)
R12-14: Ch 1, sc in each st around, sl st to join. (114)
Round 15: Ch 1, (sc next 17 sts, sc2tog) around. (108)
Round 16: Ch 1, (sc next 16 sts, sc2tog) around. (102)
Round 17: Ch 1, (sc next 15 sts, sc2tog) around. (96)
Round 18: Ch 1, (sc next 14 sts, sc2tog) around. (90)
Round 19: Ch 1, (sc next 13 sts, sc2tog) around. (84)
Round 20: Ch 1, (sc next 12 sts, sc2tog) around. (78)
Round 21: Ch 1, (sc next 11 sts, sc2tog) around. (72)
Round 22: Ch 1, sc in each st around, fasten off.
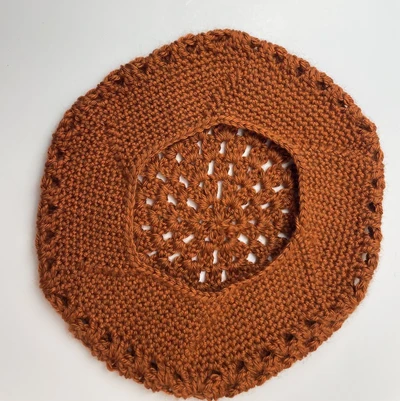
Finished beret displayed to show final slouch and edge finish.
Finishing Tips
- Weave in all ends securely.
- Lightly block the beret to smooth stitches and set the shape if desired.
- Add a small pom or decorative button at the center if you like extra flair.
Enjoy wearing or gifting your handmade beret — it makes a cozy, stylish accessory and a satisfying quick project.