


Easy Crochet Headband Pattern (H/8 5.5mm) — HDC & Post-Stitch Texture
This easy crochet headband pattern creates a stretchy, textured accessory using half double crochet and alternating front/back post stitches. It's a quick project suitable for beginners who know basic stitches and want a stylish headband made with a single skein or scrap yarn.
Materials and tools are listed below, followed by a row-by-row pattern. Make sure to check gauge and fit as you work — you can adjust the starting chain or repeat rows to change the final width.
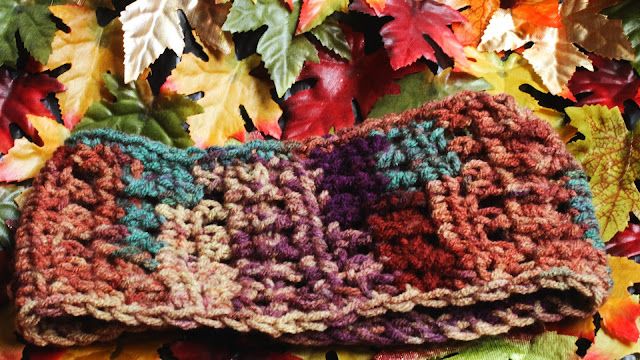
Finished headband showing the textured pattern made with Red Heart Super Saver scrap yarn.
Ingredients / Tools:
- Crochet Hook: H/8 — 5.50 mm
- Craft scissors
- Yarn sewing needle
- Scrap yarn used: Red Heart Super Saver
Stitch guide / Abbreviations:
HDC = half double crochet // SC = single crochet // DC = double crochet // SS = slip stitch // ST(S) = stitch(es) // CH = chain // R[number] = Row // FPHDC = front post half double crochet // BPHDC = back post half double crochet
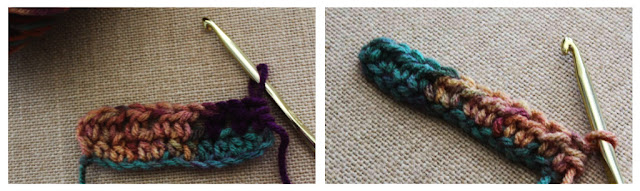
Close-up of the foundation chain (CH 15) and the beginning rows for the headband.
CH 15
R1: HDC into all of the STS for the entire row. At the end of the row, turn work to continue.
R2: HDC into the first two STS, CH 1, skip 1 ST, HDC into the following ST, CH 1, skip 1 ST, HDC into the following two STS, CH 1, skip 1 ST, HDC into the following ST, CH 1, skip 1 ST, HDC into the following two STS. Turn work to continue.
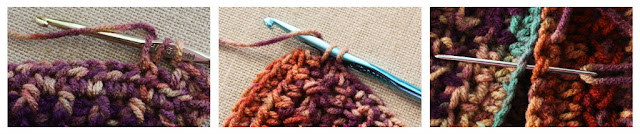
Work in progress showing the alternating front and back post HDC texture on the headband.
R3: HDC into all of the STS for the entire row. At the end of the row, turn work to continue.
R4: HDC into the first ST, FPHDC for the second ST, BPHDC into the following third ST, FPHDC for the 4th ST, BPHDC into the following 5th ST, FPHDC for the 6th ST, BPHDC into the following 7th ST, FPHDC for the 8th ST, BPHDC into the following 9th ST, FPHDC for the 10th ST, BPHDC into the following 11th ST, FPHDC for the 12th ST, BPHDC into the following 13th ST, HDC into the 14th ST. Turn work to continue.
R5: HDC into all of the STS for the entire row. At the end of the row, turn work to continue.
R6: HDC into the first two STS, CH 1, skip 1 ST, HDC into the following ST, CH 1, skip 1 ST, HDC into the following two STS, CH 1, skip 1 ST, HDC into the following ST, CH 1, skip 1 ST, HDC into the following two STS. Turn work to continue.
R7: HDC into all of the STS for the entire row. At the end of the row, turn work to continue.
R8: HDC into the first ST, FPHDC for the second ST, BPHDC into the following third ST, FPHDC for the 4th ST, BPHDC into the following 5th ST, FPHDC for the 6th ST, BPHDC into the following 7th ST, FPHDC for the 8th ST, BPHDC into the following 9th ST, FPHDC for the 10th ST, BPHDC into the following 11th ST, FPHDC for the 12th ST, BPHDC into the following 13th ST, HDC into the 14th ST. Turn work to continue.
R9: HDC into all of the STS for the entire row. At the end of the row, turn work to continue.
R10: HDC into the first two STS, CH 1, skip 1 ST, HDC into the following ST, CH 1, skip 1 ST, HDC into the following two STS, CH 1, skip 1 ST, HDC into the following ST, CH 1, skip 1 ST, HDC into the following two STS. Turn work to continue.
R11: HDC into all of the STS for the entire row. At the end of the row, turn work to continue.
R12: HDC into the first ST, FPHDC for the second ST, BPHDC into the following third ST, FPHDC for the 4th ST, BPHDC into the following 5th ST, FPHDC for the 6th ST, BPHDC into the following 7th ST, FPHDC for the 8th ST, BPHDC into the following 9th ST, FPHDC for the 10th ST, BPHDC into the following 11th ST, FPHDC for the 12th ST, BPHDC into the following 13th ST, HDC into the 14th ST. Turn work to continue.
R13: HDC into all of the STS for the entire row. At the end of the row, turn work to continue.
R14: HDC into the first two STS, CH 1, skip 1 ST, HDC into the following ST, CH 1, skip 1 ST, HDC into the following two STS, CH 1, skip 1 ST, HDC into the following ST, CH 1, skip 1 ST, HDC into the following two STS. Turn work to continue.
R15: HDC into all of the STS for the entire row. At the end of the row, turn work to continue.
R16: HDC into the first ST, FPHDC for the second ST, BPHDC into the following third ST, FPHDC for the 4th ST, BPHDC into the following 5th ST, FPHDC for the 6th ST, BPHDC into the following 7th ST, FPHDC for the 8th ST, BPHDC into the following 9th ST, FPHDC for the 10th ST, BPHDC into the following 11th ST, FPHDC for the 12th ST, BPHDC into the following 13th ST, HDC into the 14th ST. Turn work to continue.
R17: HDC into all of the STS for the entire row. At the end of the row, turn work to continue.
R18: HDC into the first two STS, CH 1, skip 1 ST, HDC into the following ST, CH 1, skip 1 ST, HDC into the following two STS, CH 1, skip 1 ST, HDC into the following ST, CH 1, skip 1 ST, HDC into the following two STS. Turn work to continue.
R19: HDC into all of the STS for the entire row. At the end of the row, turn work to continue.
R20: HDC into the first ST, FPHDC for the second ST, BPHDC into the following third ST, FPHDC for the 4th ST, BPHDC into the following 5th ST, FPHDC for the 6th ST, BPHDC into the following 7th ST, FPHDC for the 8th ST, BPHDC into the following 9th ST, FPHDC for the 10th ST, BPHDC into the following 11th ST, FPHDC for the 12th ST, BPHDC into the following 13th ST, HDC into the 14th ST. Turn work to continue.
R21: HDC into all of the STS for the entire row. At the end of the row, SS to complete work.
Step 2
SC around the entire finished crocheted piece once. At the end, SS to complete the round.
Step 3
Using your yarn sewing needle and a strand of yarn, sew the ends together horizontally to form the headband loop.
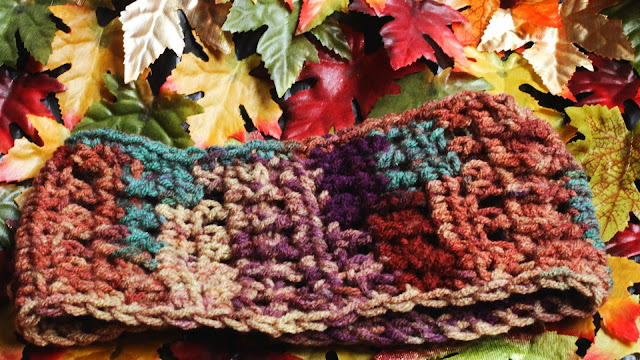
Final step: ends sewn together to complete the headband loop.
Finishing tips: Weave in any loose ends and block lightly if desired to even out the texture. If you need a different width, adjust the number of rows or repeats of the textured pattern.