


Tiny Crochet Sea Turtle (6.5 cm) — Amigurumi Pattern with Real Shell & Magnet Option
This compact amigurumi sea turtle is a quick, satisfying crochet project that makes a charming decoration, fridge magnet, or small gift. The finished turtle measures about 6.5 cm; the pattern uses simple stitches and attaches a real sea shell for an authentic look.
Crocheting a sea turtle is such a delightful project that brings joy and creativity together. The intricate details of the shell and the adorable flippers are just too cute to resist. As you work on each stitch, you can almost feel the gentle waves of the ocean and the sun shining above. The end result is not just a crocheted turtle, but a little piece of whimsical art that brings a smile to anyone who sees it. Happy crocheting, sea turtle enthusiasts!
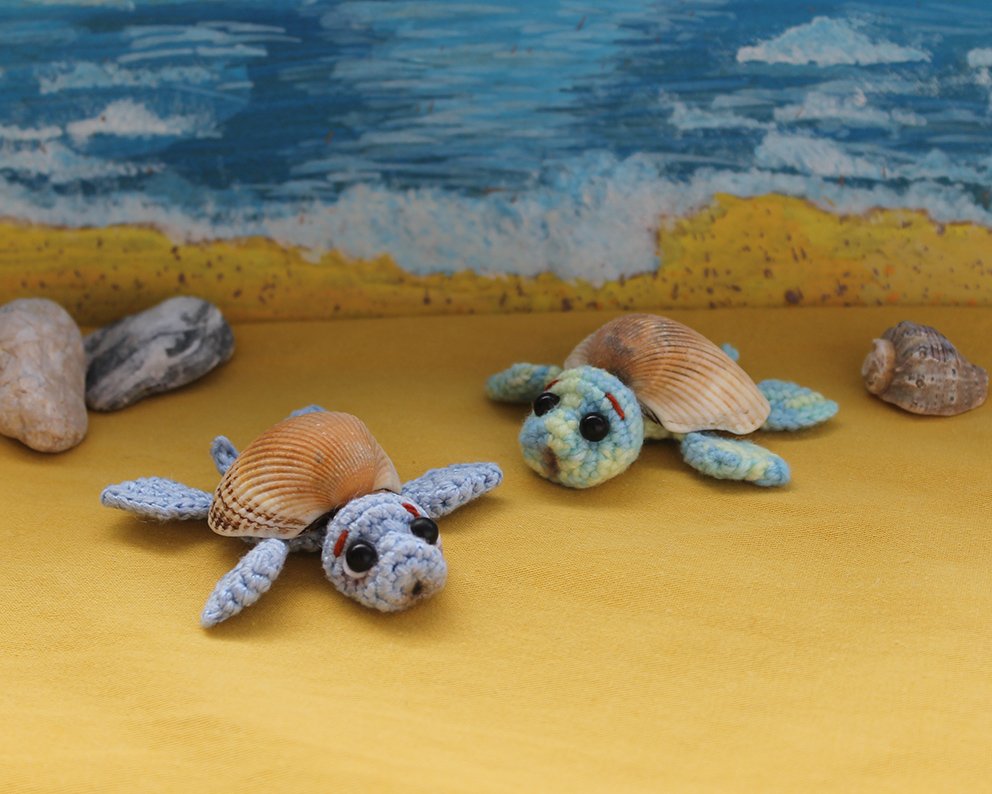
Finished 6.5 cm crochet sea turtle with a real shell attached.

Close-up view highlighting the turtle's head and shell detail.
The size of the turtle is 6.5 cm. I used 400 m/100 g acrylic yarn. The turtle shell made is from real sea shells and attached with a super glue.
If you glue a magnetic tape on the turtle's stomach, you will get a fridge magnet.
Materials:
- — Yarn, (acrylic or cotton) of your choice. The yarn colour is at your discretion
- — A crochet hook, I have 1,5 mm crochet hook
- — Hollow fibre for stuffing
- — For eyes: 2 half-beads, I used 6mm diam half-beads
- — For the shell: a sea shell of a suitable size
- — A piece of thick cardboard
- — A sewing needle
- — Transparent glue
- — Flexible magnetic tape 2 cm х 3 cm (at your wish)
Abbreviations:
- ch – chain
- sl st – slip stitch
- sc – single crochet
- hdc – half double crochet
- inc – increase (2 sc in 1 st)
- dec – decrease (single crochet two stitches together)
- (...) x N times – repeat instructions in brackets N times
Flipper (make 4)
1) 4 sc in Magic Ring
2) (inc)× 4 times (8)
3) (1 sc, inc)× 4 times (12)
4) (2 sc, inc)× 4 times (16)
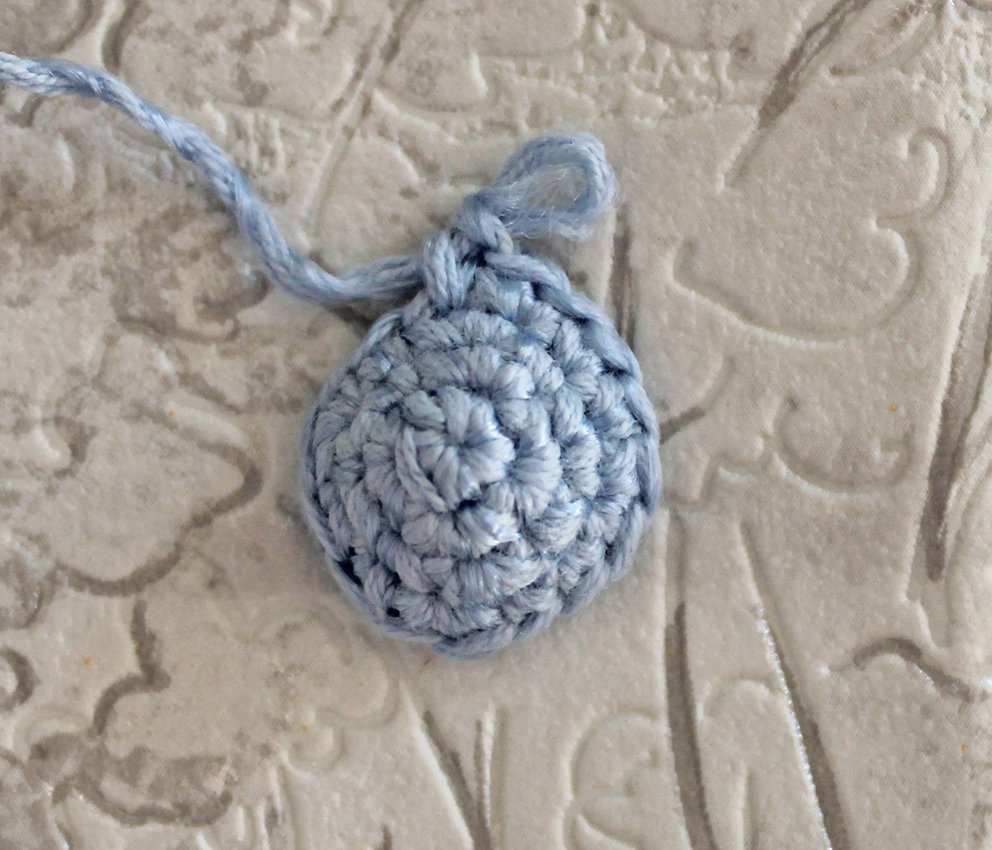
Crochet flipper piece laid flat before folding and joining.
5) Fold the part in two, work by hooking through both edges of the part: 3 sc, 3 sc in 1 loop, 3 sc (9)
Bind off, cut off any excess yarn.
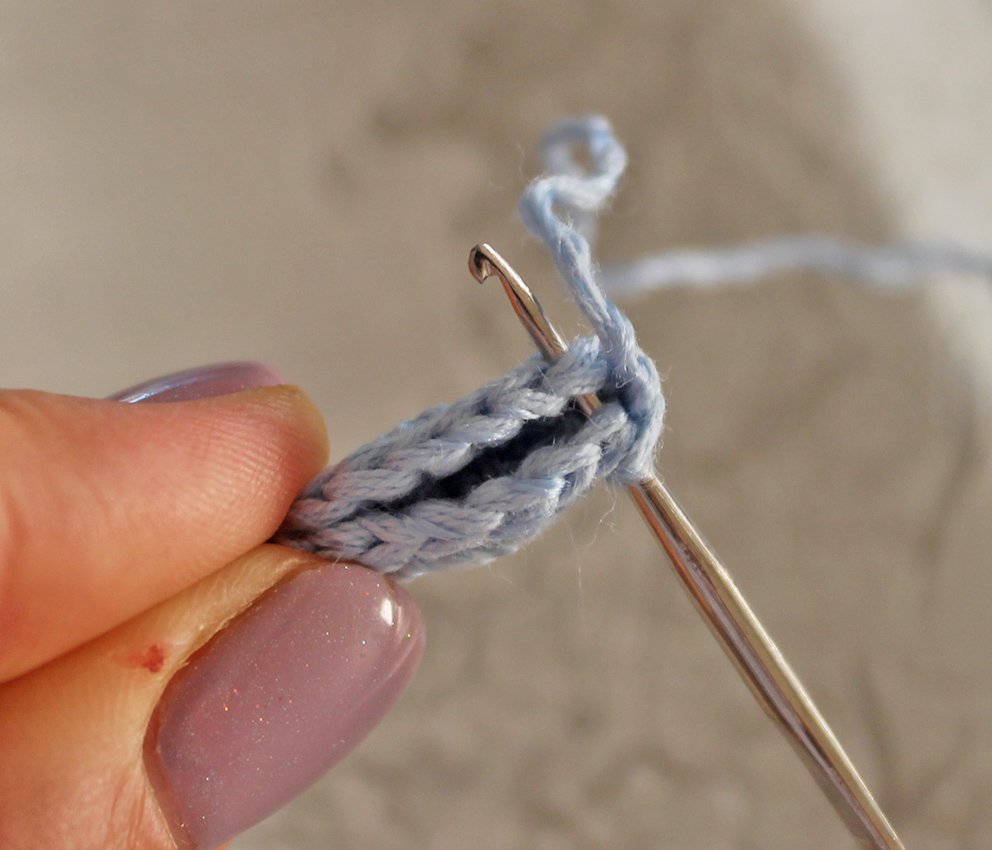
Flipper folded and joined — showing where to crochet through both layers.
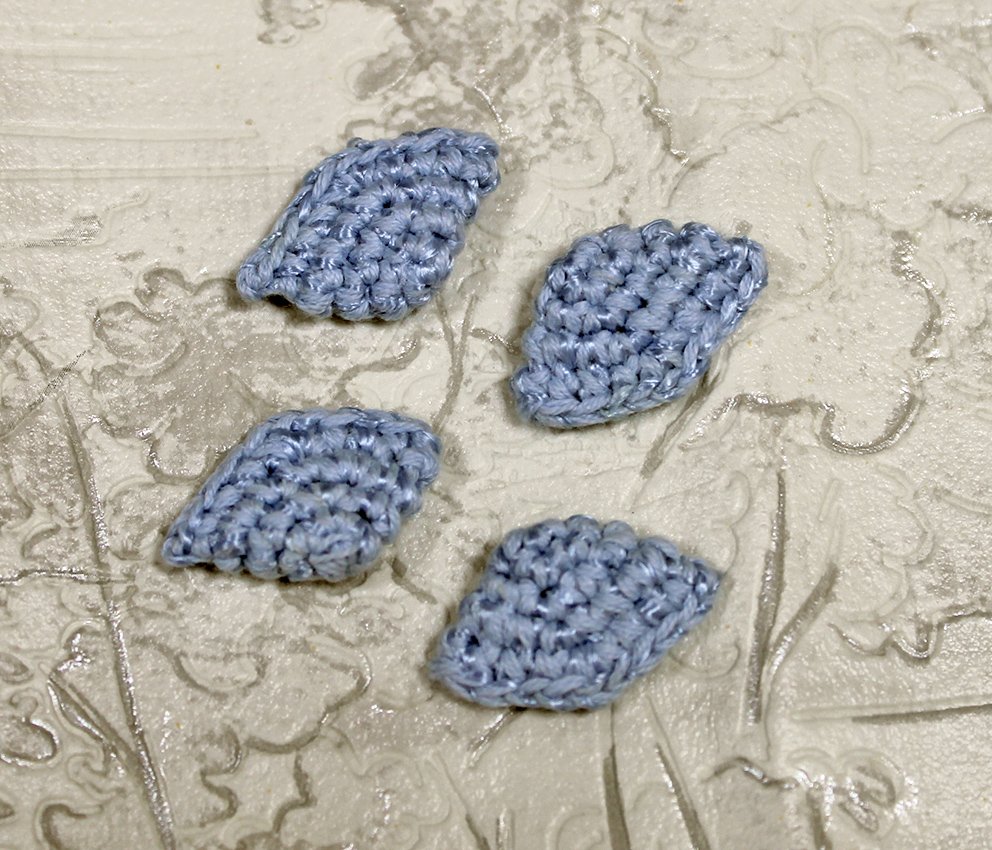
Four crocheted flippers ready to be attached to the body.
Head — Body
1) 6 sc in Magic Ring
2) (inc)× 6 times (12)
3) 1 sc, inc, 8 sc, inc, 1 sc (14)
4) 14 sc — mark the 5th, 6th, 9th, 10th loops.
5) 4 sc, (inc)× 6 times, 4 sc (20)
6-8) 20 sc
Work 1 sc, transfer your place marker here
9) 5 sc, dec, 6 sc, dec, 5 sc (18)
10) (dec, 1 sc)× 6 times (12)
Add some hollow fibre.
11) (dec)× 6 times (6)
12) 6 sc
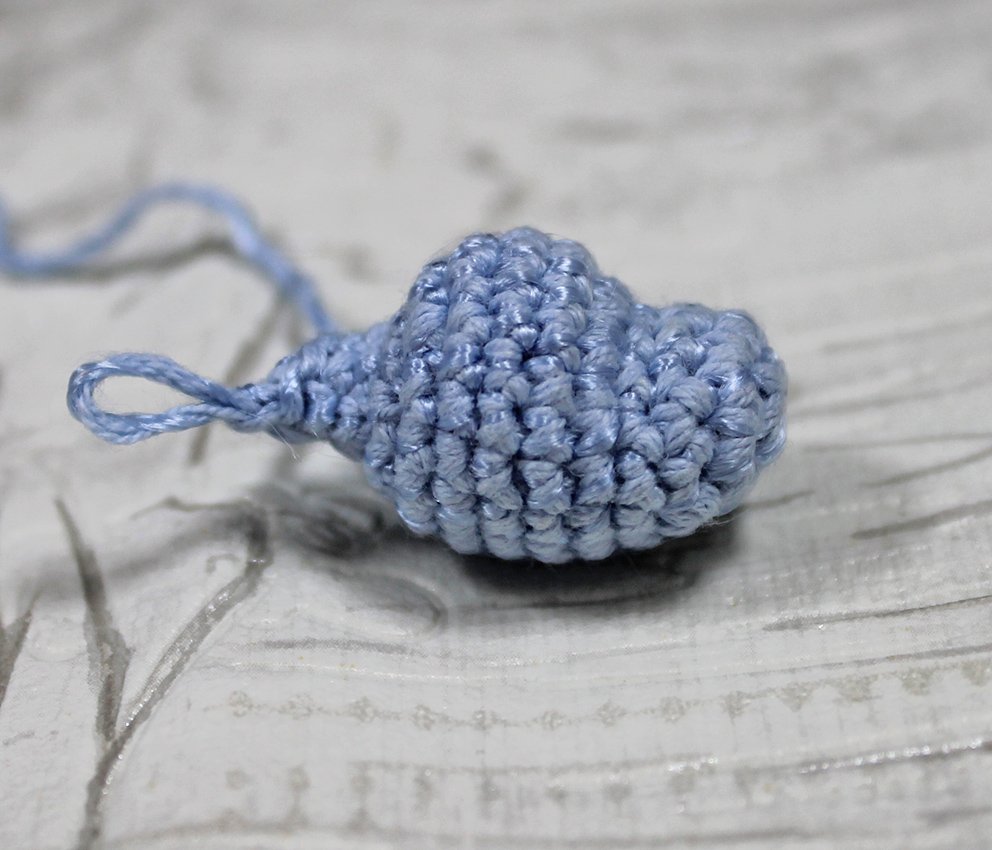
Body shaping showing the front loops and placement for shell attachment.
13) into the front loops only: (inc) ×6 times (12)
14) (1 sc, inc)× 6 times (18)
15) (1 sc, inc, 1 sc)×6 times (24)
16) 5 sc, attach the flipper, crochet the outer loop of the flipper and the loop of the body together, 12 sc, attach the flipper, crochet the outer loop of the flipper and the loop of the body together, 5 sc (24)
17-19) 24 sc
Work 1 sc, transfer your place marker here.
20) 4 sc, 2 dec, 8 sc, 2 dec, 4 sc (20)
21) 4 sc, attach the flipper, crochet the outer loop of the flipper and the loop of the body together, 10 sc, attach the flipper, crochet the outer loop of the flipper and the loop of the body together, 4 sc (20)
Cut out a bottom part of the body from a piece of cardboard. This part should be smaller than size of the body. Put inward.
22) 2 sc, dec, 1 sc, dec, 2 sc, dec, 2 sc, dec, 1 sc, dec, 2 sc (15)
Add some hollow fibre.
23) (dec, 1 sc)× 5 times (10)
24) 2 dec, 1 sl st, work 4 ch, starting from 2nd ch from hook: 1 sl st, 1 sc, 1 hdc — it's a tail, continue: 2 dec (6)
Pull off the loops. Cut the thread, hide the end.
Find the points for sculpting as follows.
Spot 0 is in the centre of the neck from behind between rounds 10 & 11.
Spots 1 & 2, 3 & 4 are in Rnd 4. See the photo for guidance.
To sculpt the eyes: take some strong sewing thread and fasten it below in point 0, take the needle out in point 1. Insert the needle in point 2 and back in point 0. Sculpt the second eye. Points 0 — 3 — 4 — 0.
Fasten the thread. Glue the eyes into the eye sockets.
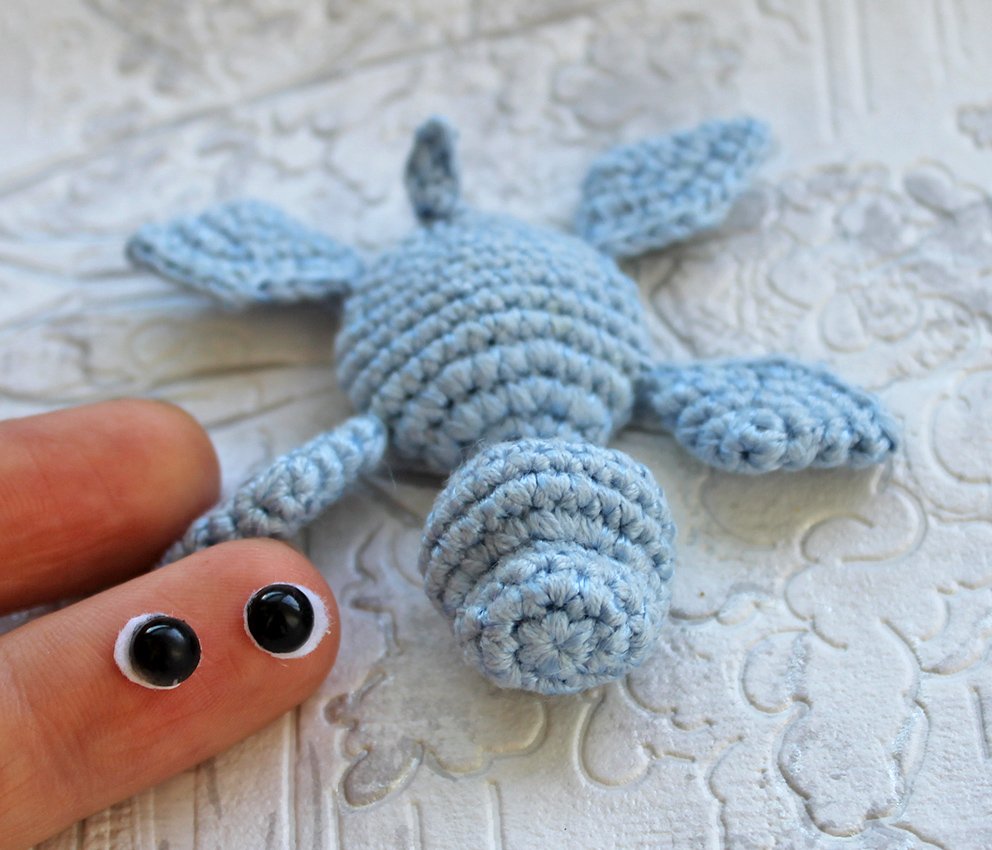
Facial details and shell attachment — final touches shown before adding a magnet.
Embroider eyebrows.
The mouth can be embroidered or painted.
Attach the shell to the back of the turtle, mark the edge that connects with the body of the turtle (in my photo they are marked with red lines). Apply some glue to the marked area and press firmly.
Should you wish to make a magnet, glue some magnetic tape to the turtle's belly.