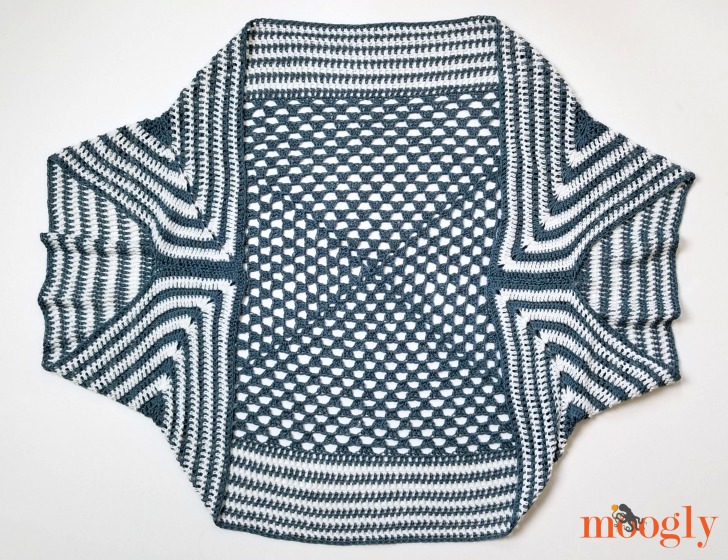
Cozy Crochet Handkerchief Cocoon — Granny-Square Shawl Pattern & Schematic
Add a cozy, vintage-inspired layer to your wardrobe with this Crochet Handkerchief Cocoon. This easy-to-follow pattern uses a modified granny-square worked in the round, then folded and seamed to create a flattering handkerchief hem. Below you'll find a brief overview, the full materials list, notes and step-by-step instructions including border rounds and assembly tips.
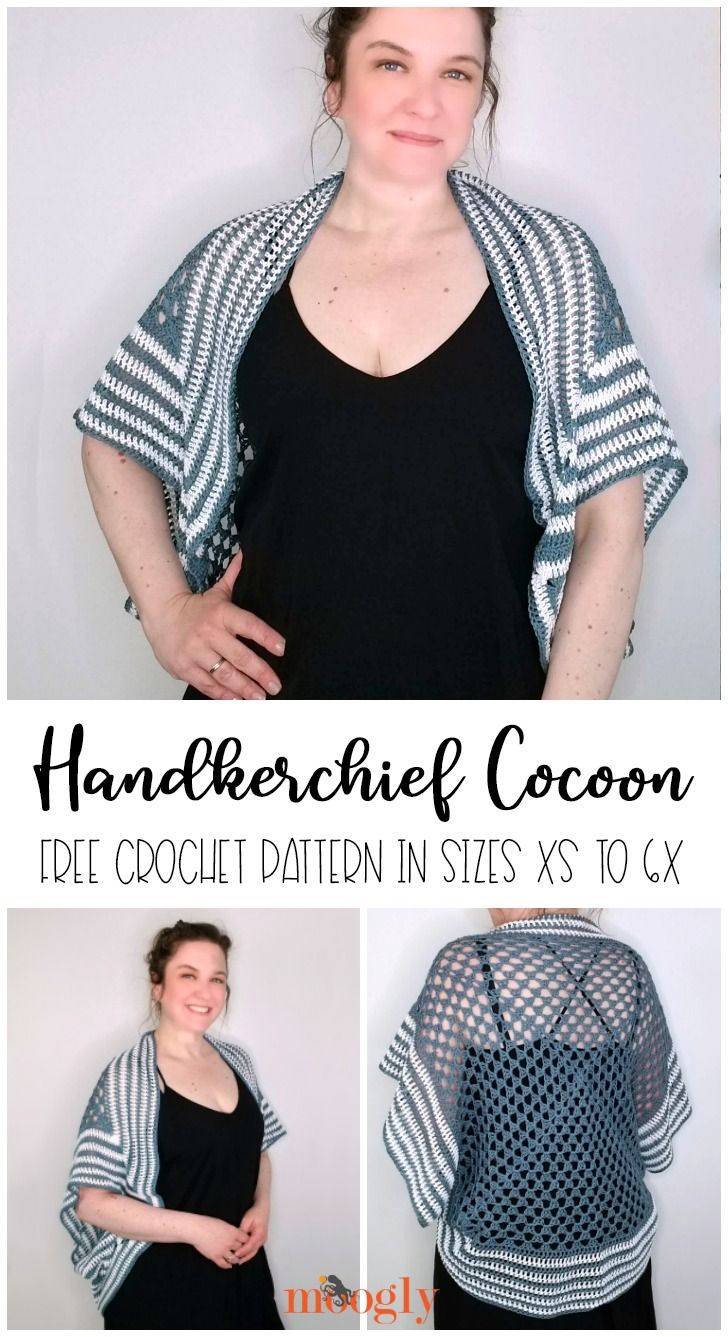
This pattern works best with mercerized cotton (Patons Grace is recommended), and is written for multiple sizes. Blocking will open up the stitches and increase finished dimensions — read the note on blocking and fit before seaming.
Crochet handkerchief cocoons are the perfect accessory to add a touch of coziness and charm to any outfit. The delicate design, resembling a handkerchief, brings a sweet and unique style that pairs well with both casual and dressy looks.
Materials:
- US-I, 5.5mm hook — Furls
- 550 — 1325 yds Patons Grace (3-Light/UK: 8 ply; 100% mercerized cotton; 50 g/1.75 oz, 125 m/136 yds)
- Color A: Citadel — 3 (4, 5, 6, 7) balls
- Color B: Snow — 2 (2, 2, 3, 3) balls
Gauge: 8 rows = 4" in granny st
Sizes: XS/S (M/L, XL/2X, 34X/4X, 5X/6X)
Dimensions shown are BEFORE blocking. If you use the suggested yarn, the finished item will be several inches larger after blocking. If you use a yarn that does not grow with blocking it will still fit, but be a slimmer/closer fit.
NOTES:
- There are several «tricks» used here to make the traditional granny square the best it can be.
- Instead of a ch 3 for the first dc, the CSDC is used. If you prefer another dc substitute, use that one.
- Instead of joining the end of each granny st rnd with a sl st, a hdc stitch is worked into the first st of the rnd. This puts the hook in the middle of that corner «ch sp» to create a more balanced look.
- Though this pattern is worked in the round, DO turn at the end of each rnd to work in the opposite direction. Instructions for this are included. This prevents the «swirl» you can get with granny squares.
- The Right Side of the project is the same side that the very last rnd of the project is worked on — whether this is odd or even depends on size. It would be reversible, but looks a bit better to have that final rnd facing out.
- The interior granny stitch section is square, but the solid border rnds do flair out and increase at the corners. This is intentional and part of the fit of the piece.
Instructions
Granny Rnds
Rnd 1: With Color A, make a magic circle, CSDC, 2 dc, (ch 2, 3 dc) 3 times, ch 1, hdc in the CSDC; turn. (12 dc)
Rnd 2: (CSDC, 2dc) in the same ch sp, ch 1, skip the next 3 sts, [(3 dc, ch 2, 3 dc) in the ch-2 sp, ch 1, skip the next 3 sts] 3 times, 3 dc in first ch sp, ch 1, hdc in the CSDC; turn. (24 dc)
Rnd 3: (CSDC, 2dc) in the same ch sp, ch 1, skip the next 3 sts, 3 dc in the next ch-1 sp, ch 1, skip the next 3 sts, *(3 dc, ch 2, 3 dc) in the ch-2 sp, ch 1, skip the next 3 sts, 3 dc in the next ch-1 sp, ch 1, skip the next 3 sts; rep from * to first ch sp, 3 dc in first ch sp, ch 1, hdc in the CSDC; turn. (36 dc)
Rnd 4 — 15 (17, 19, 21, 23): (CSDC, 2dc) in the same ch sp, [ch 1, skip the next 3 sts, 3 dc in the next ch-1 sp] to next ch-2 sp, *(3 dc, ch 2, 3 dc) in the ch-2 sp, [ch 1, skip the next 3 sts, 3 dc in the next ch-1 sp] to next ch-2 sp; rep from * to first ch sp, 3 dc in first ch sp, ch 1, hdc in the CSDC; turn.
Border Rnds
Rnd 1: (CSDC, 2 dc) in the same ch sp, *dc in each st and ch-1 sp to next ch-2 sp,** (3 dc, ch 2, 3 dc) in ch-2 sp; rep from * around finishing last rep at **, 3 dc in first ch sp, ch 1, hdc in the CSDC finishing st with Color A; turn.
Rnd 2: (CSDC, 2 dc) in same ch sp, *dc in each st to next ch-2 sp,** (3 dc, ch 2, 3 dc ) in ch-2 sp; rep from * finishing last rep at **, 3 dc in first ch sp, ch 1, hdc in the CSDC finishing last st with Color B; turn.
Rnd 3 — 8 (10, 11, 12, 13): Rep Rnd 2, switching color ever rnd. After last rnd, break both colors leaving a 24" tail of the final color used.
Assembly
If blocking, block before seaming. Do not overstretch fabric.
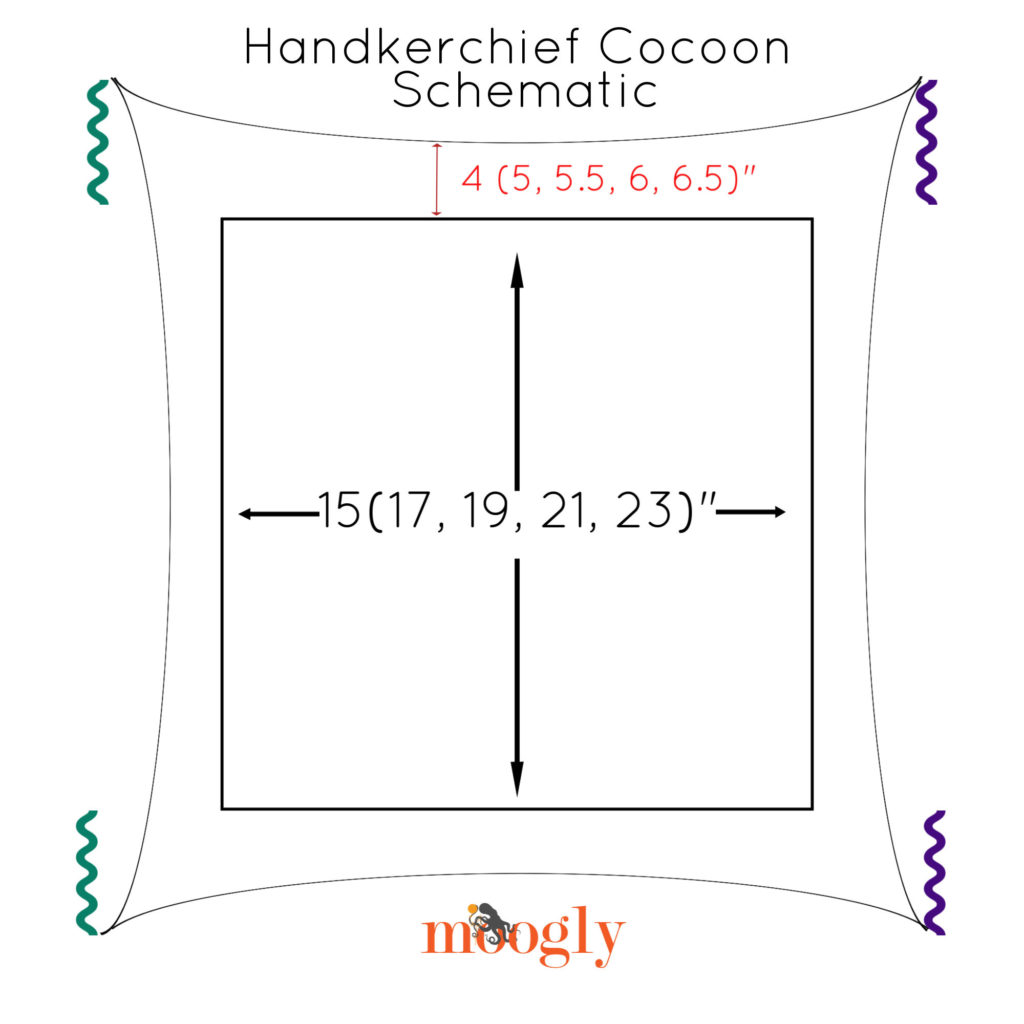
Fold piece in half, matching up the corners. Direction doesn't matter as the sides are all the same length, but do have the last rnd facing out.
Using the Mattress Stitch, seam from each corner toward the fold for 4 (5, 5.5, 6, 6.5)". Use the long tail for the one side, and then cut a piece of the same color yarn to sew the other side. See the squiggly lines on the schematic for seaming guidance.