


Make This Charming Crochet Bobble Mini Wall Hanging — Easy Mini Pattern & Finish Ideas
Add a handmade touch to any room with this Crochet Bobble Mini Wall Hanging. This quick mini project features rows of bobble stitches worked into a small 5" square and finished on a wooden dowel with matching beads for texture and length. The pattern is written in US terms and is suitable for anyone comfortable with basic crochet stitches and the bobble stitch.
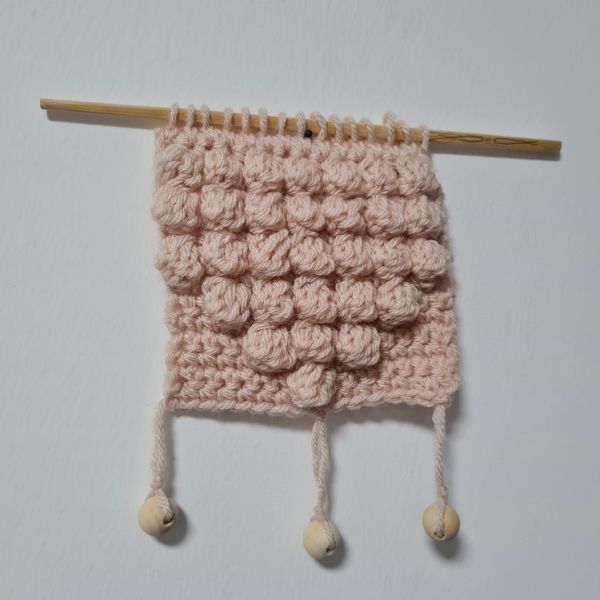
Crochet Bobble Mini Wall Hanging — 5” square sample mounted on a wooden dowel with matching wooden beads.
Materials
- Cygnet Yarn, Aran, 100gr, 100% Acrylic, 210 m (230 yards) — about 30 gr for this mini sample
- Or any weight #4 (Aran/Worsted) yarn
- Hook: US Size J/10 (6.00 mm) or US Size J 6 (4.00 mm) as listed — use the hook that gives you desired fabric (the pattern sample used a 4.00 mm)
- Yarn needle, scissors, measuring tape
Gauge
Not relevant for this mini decorative square.
Sizes
This sample is approximately 5" x 5" square.
Stitch Key
- Ch = Chain
- Sc = Single Crochet
- Dc = Double Crochet
- St = Stitch
- Bo = Bobble stitch
Specialty Stitches
Bobble stitch: Yo, insert hook in st, yo and draw up a loop, yo and pull through 2 loops — repeat 5 times (6 loops on the hook), yo and pull through all loops on hook.
Notes
- This pattern is written in US terminology.
- Ch 1 at the beginning of a row does not count as a stitch.
- This pattern uses pattern repeats.
- You can work this pattern in one color or multiple colors — the sample shown uses one solid color.
- If changing colors, choose a color-changing technique and weave in your ends neatly.
Instructions
Ch 16
Row 1: Sc1 in 2nd ch from hook, sc1 in next and across to end of row (15 st)
Row 2: Sc1 in 1st st from hook, sc1 in next 6 st, Bo in next st, sc1 in next 7 st (15 st)
Row 3: Sc1 in 1st st from hook, sc1 in next and across to end of row (15 st)
Row 4: Sc1 in 1st st from hook, sc1 in next 4 st, *Bo in next st, sc1 in next st; repeat two more times, sc1 in next 4 st (15 st)
Row 5: Sc1 in 1st st from hook, sc1 in next and across to end of row (15 st)
Row 6: Sc1 in 1st st from hook, sc1 in next 2 st, *Bo in next st, sc1 in next st; repeat four more times, sc1 in next 2 st (15 st)
Row 7: Sc1 in 1st st from hook, sc1 in next and across to end of row (15 st)
Row 8: Sc1 in 1st st from hook, *Bo in next st, sc1 in next st; repeat six more times, sc1 in next st (15 st)
Row 9: Sc1 in 1st st from hook, sc1 in next and across to end of row (15 st)
Row 10: Sc1 in 1st st from hook, *Bo in next st, sc1 in next st; repeat six more times, sc1 in next st (15 st)
Finishing
Mount the square on a small wooden dowel or chopstick by slip stitching or wrapping the top edge, as preferred. Add wooden beads to the bottom fringe or hang a few beads on strands of yarn to add texture and length, matching the yarn color for a cohesive look. You can customize the length, number of beads, or colors to fit your decor.