


Crochet Retro Poncho — Chunky Granny-Stripe Pattern with Fringe (US Terms)
Bring '70s-inspired boho to your wardrobe with this Crochet Retro Poncho — a chunky, color-block granny-stitch design finished with fringe. This pattern uses #5/Chunky yarn and basic stitches (sc, dc, granny stitch) worked as two rectangles that are sewn together to form the poncho. Suitable for crocheters who know basic stitches and want a quick, cozy project.
The pattern below includes materials, gauge, stitch key, notes, full row-by-row instructions, construction and finishing directions. Follow the color changes in the row sequence to recreate the striped, retro look; you can also substitute your own color palette or work the poncho in a single color.
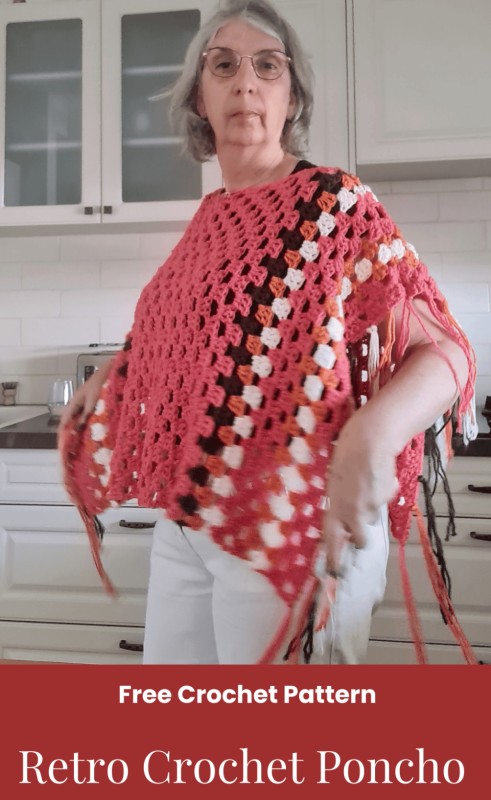
Finished retro poncho shown in four-color chunky stripes with fringe — the sample uses four solid colors worked in granny stitch stripes.
Materials
- Stylecraft Special Chunky Yarn, 100% premium Acrylic, 100gr, 144 m, 157 yards in 4 colors (total of 800 yards)
- Or any weight #5 yarn you decide
- Hook: US Size (8 mm)
- Yarn Needle, Scissors, Measuring Tape
Gauge
9 st X 5 rows (4” X 4”)
Sizes
This sample is women 30 in length X 20 in height (without fringe)
Stitch Key
- Ch = Chain
- Sc = Single Crochet
- St = Stitch
- Slst = Slip stitch
- Dc = Double Crochet
- Yo = Yarn over
Specialty Stitches
GrSt = Granny Stitch (Dc 3 in next ch space, ch1)
Notes
- This pattern uses US terminology
- Ch3 does count as st at the beginning of each row
- Ch 4 counts as st + ch 1 at the beginning of row
- Ch1 at the beginning of the row does not count as a stitch
- This pattern uses pattern repeats.
- This pattern is worked in two rectangles joined to form a Poncho
- You can work this pattern with one color or multiple as you wish- I used 4 solid colors
- If changing colors make sure to have a changing technique and weave your ends in.
- You can decide on the poncho size by adding chains and rows
Instructions
Panel – make two
Chain 52 – start with color A
Row 1: Sc 1 in 2nd ch from hook, sc 1 in next and across to the end of the row, turn (51)
Row 2: Ch 3 + dc 2 in 1st st from hook, *skip 3 st, GrSt in next st, repeat from * to end of row, finish with last Grdc in last st, turn (51)
Row 3: Ch 4, GrSt in next ch 1 space and across to end of row, finish with dc 1 on top of last dc from prev row, turn (51)
Change to color B
Row 4: Ch 3 + dc 2 in 1st st from hook, *skip 3 st, GrSt in next st, repeat from * to end of the row, finish with last Grdc in last st, turn (51)
Change to color C
Row 5: Ch 4, GrSt in next ch 1 space and across to end of the row, finish with dc 1 on top of last dc from prev row, turn (51)
Change to color B
Row 6: Ch 3 + dc 2 in 1st st from hook, *skip 3 st, GrSt in next st, repeat from * to end of the row, finish with last Grdc in last st, turn (51)
Change to color A
Row 7: Ch 4, GrSt in next ch 1 space and across to end of row, finish with dc 1 on top of last dc from prev row, turn (51)
Row 8+9: Repeat row 6+7
Change to color C
Row 10: Ch 3 + dc 2 in 1st st from hook, *skip 3 st, GrSt in next st, repeat from * to end of the row, finish with last Grdc in last st, turn (51)
Change to color B
Row 11: Ch 4, GrSt in next ch 1 space and across to end of row, finish with dc 1 on top of last dc from prev row, turn (51)
Change to color D
Row12: Ch 3 + dc 2 in 1st st from hook, *skip 3 st, GrSt in next st, repeat from * to end of the row, finish with last Grdc in last st, turn (51)
Change to color A
Row 13:Ch 4, GrSt in next ch 1 space and across to end of row, finish with dc 1 on top of last dc from prev row, turn (51)
Row 14-29: repeat rows 2+3
Change to color B
Row 30: Ch 3 + dc 2 in 1st st from hook, *skip 3 st, GrSt in next st, repeat from * to end of the row, finish with last Grdc in last st, turn (51)
Change to color C
Row 31: Ch 4, GrSt in next ch 1 space and across to end of the row, finish with dc 1 on top of the last dc from prev row, turn (51)
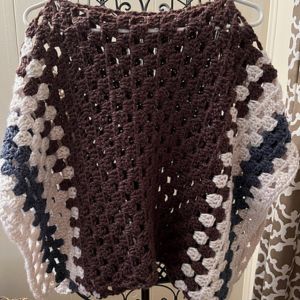
Close-up showing the granny stitch cluster pattern and how color changes align across rows.
Change to color B
Row 32: Ch 3 + dc 2 in 1st st from hook, *skip 3 st, GrSt in next st, repeat from * to end of the row, finish with last Grdc in last st, turn (51)
Change to color D
Row 33: Ch 4, GrSt in next ch 1 space and across to end of row, finish with dc 1 on top of last dc from prev row, turn (51)
Change to color A
Row 34+35: repeat row 2+3
Change to color B
Row 36: Ch 3 + dc 2 in 1st st from hook, *skip 3 st, GrSt in next st, repeat from * to end of the row, finish with last Grdc in last st, turn (51)
Change to color C
Row 37: Ch 4, GrSt in next ch 1 space and across to end of row, finish with dc 1 on top of last dc from prev row, turn (51)
Change to color B
Row 38: Ch 3 + dc 2 in 1st st from hook, *skip 3 st, GrSt in next st, repeat from * to end of the row, finish with last Grdc in last st, turn (51)
Change to color A
Row 39-41: repeat row 2+3
Row 42: Ch 1, sc 1 in 1st st from hook, sc 1 in next and across to the end of the row, (51)
Construction
Place two rectangles on the right side facing in, and long side up, measure 12” from each side in to form a shoulder and head hole, and sew using a tapestry needle on both sides.
Sc 1 on each st around the head hole
Cut yarn 18 “ long for fringe and attach around the sides, spreading and changing colors.
Finishing
Cut your yarn and weave in the ends.