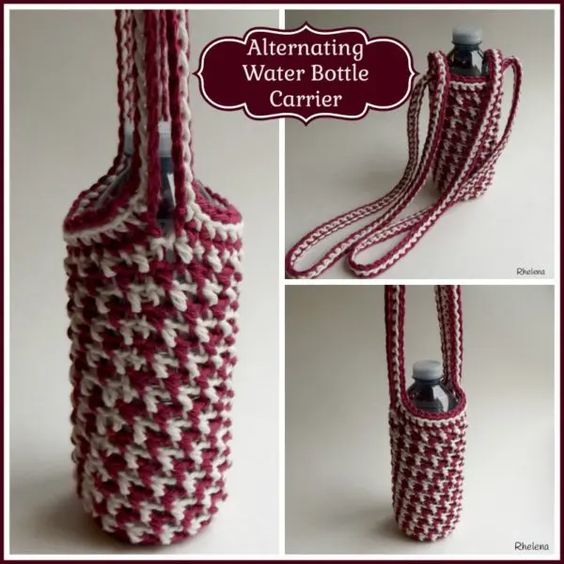
Crochet Water Bottle Carrier Pattern
Looking for a stylish and practical way to carry your water bottle? Look no further than the Crochet Water Bottle Carrier! This innovative accessory is designed to keep your water bottle secure and easily accessible, making it the perfect companion for your daily activities. Made from high-quality yarn, this crochet carrier is not only durable but also adds a touch of charm to your outfit. Additionally, the Crochet Water Bottle Carrier is not limited to just water bottles. It can also accommodate other beverages like sports drinks or even a thermos. The carrier's stretchy material ensures a snug fit for different bottle sizes, keeping them in place and preventing any spills or leaks. Plus, the crochet design allows for proper ventilation, keeping your drink cool for longer periods. Say goodbye to carrying your water bottle in your hand or stuffing it into a bag — the Crochet Water Bottle Carrier is here to make your life easier and more fashionable.
Skill Level
- Intermediate
Materials
- Yarn: Bernat Handicrafter Cotton or any similar worsted weight cotton. (2 colors)
- Crochet Hook: H/8-5.00mm
- Other: Measuring Tape, Scissors, Yarn Needle.
Measurements
- Gauge: 2" across the diameter of first 4 rounds.
- Finished Size: Fits a 500mL water bottle.
Abbreviations
- CA = Color A
- CB = Color B
- Blslst = Back Loop Slip Stitch
- Ch/Chs = Chain/Chains
- Flhdc = Front Loop Half Double Crochet
- Rep = Repeat
- Sc = Single Crochet
- Sl St = Slip Stitch
- St/Sts = Stitch/Stitches
- Crochet Abbreviations explained in more details.
Notes
- Color changes are made after each round is joined with a slip stitch.
- Join each round in both loops of first stitch.
- If you experience difficulties making the first flhdc and blslst in each round, try wiggling the hook.
- The stitches are alternated with the half double crochet (hdc) worked into the front loop only of the slip stitch, and the slip stitch is worked into the back loop only of the hdc.
Instructions
- Rnd 1: With CA, ch 2, work 6 sc into 2nd ch from hook; join with sl st in first sc. (6 sts)
- Alternatively, you can start by working 6 sc into a magic circle.
- Rnd 2: Ch 1, work 2 sc into each st around; join with sl st in first sc. (12 sts)
- Rnd 3: Ch 1, 2 sc in same st as join, sc in next st, *2 sc in next st, sc in next st; rep from * around; join with sl st in first sc. (18 sts)
- Rnd 4: Ch 1, 2 sc in same st as join, sc in next 2 sts, *2 sc in next st, sc in next 2 sts; rep from * around; join with sl st in first sc. (24 sts)
- Rnd 5: Ch 1, 2 sc in same st as join, sc in next 3 sts, *2 sc in next st, sc in next 3 sts; rep from * around; join with sl st in first sc. (30 sts)
- Rnd 6: With CB, ch 1, flhdc in same st as join, blslst in next st, *flhdc in next st, blslst in next st; rep from * around; join with sl st in first flhdc. (30 sts)
- Rnd 7: With CA, blslst in same st as join, flhdc in next st, *blslst in next st, flhdc in next st; rep from * around; join with sl st in first blslst.
- Rnds 8-24: Rep rnds 6 & 7 ending with CB at rnd 24.
Begin Handles
- See Image Below about working into the back bumps.
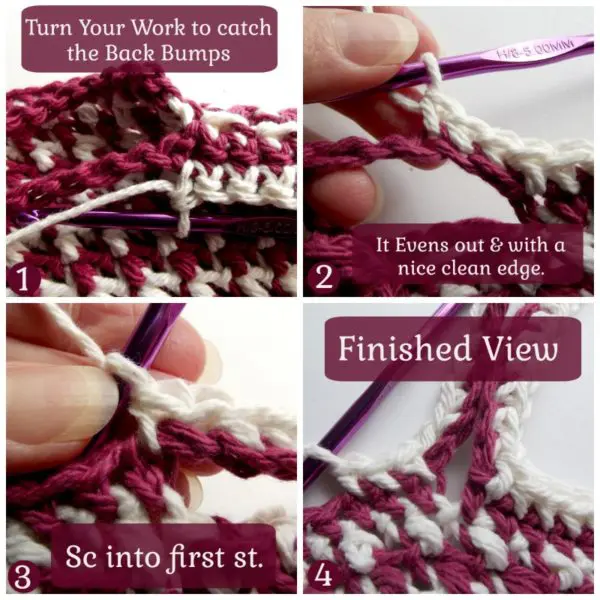
- Rnd 25: With CA and working in both lps, ch 1, sc in same st as join, sc into next 14 sts, ch 80 (or any number), making sure not to twist chs, sc in last 15 sts, ch 80 (or any number), making sure not to twist chs, join with sl st in first sc. (30 sc)
- Rnd 26: With CB, ch 1, sc into same st as join and into next 14 sts, working into back bumps, sc into each ch, sc in next 15 sts, working into back bumps, sc into each ch; join with sl st in first sc. (190 sts)
- Rnd 27: With CA, blslst into first st and into each st around; join with sl st in first sl st. Fasten Off.