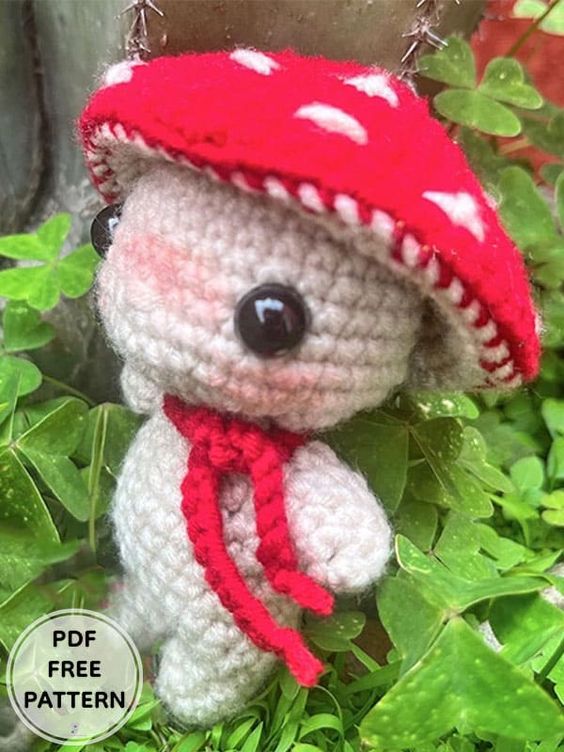
Crochet Mushroom Doll Amigurumi
Create your very own adorable mushroom doll using the art of crochet with this fun and engaging amigurumi project. By following a simple pattern and using basic crochet techniques, you can bring this charming mushroom doll to life. Choose your favorite colors of yarn to customize the doll to your liking, whether you prefer a classic red and white mushroom or a more whimsical color combination. This project is perfect for both beginners and experienced crocheters alike, offering a creative and rewarding way to spend your time. The possibilities are endless when it comes to personalizing your mushroom doll – you can add details like eyes, a smile, or even tiny accessories to make it truly unique. Crocheting this mushroom doll is not only a fun and relaxing activity, but it also allows you to showcase your creativity and craftsmanship in a tangible and adorable way.
Materials
3,5 mm crochet hook• Yarn (red, ivory)
• 10-12 mm safety eyes
• Stuffing
• Darning needle
• Scissors
Abbreviations
Rnd– round
MR– magic ring
Sc– single crochet
Inc– increase
Dec– decrease
Ch– chain
Head
In ivory yarn;
Rnd 1. 6sc in MR (6)
Rnd 2. 6 inc (12)
Rnd 3. (sc, inc) x 6 (18)
Rnd 4. (2sc, inc) x 6 (24)
Rnd 5. (3sc, inc) x 6 (30)
Rnd 6-10. 30sc (30)
Rnd 11. (4sc, inc) x 6 (36)
Rnd 12. 36sc (36)
Place security eyes between Rnd 9-10, 6 stitches between eachother optional with darning needle add nose detail between the eyes.
Rnd 13. (2sc, dec) x 9 (27)
Rnd 14. (sc, dec) x 9 (18)
Rnd 15. 9 dec (9)
Add stuffing into head
Rnd 16. 4 dec, sc (5)
Fasten off.
Body (part 1)
Legs(x2)
Rnd 1. 4sc in MR (4)
Rnd 2. (sc, inc) x 2 (6)
Rnd 3. (2sc, inc) x 2 (8)
Rnd 4. 8sc (8)
Rnd 5. (2sc, dec) x 2 (6)
Fasten off 1 leg, not the 2nd
Body
In ivory color;
Rnd 6. ch 3 and join legs: 6sc (right leg), 3sc (join), 6sc (left leg) (18)
Rnd 7. 3 inc (join), 6sc (right leg), 3 inc (join), 6sc (left leg) (24)
Rnd 8-9. 24sc (24)
Rnd 10. (4sc, dec) x 4 (20)
Body (part 2)
In ivory color:
Rnd 11-12. 20sc (20)
Rnd 13. (3sc, dec) x 4 (16)
Rnd 14. 16sc (16)
Rnd 15. (6sc, dec) x 2 (14)
Rnd 16. (5sc, dec) x 2 (12)
Add stuffing into body
Arms (x2)
In ivory color:
Rnd 1. 4sc in MR (4)
Rnd 2. (sc, inc) x 2 (6)
Rnd 3. (2sc, inc) x 2 (8)
Rnd 4. 8sc (8)
Rnd 5. (2sc, dec) x 2 (6)
Hat (part 1)
In red yarn:
Rnd 1. 6sc in MR (6)
Rnd 2. 6 inc (12)
Rnd 3. (2sc, inc) x 4 (16)
Rnd 4. (3sc, inc) x 4 (20)
Rnd 5. (4sc, inc) x 4 (24)
Rnd 6. (5sc, inc) x 4 (28)
Rnd 7. (6sc, inc) x 4 (32)
Rnd 8. (7sc, inc) x 4 (36)
Rnd 9. (8sc, inc) x 4 (40)
Rnd 10. (9sc, inc) x 4 (44)
Rnd 11. (10sc, inc) x 4 (48)
Rnd 12. 48sc (48)
Rnd 13. (11sc, inc) x 4 (52)
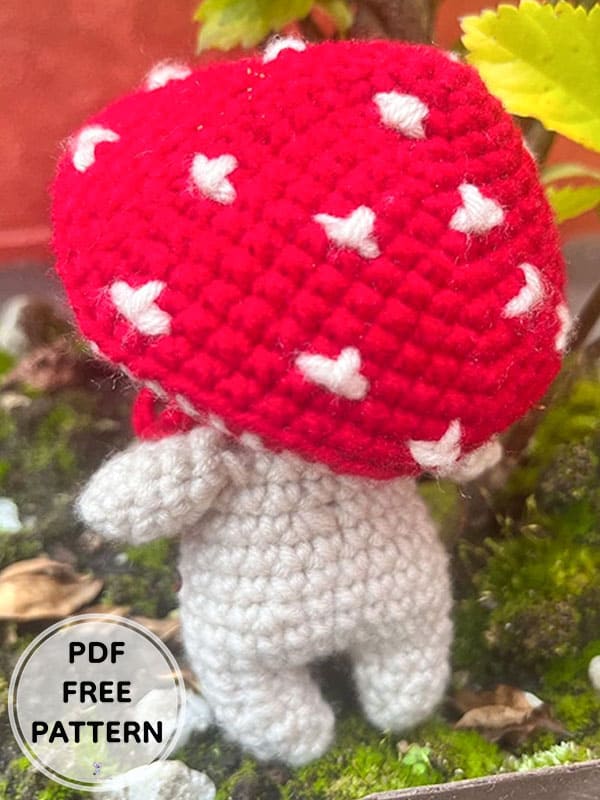
With darning needle embroider mushroom spots all over the hat.
Hat (part 2)
Change yarn to ivory:
Rnd 17. BLO, sc (52)
Rnd 18. (6sc, dec) x 6, 4sc (46)
Rnd 19. (5sc, dec) x 6, 4sc (40)
Rnd 20. (4sc, dec) x 6, 4sc (34)
Rnd 21. (3sc, dec) x 6, 4sc (28)
Rnd 22. (5sc, dec) x 6, 4sc (24)
Rnd 23. 24sc (24)
Fasten off.
Fold ivory part inside the red part.
Scarf
Rnd 1. 40 ch, fasten off.
Cut ends shorter and mess up the yarn to achieve a “fluffy look”
Assembly
I suggest using pins to hold things in place
Add pins to position the mushroom hat in the orientation you want it. Sew the inner circumference of the hat into the head.
Sew arms on the sides of the body, between rows 14-15.
Sew the center of the head into the body.
Wrap scarf in mushroom boy’s neck
Congratulations, you have completed the amigurumi pattern.