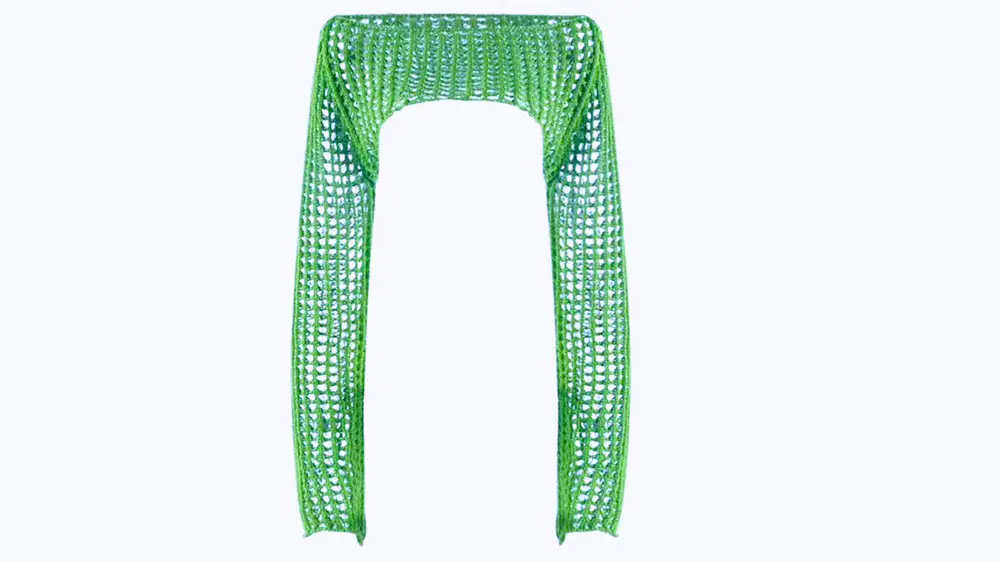
Crochet Trumpet Crop Top
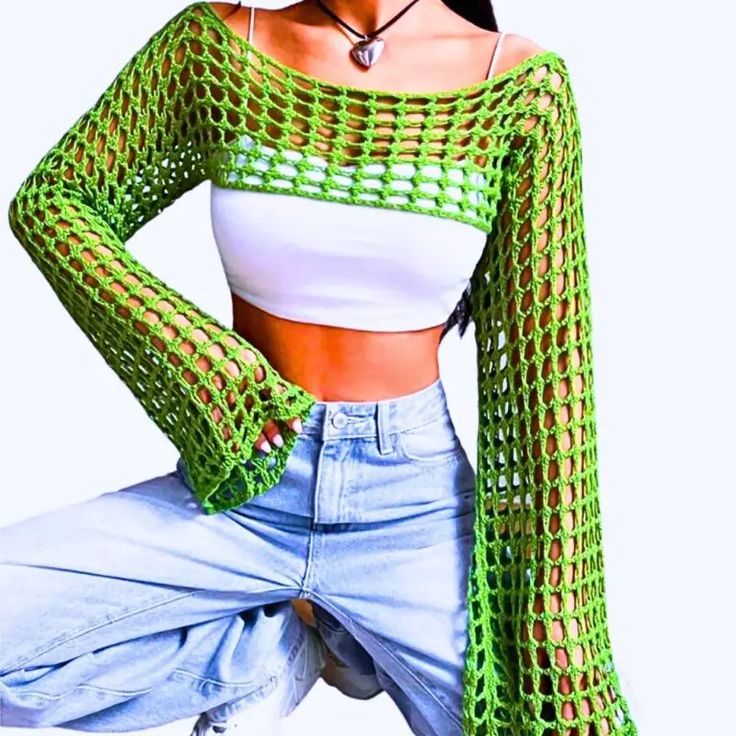
Embrace your inner boho vibes with the charming Crochet Trumpet Crop Top! This trendy piece effortlessly combines playful style with cozy comfort, making it a must-have for any fashion-forward individual. The intricate crochet detailing adds a touch of whimsy, while the flattering crop silhouette exudes a laid-back, summer-ready vibe. Pair it with high-waisted jeans or flowy skirts for a chic and carefree look that will have you turning heads wherever you go. Elevate your wardrobe with this delightful top and get ready to rock that effortlessly cool aesthetic!
Materials Needed
- 4-ply yarn
- 5 mm crochet hook
- Stitch markers (optional)
- Pair of scissors
- Yarn needle
Instructions
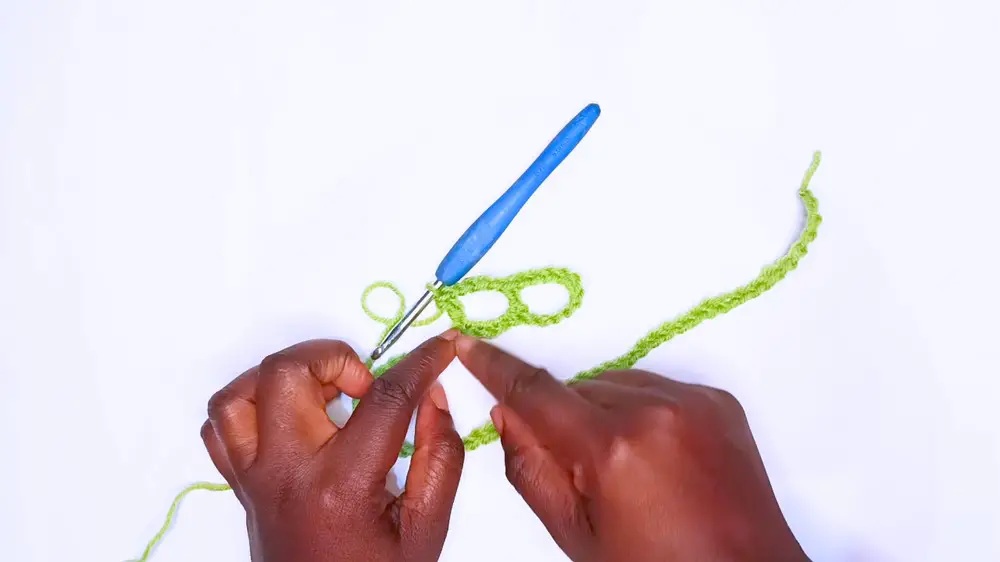
Step 1: Create the Foundation Chain
Start with a slip knot.
Make a foundation chain that is a multiple of four. For this tutorial, the chain will be 52 stitches long, but you can adjust the length according to your measurements.
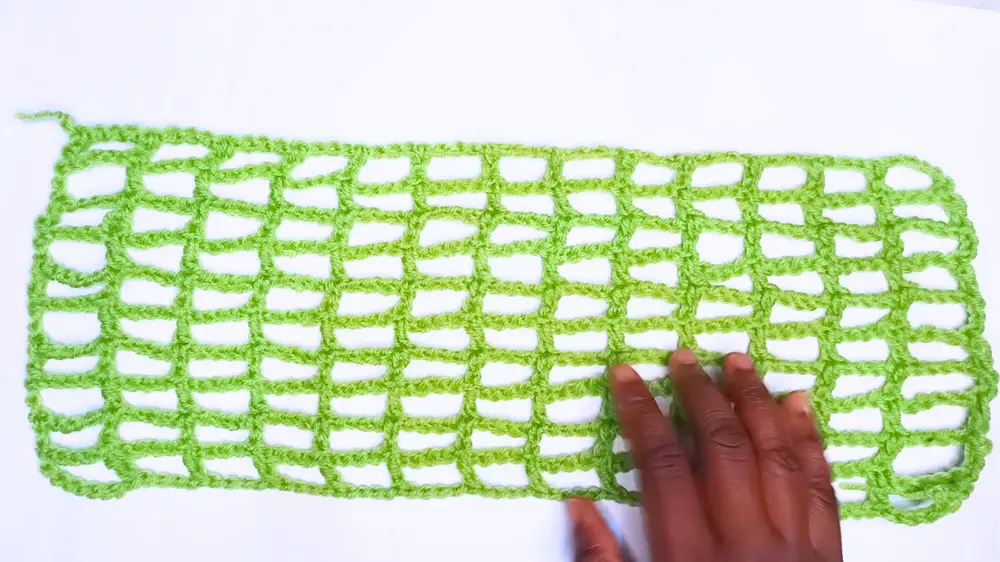
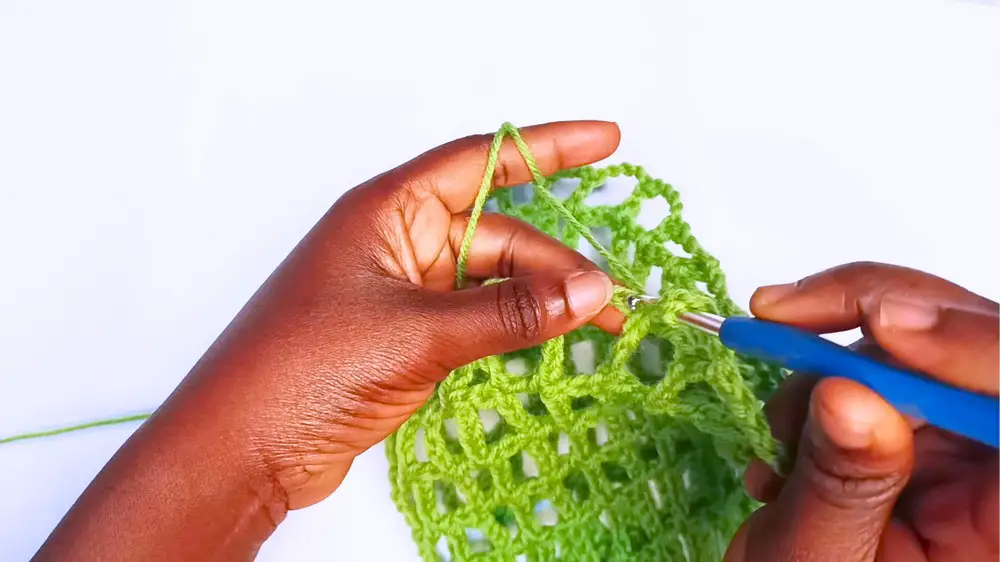
Step 2: Begin the Mesh Pattern
Chain 5 more stitches.
Count from your starting point and make a double crochet into the 4th stitch from your hook.
Continue the pattern by chaining 4 stitches, then skipping 3 stitches and making a double crochet into the 4th stitch.
Repeat this pattern of chaining 4 and making double crochets into the 4th stitch until you reach the end of the row.
Step 3: Start the Second Row
When you finish the first row, turn your work.
Chain 3 (this will act as the first double crochet of the row).
Chain an additional 4 stitches for the mesh pattern (totaling 7 chains).
Yarn over and make a double crochet on top of the previous row’s double crochet.
Continue by chaining 4 and making double crochets on top of the previous row’s double crochets.
Repeat this pattern across the row.
Step 4: Continue the Mesh Pattern
Turn your work at the end of each row.
Chain 3 for the first double crochet, then chain 4 more for the mesh pattern.
Double crochet on top of the previous row’s double crochets.
Repeat the mesh pattern until you have the desired length to cover your chest. Around 10 rows should be sufficient, but you can adjust as needed.
Step 5: Create the Back Panel
Repeat Steps 1 to 4 to create an identical panel for the back of the top.
Step 6: Join the Front and Back Panels
Align the front and back panels together, making sure they are of equal length.
Use slip stitches or single crochet stitches to join the sides, leaving openings for the sleeves.
You can also place stitch markers to ensure even joining
Step 7: Crochet the Sleeves
Start at the side seams where you want the sleeves to begin.
Chain 4 and join to the top of the double crochet on the side.
Continue with the pattern of chaining 4 and making double crochets on top of the corresponding stitches, moving around the armhole.
The sleeves will begin to take shape as you add more rows.
Adjust the number of rows to your desired sleeve length. If needed, reduce the number of chains for a tighter mesh or increase them for a looser fit.
Step 8: Finishing Touches
Once the mesh top and sleeves are complete, make sure all loose ends are woven in using a yarn needle.
Cut off any excess yarn.
Conclusion
You have just completed a stylish crochet mesh top. This versatile piece can be made in various colors to complement your wardrobe. It can be worn over a plain dress or paired with different outfits for a chic look.