Crochet Beautiful Neckwarmer
Crocheting a beautiful neckwarmer can be such a rewarding and cozy project to take on! Not only will you be able to customize it to match your style perfectly, but the process of creating something warm and stylish with your own hands is truly fulfilling. The patterns and yarn colors are endless, allowing you to unleash your creativity and make a unique accessory that will keep you warm and fashionable. So, grab your crochet hook and let's get started on crafting a delightful neckwarmer that you'll love to wear on chilly days!
YOU WILL NEED
YARN
- 2 x 50g (1¾ oz) balls of Orkney Angora St Magnus DK, or a similar double-knitting-weight wool yarn, in one color:
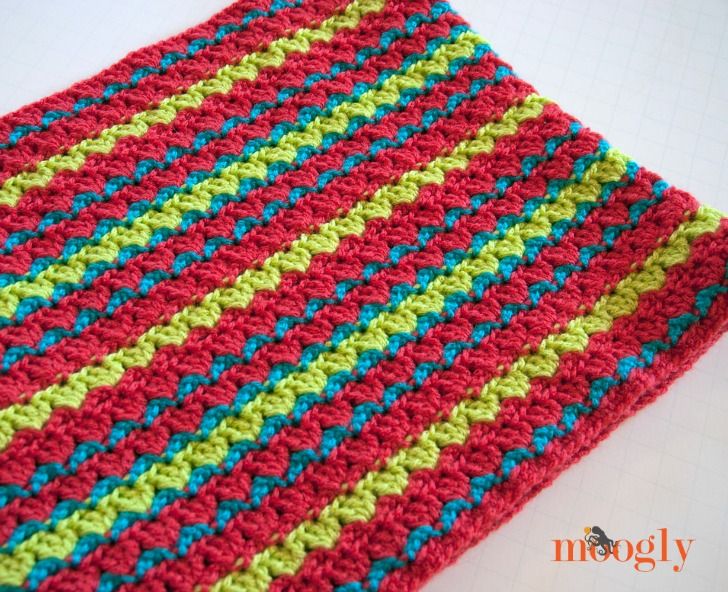
- A bright red (Scarlet)
- 1 x 50g (1¾ oz) ball of Orkney Angora St Magnus DK, or a similar double-knitting-weight wool yarn, in each of two colors:
- B mustard (Magical Goose)
- C pale blue (Aqua)
CROCHET HOOK
US size G/6 (4mm) crochet hook
OTHER EQUIPMENT
Blunt-tipped yarn or tapestry needle, for weaving in yarn ends and sewing seams
GAUGE
7½ cluster repeats and 16 rows to 4in (10cm) measured over stitch pattern using a US size G/6 (4mm) crochet hook.
Foundation chain: Using a US size G/6 (4mm) crochet hook and Col A, ch 125.
Cont working in rows, turning at end of each row.
Row 1: 1 sc in second ch from hook, 1 sc in each ch to end
of row. 124 sc.
Row 2: Change to Col C, ch 1 (does NOT count as a st),
1 sc in first sc, *ch 2, skip 2 sc, 1 sc in next sc; rep from *
to end of row.
Row 3: Change to Col A, ch 3 (counts as first dc), 1 dc in
first sc, *skip 2 ch, 3 dc in next sc; rep from * to end of
row, ending last rep with 2 dc in last sc instead of 3.
Row 4: Still using Col A, ch 1, 1 sc in first dc, *ch 2, skip
2 dc, 1 sc in next dc; rep from * to end of row, working last
sc of last rep in top of 3-ch.
Row 5: Change to Col B, work as Row 3.
Row 6: Change to Col A, work as Row 4.
Row 7: Still using Col A, work as Row 3.
Row 8: Change to Col C, work as Row 4.
Row 9: Change to Col A, work as Row 3.
Row 10: Change to Col C, work as Row 4.
Row 11: Change to Col B, work as Row 3.
Row 12: Change to Col C, work as Row 4.
Row 13: Change to Col A, work as Row 3.
Row 14: Change to Col C, work as Row 4.
Row 15: Change to Col A, work as Row 3.
Row 16: Still using Col A, work as Row 4.
Row 17: Change to Col B, work as Row 3.
Row 18: Change to Col A, work as Row 4.
Row 19: Still using A, work as Row 3.
Row 20: Change to Col C, work as Row 4.
Row 21: Change to Col A, work as Row 3.
Row 22: Change to Col C, work as Row 4.
Row 23: Change to Col B, work as Row 3.
Row 24: Change to Col C, work as Row 4.
Row 25: Change to Col A, work as Row 3.
Row 26: Change to Col C, work as Row 4.
Row 27: Change to Col A, work as Row 3.
Row 28: Still using Col A, work as Row 4.
Row 29: Change to Col B, work as Row 3.
Row 30: Change to Col A, work as Row 4.
Row 31: Still using Col A, work as Row 3.
Row 32: Change to Col C, work as Row 4.
Row 33: Change to Col A, work as Row 3.
Fasten off.
TO FINISH
Weave any loose yarn ends into the back of your work so they are not visible from the right side.
Lightly steam the piece.
Stitch the two short sides of the snood together to form a loop.