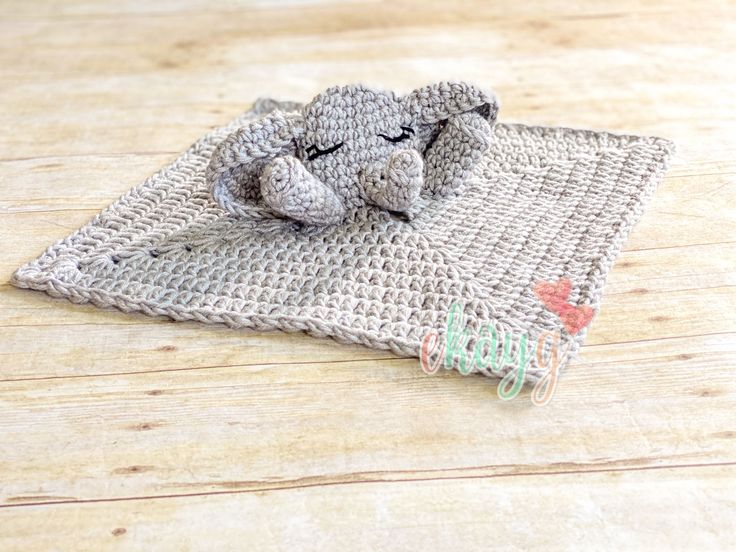
Crochet Elephant Lovey Puppet
The Crochet Elephant Lovey Puppet is an adorable and huggable companion that little ones will surely love. With its soft yarn and cute design, it's not just a toy but a lovely friend for playtime and bedtime snuggles. This charming puppet adds a touch of whimsy and coziness to any child's day, making it a perfect gift for any occasion. Your little one will have endless fun creating stories and adventures with this delightful crochet elephant puppet!
Notes:
The elephant lovey puppet pattern is worked from the head down through the blanket in one piece, with the arms, ears, and trunk sewn on separately. The head is worked up in sc, in continuous rnds, with no joining. The blanket portion is worked up in dc, with joining. Chs do not count as sts. Gauge is provided for both sections. It is designed to be both a lovey and a puppet for little ones to play and snuggle with! There is no stuffing, so they are easily washed.
Gauge for head: 7 sts and 7 rnds = 2 inches
Gauge for blanket: 6 sts and 4 rnds = 2 inches
Finished size: approximately 11 inches tall, corner to corner = 18 inches
Materials:
- The Hook Nook, Main Squeeze – Gray Area – 3.8 oz, a little more than 1 skein
- The Hook Nook, Small Stuff – Tattoo Ink – very small amount for sewing on the eyes
- Crochet Hook, I – 5.5mm – I use and LOVE The Hook Nook Interchangeable Designer Hooks!
- Tapestry Needles
- Scissors
Terms and abbreviations to know:
- magic ring
- rnd, rnds – round, rounds
- ch, chs – chain, chains
- sp, sps – space, spaces
- st, sts – stitch, stitches
- sl st – slip stitch
- sk – skip
- sc – single crochet
- hdc – half double crochet
- dc – double crochet
- inc – make 2 sc together into same st
invsc2tog – invisible single crochet 2 together; this is essentially a decrease, but done in such a way as to make the continuous stitching smoother, and the decrease not as noticeable.
Insert hook into front loop only of next stitch, DO NOT yarn over.
Insert hook into front loop of second stitch.
Yarn over. Pull through 2 loops.
Yarn over and pull through last 2 loops.
Elephant Lovey Puppet
Beginning with head, in Gray
Begin with magic ring. Work in continuous rnds, no joining.
Rnd 1: 6 sc in magic ring; 6 sts
Rnd 2: inc in each st around; 12 sts
Rnd 3: (inc, sc in next st)6x; 18 sts
Rnd 4: (inc, sc in next 2 sts)6x; 24 sts
Rnds 5-10: sc in each st around; 24 sts
Rnd 11: (invsc2tog, sc in next 2 sts)6x; 18 sts
Rnd 12: (invsc2tog, sc in next st)6x; 12 sts
Beginning with the blanket portion, you will now be joining rnds. Chs will not count as sts.
Rnd 13: FLO this rnd only (2 dc in next st, ch 3, 2 dc in next st, dc in next st)4x, sl st in first st to join; 20 sts, 4 ch-3 sps
Rnd 14: ch 2, dc into same st as joining, dc in next st, [(2 dc, ch 1, 2 dc) in ch-3 sp, dc in next 5 sts]3x, (2 dc, ch 1, 2 dc) in ch-3 sp, dc in next 3 sts, sl st in first st to join; 36 sts, 4 ch-1 sps
Rnd 15: ch 2, dc into same st as joining, dc in next 3 sts, [(2 dc, ch 1, 2 dc) in ch-1 sp, dc in next 9 sts]3x, (2 dc, ch 1, 2 dc) in ch-1 sp, dc in next 5 sts, sl st in first st to join; 52 sts, 4 ch-1 sps
Rnd 16: ch 2, dc into same st as joining, dc in next 5 sts, [(2 dc, ch 1, 2 dc) in ch-1 sp, dc in next 13 sts]3x, (2 dc, ch 1, 2 dc) in ch-1 sp, dc in next 7 sts, sl st in first st to join; 68 sts, 4 ch-1 sps
Rnd 17: ch 2, dc into same st as joining, dc in next 7 sts, [(2 dc, ch 1, 2 dc) in ch-1 sp, dc in next 17 sts]3x, (2 dc, ch 1, 2 dc) in ch-1 sp, dc in next 9 sts, sl st in first st to join; 84 sts, 4 ch-1 sps
Rnd 18: ch 2, dc into same st as joining, dc in next 9 sts, [(2 dc, ch 1, 2 dc) in ch-1 sp, dc in next 21 sts]3x, (2 dc, ch 1, 2 dc) in ch-1 sp, dc in next 11 sts, sl st in first st to join; 100 sts, 4 ch-1 sps
Rnd 19: ch 2, dc into same st as joining, dc in next 11 sts, [(2 dc, ch 1, 2 dc) in ch-1 sp, dc in next 25 sts]3x, (2 dc, ch 1, 2 dc) in ch-1 sp, dc in next 13 sts, sl st in first st to join; 116 sts, 4 ch-1 sps
Rnd 20: ch 2, dc into same st as joining, dc in next 13 sts, [(2 dc, ch 1, 2 dc) in ch-1 sp, dc in next 29 sts]3x, (2 dc, ch 1, 2 dc) in ch-1 sp, dc in next 15 sts, sl st in first st to join; 132 sts, 4 ch-1 sps
Rnd 21: ch 2, dc into same st as joining, dc in next 15 sts, [(2 dc, ch 1, 2 dc) in ch-1 sp, dc in next 33 sts]3x, (2 dc, ch 1, 2 dc) in ch-1 sp, dc in next 17 sts, sl st in first st to join; 148 sts, 4 ch-1 sps
Rnd 22: ch 1, hdc into same st as joining, sl st in next st, (hdc in next st, sl st in next st)8x, 3 hdc in ch-1 sp, [sl st in next st, (hdc in next st, sl st in next st)18x, 3 hdc in ch-1 sp]3x, sl st in next st, (hdc in next st, sl st in next st)9x; 160 sts
Fasten off, and weave in ends.
Arms, Make 2
Begin with magic ring. Work in continuous rnds with no joining.
Rnd 1: 6 sc in magic ring; 6 sts
Rnd 2: (inc, sc in next st)3x; 9 sts
Rnd 3: sl st around each st; 9 sts
Rnd 4: work this rnd behind the sl sts, into rnd 2, sc in each st around; 9 sts
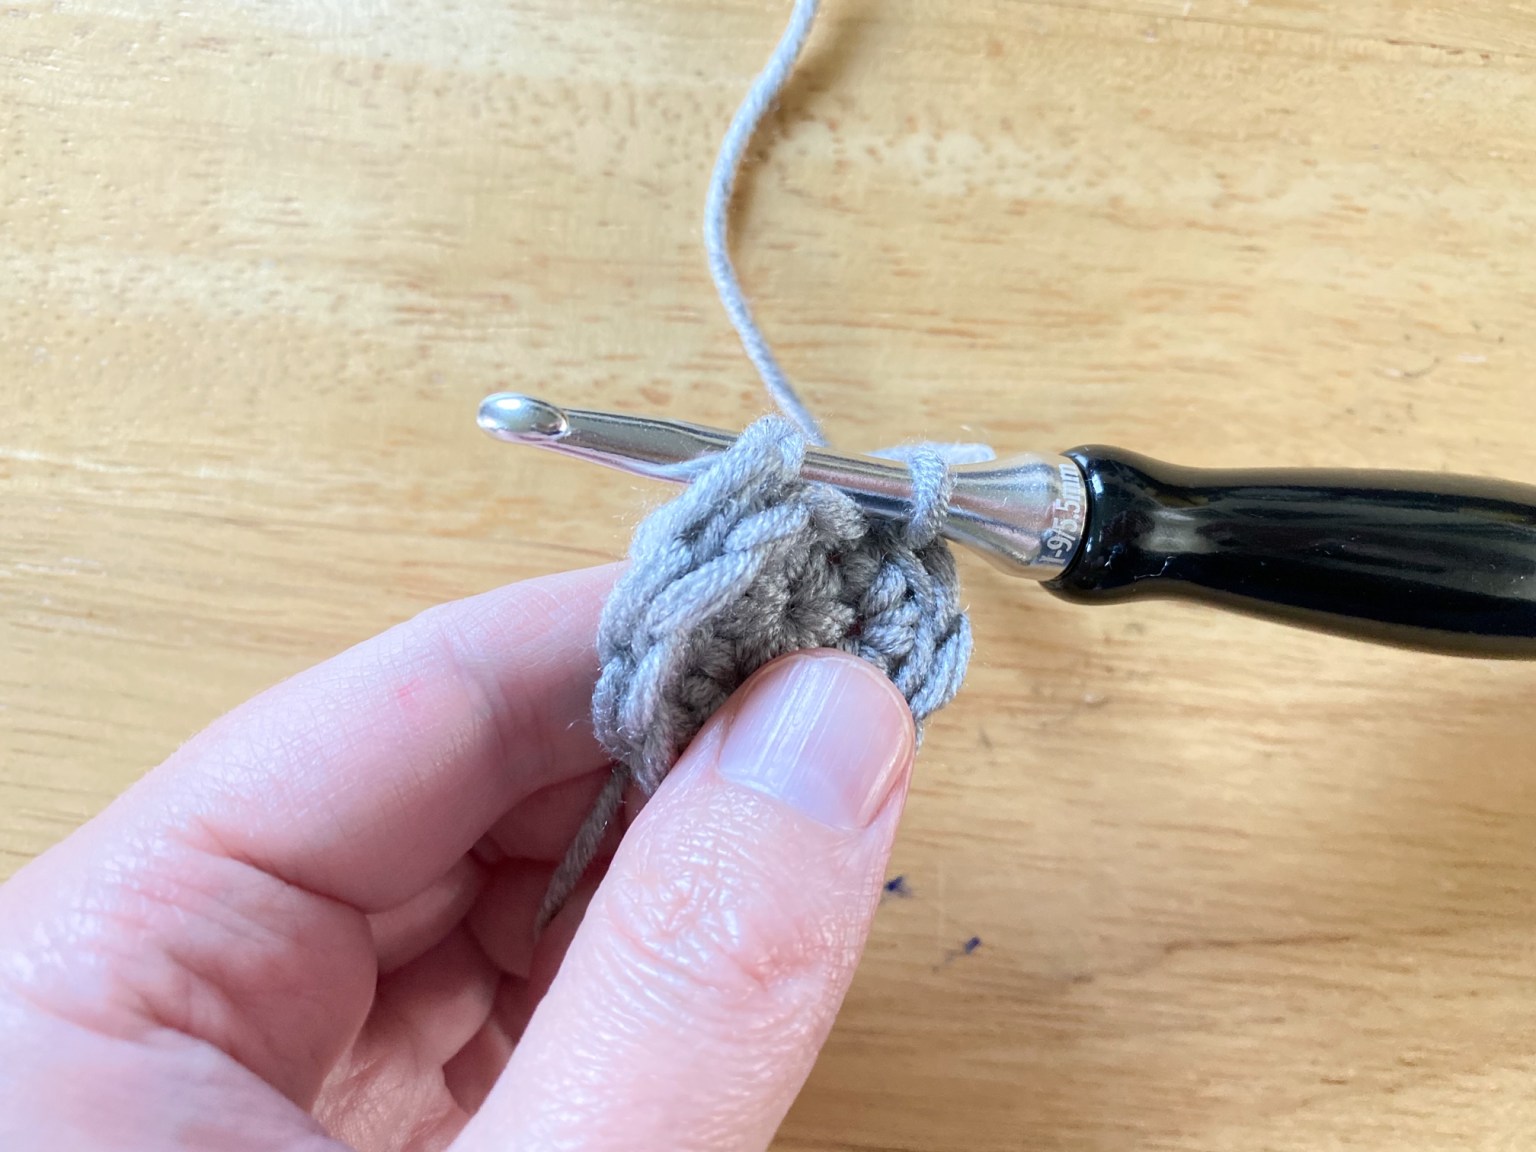
Rnds 5-9: sc in each st around; 9 sts
Fasten off, leaving a long tail for sewing. Sew into the ch 3 sps to each side of the head, as the finger holes for the puppet.
Trunk in Gray
Begin with magic ring.
Rnd 1: 6 sc in magic ring; 6 sts
Rnd 2: loosely sl st in each st around; 6 sts
Rnd 3: work this rnd behind the sl sts, into rnd 1, sc in each st around; 6 sts
Rnd 4: sc in each st around; 6 sts
Rnd 5: invsc2tog, sc in next st, inc in next 2 sts, sc in next st; 7 sts
Rnd 6: sc in each st around; 7 sts
Rnds 7-8: invsc2tog, sc in next 2 sts, inc, sc in next 2 sts; 7 sts
Rnd 9: invsc2tog, sc in next st, 2 inc, sc in next 2 sts; 8 sts
Fasten off, leaving a long tail for sewing. Sew onto the lower center of the face, just above the front ch-3 sp.
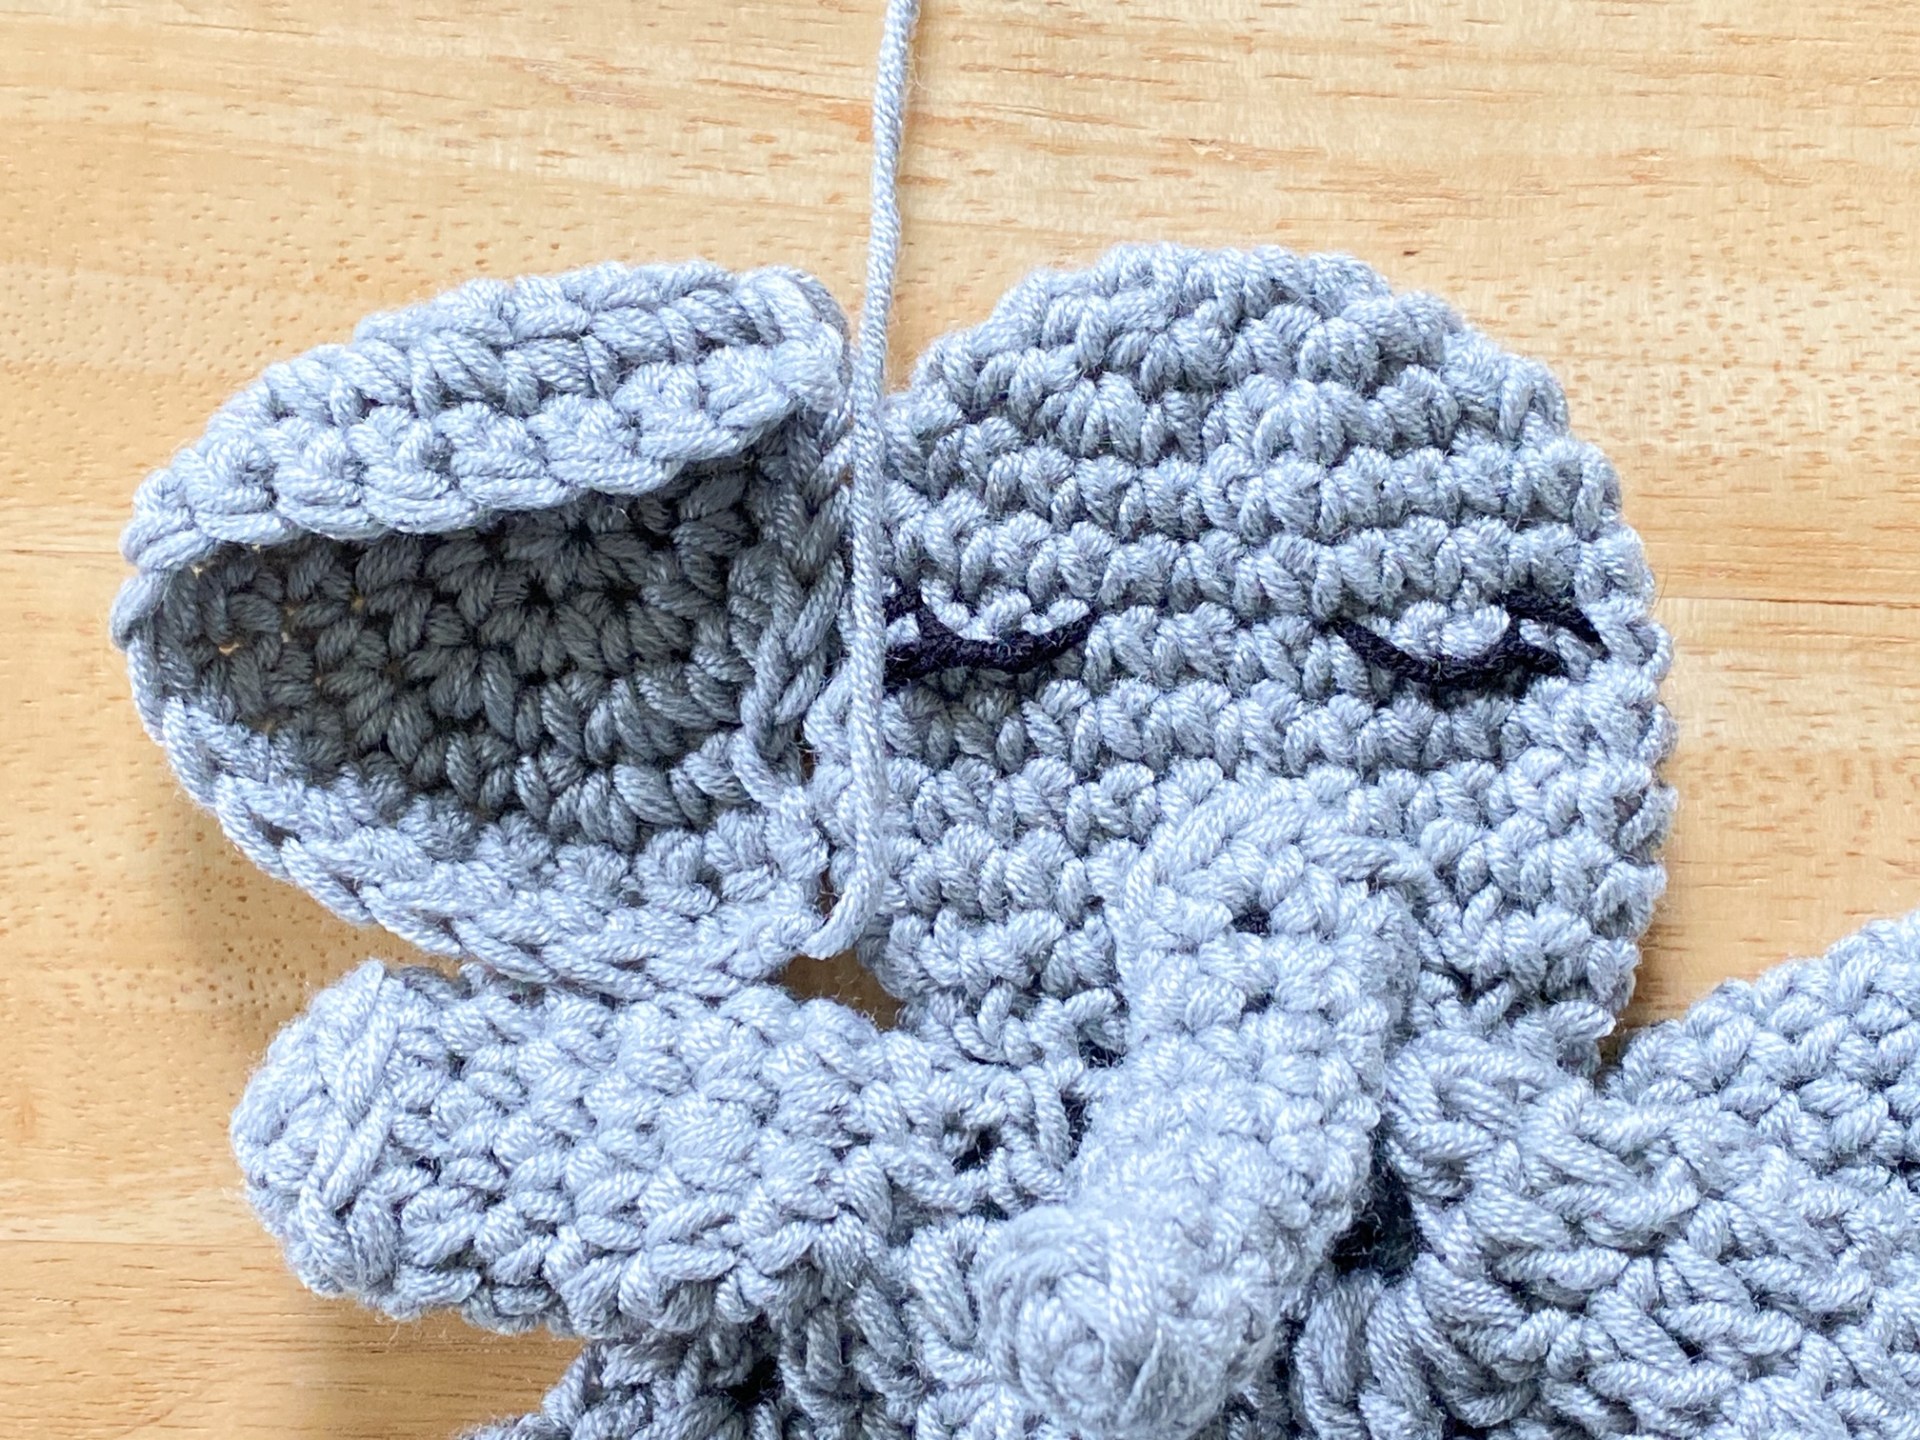
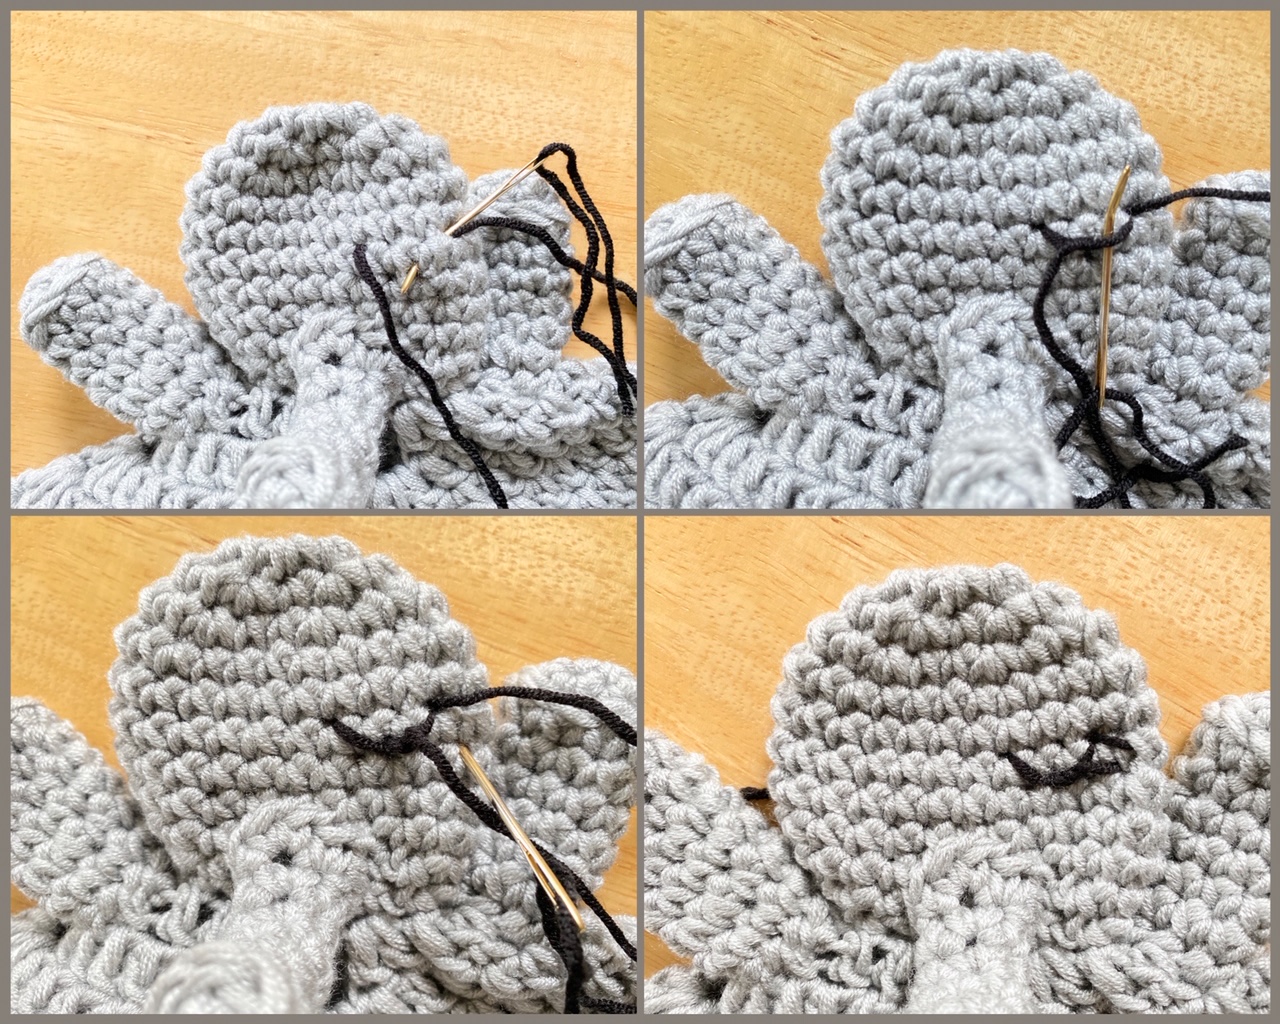
Eyes in black
After sewing on the trunk, sew the eyes onto the face. Place the eyes at about rnd 6, spanning 4 stitches each, about 1 st apart.
Ears in Gray
Begin with magic ring.
Rnd 1: 6 sc in magic ring; 6 sts
Rnd 2: inc in each st around; 12 sts
Rnd 3: (inc, sc in next st)6x; 18 sts
Rnd 4: (inc, sc in next 2 sts)6x; 24 sts
Rnd 5: ch 1 and turn so WS is facing, sc in next 18 sts, leaving 6 sts unworked; 18 sts
Rnd 6: ch 1 and turn, sc in all 18 sts; 18 sts
Fasten off, leaving a long tail for sewing. Weave in the beginning tail. Using long tail, sew onto the sides of the head, with the top part folded down just a bit, as pictured. The wrong side of rnd 1 should always be in the back.