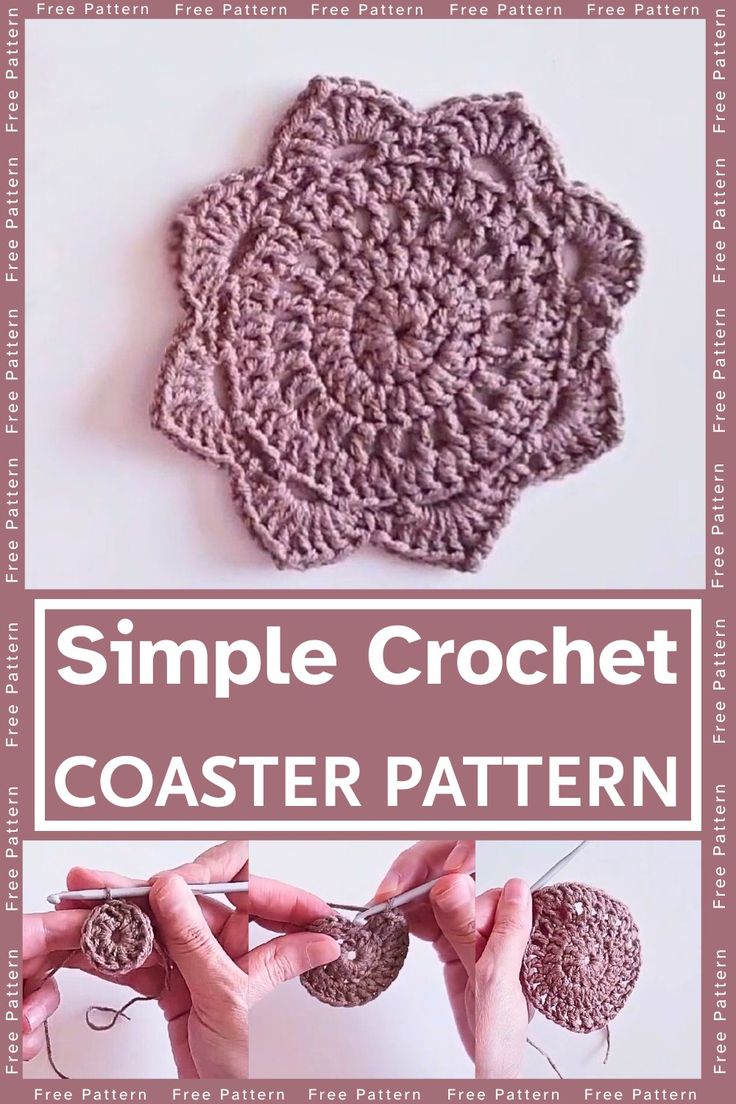
Crochet Adorable Coaster
Add a touch of charm to your home with these adorable crochet coasters! Perfect for keeping your tables safe from those pesky water rings while adding a cozy and personal touch to your décor. Whether you're sipping on a cup of tea or enjoying a glass of refreshing lemonade, these cute coasters will put a smile on your face every time you reach for your drink. Handmade with love and attention to detail, they make a thoughtful gift for someone special or a lovely addition to your own collection. So grab your favorite yarn and crochet hook, and get ready to create these delightful coasters that are sure to brighten up any room in your home!
Materials and Preparation
To make this gorgeous and easy crochet coaster, gather the following materials:
Yarn:
- Acrylic or cotton yarn (cotton yarn is preferred for coasters as it is heat-resistant and absorbs moisture well).
- Recommended: Scraps from “Pure Gold Range” by L (or similar).
Crochet Hook:
Size 4 mm crochet hook.
Additional Tools:
- Scissors.
- Yarn needle (for weaving in ends).
Yarn Weight: Any medium (weight 4) yarn will work well for this project.
Abbreviations and Notes
Below are the crochet abbreviations and techniques used:
- CH = Chain.
- SC = Single crochet.
- DC = Double crochet.
- Slip Stitch (SL ST) = Slip stitch.
Pattern Notes:
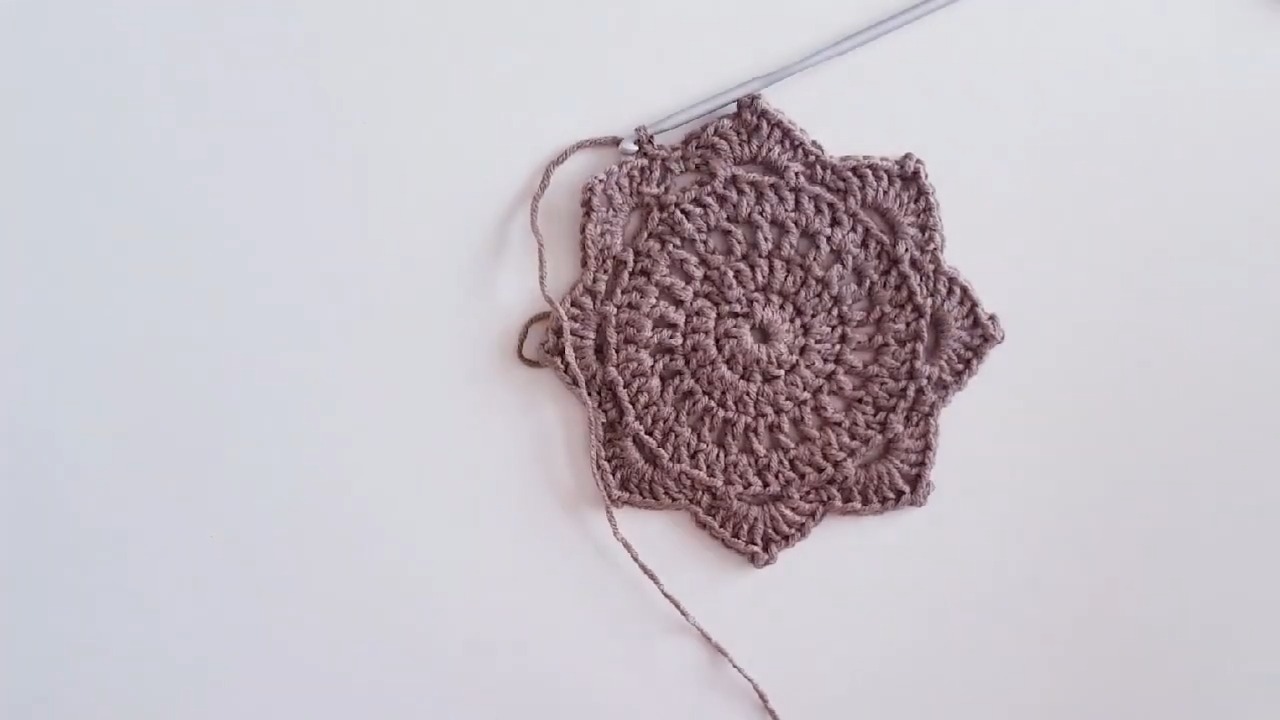
- The coaster measures 14 cm (5.5 inches) in diameter.
- Cotton yarn is preferred for coasters, but acrylic yarn may also be used.
- The CH 3 at the start of certain rounds acts as the first DC unless stated otherwise.
- Gauge swatches are optional as sizing is easy to adjust.
Gauge, Approximate Size, and Pattern Notes
Gauge: Not critical for this project.
Final Size: 14 cm or 5.5 inches diameter.
No special techniques are needed.
Step-by-Step Pattern
Foundation Ring:
Start by making a slip knot on your hook.
CH 5, then SL ST into the first chain to form a ring.
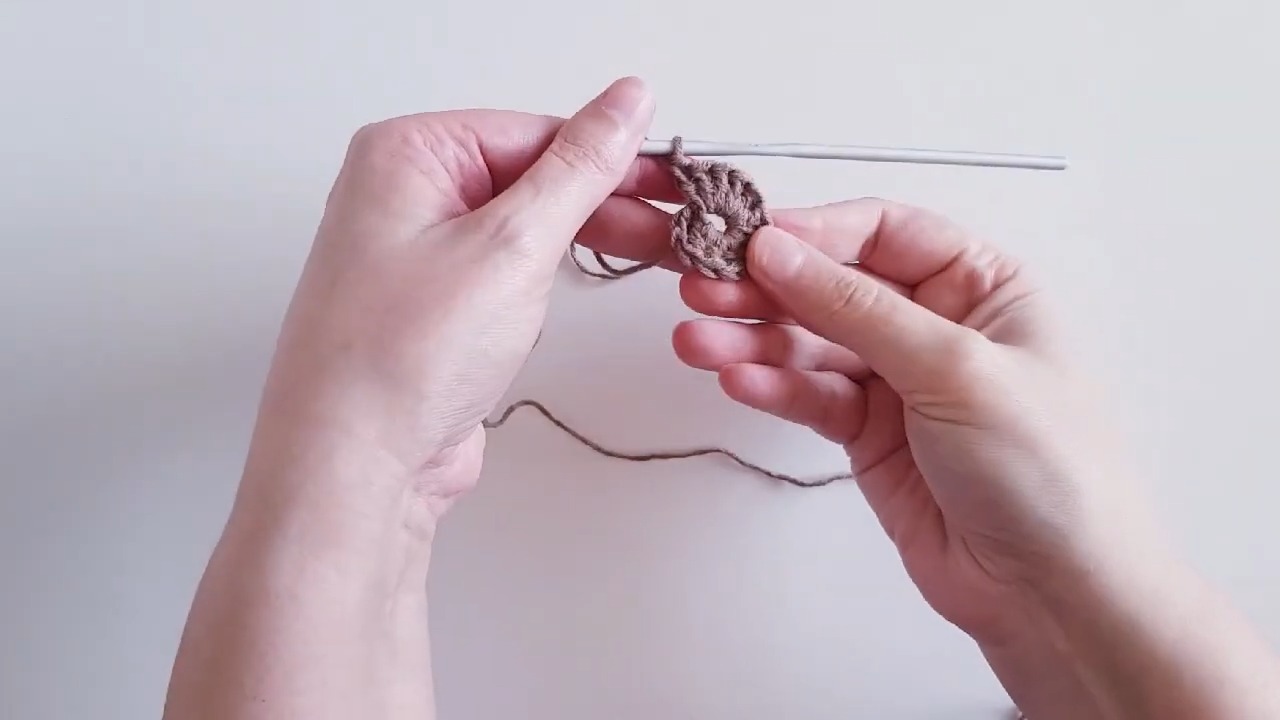
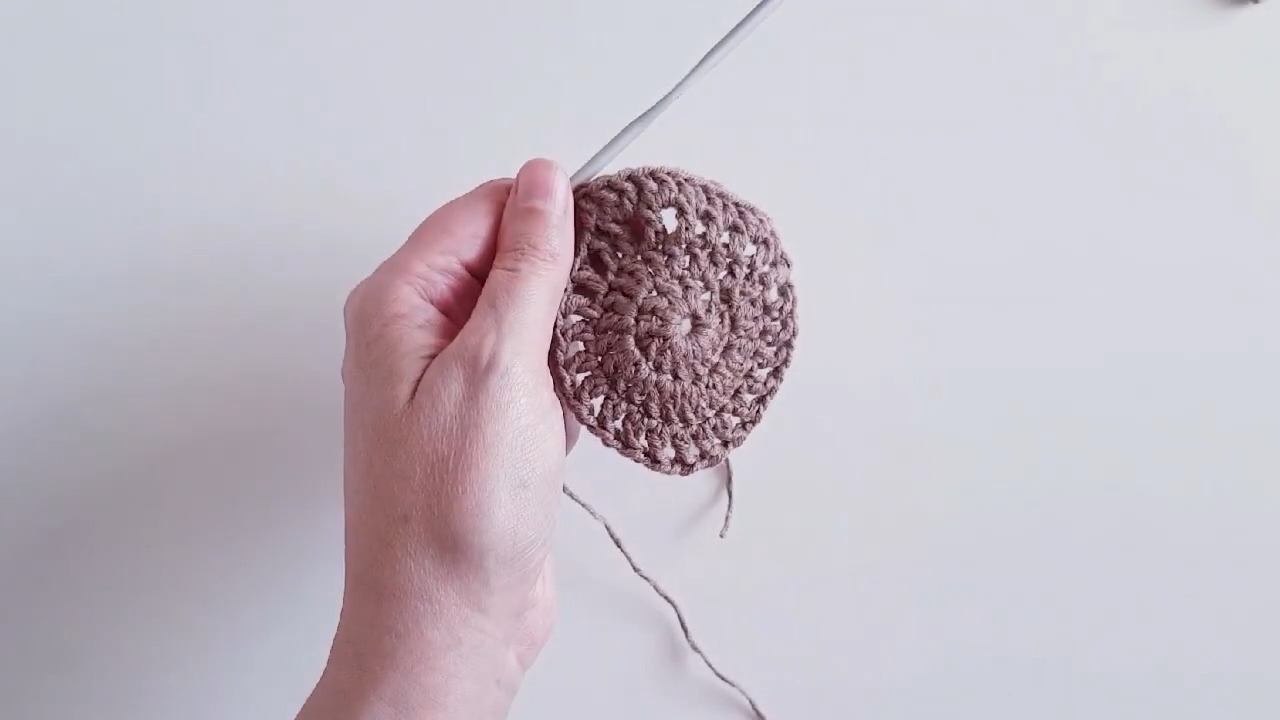
Round 1:
CH 3 (this counts as your first DC).
Work 11 DC into the ring (you should end up with 12 DC total, including the initial CH 3).
Join with a SL ST to the 3rd chain of your starting CH 3.
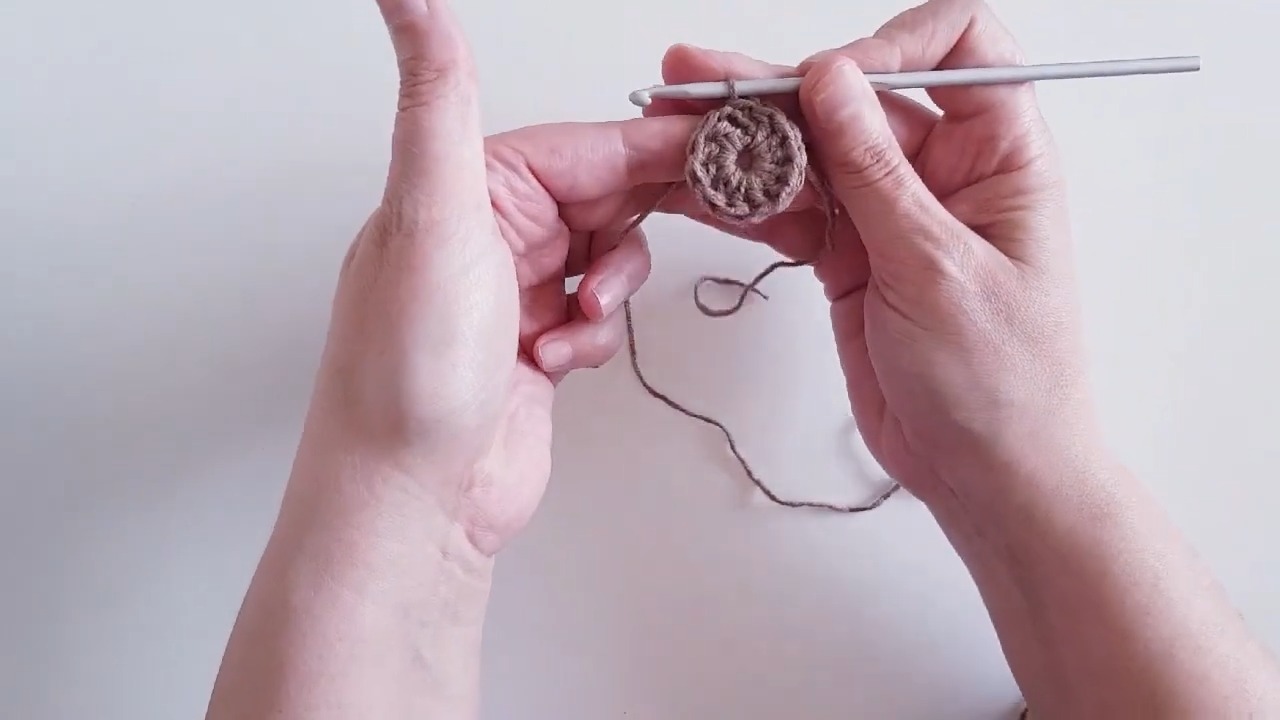
Round 2:
CH 3 (counts as 1 DC).
Work 1 more DC into the same stitch.
In each stitch around, place 2 DC (increase in each stitch).
At the end of this round, you should have 24 DC.
Join with a SL ST to the 3rd chain of your starting CH 3.
Round 3:
CH 4 (counts as 1 DC + CH 1 space).
In the next stitch, work DC, CH 1. Repeat this pattern (DC, CH 1) in each stitch around.
At the end of this round, you should have 24 DC with CH 1 spaces between each DC.
Join with a SL ST to the 3rd chain of your starting CH 4.
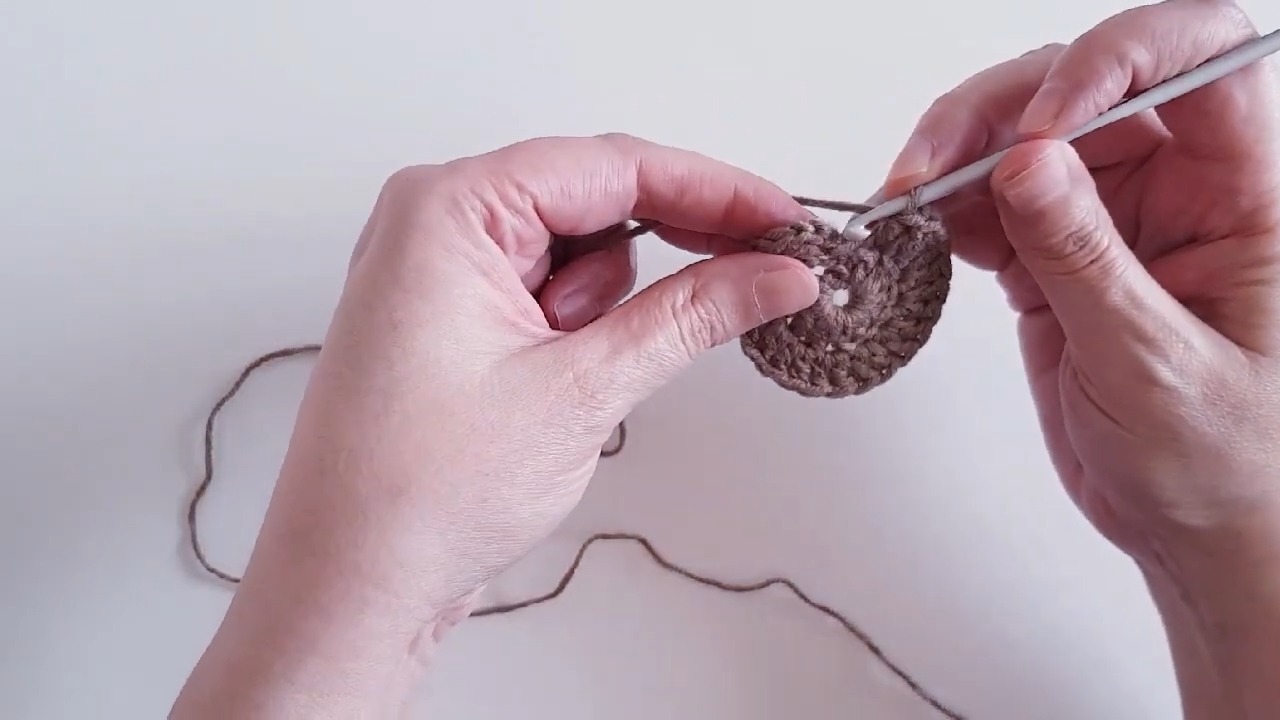
Round 4:
Slip stitch into the first CH 1 space.
CH 3 (counts as 1 DC).
In the same CH 1 space, work 1 more DC (total 2 DC in the space).
Continue placing 2 DC into each CH 1 space around.
At the end of this round, you should have 48 DC.
Join with a SL ST to the 3rd chain of your starting CH 3.
Round 5:
CH 1 and work 1 SC into the same stitch.
CH 3, skip the next 2 stitches, and work 1 SC into the following stitch.
Repeat this pattern (CH 3, skip 2 stitches, SC) around.
At the end of this round, join with a SL ST into the first SC.
Round 6 (Final Round):
Slip stitch into the first CH 3 space.
CH 3 (counts as the first DC).
In the same CH 3 space, work 3 DC (for a total of 4 DC in the space).
CH 3, then go back into the same CH 3 space and work 4 more DC (this creates a «shell»).
In the next CH 3 space, work 1 SC.
Alternate between «shell» (4 DC, CH 3, 4 DC) and SC in each CH 3 space around.
At the end of this round, join with SL ST to the 3rd chain of your starting CH 3.
Finishing:
CH 1, cut your yarn, and pull through the loop to fasten off.
Use a yarn needle to weave in the ends securely.