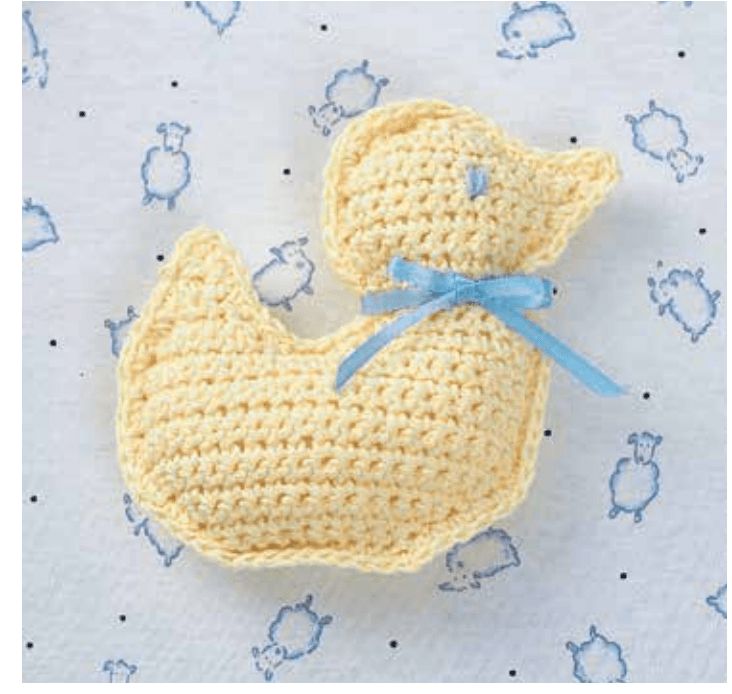
Crochet Adorable Duck Toy
Crocheting an adorable duck toy is a charming and delightful project that can bring a smile to anyone's face. The soft yarn and intricate stitches create a lovable and cuddly companion that is perfect for both children and adults. With its bright colors and cute design, this duck toy is sure to become a cherished favorite in any toy collection. Whether you are a beginner or a seasoned crocheter, crafting this charming duck will surely fill your heart with joy and creativity!
Materials You’ll Need
Here’s everything you need to get started:
- Pale Yellow (01030), 2 balls (1.75 oz/50 g; 80 yds/73 m each).
- Crochet Hook: U.S. G or 6 (4 mm) or any size to achieve the correct gauge.
- Ribbon: 14″ (35.5 cm) long, 3/8″ (1 cm) wide for the neck.
- Stuffing for the body.
- Blue thread for the embroidered eye.
Gauge Check
To ensure your duck turns out the right size:
- 18 sc and 20 rows = 4″ [10 cm].
- If your gauge is off, adjust your hook size accordingly!
Abbreviations
Before we begin, here are some terms you’ll see in the pattern:
- Ch: Chain
- Sc: Single crochet
- Sc2tog: Single crochet two stitches together
- Yoh: Yarn over hook
- RS: Right side
- Rep: Repeat
- Approx: Approximately
- Don’t worry if you’re new to these terms—they’re all explained in the steps.
Pattern Instructions
This pattern is worked in two flat pieces (front and back), which are then joined together. Let’s make magic happen!
1. Start with the Body
Make 2 pieces alike.
Chain 11.
Row 1: (Right Side) Single crochet in the 2nd chain from the hook and in each chain to the end (10 sc). Turn.
Row 2: Chain 1, 2 single crochet in the first stitch, single crochet across, and 2 single crochet in the last stitch (12 sc). Turn.
Repeat Row 2 three more times, increasing stitches to 18 sc.
Shaping the Body
Work straight by crocheting 1 single crochet in each stitch for 7 rows.
Now for the tail shaping:
Chain 1, single crochet in the next 6 stitches, then work an sc2tog (single crochet two together). Leave the remaining stitches unworked. Turn.
Follow the decreasing rows in the pattern, gradually tapering the tail to a point. Fasten off.
2. Craft the Head
The head is worked directly onto the body piece.
Attach yarn with a slip stitch on the wrong side of the last worked row.
Crochet across the body following the decreases and increases in the pattern to form a round, duck-shaped head.
Add the neck by chaining and working rows as specified in the pattern.
3. Assemble the Duck
Now that you have your two body pieces:
Place the front and back together with the right sides facing out.
Join the pieces by crocheting around the edge. Use single crochet stitches through both layers to secure them together.
Stuff lightly as you go, especially around the head and body, to keep the shape firm but soft.
Pro tip: Add extra stuffing in the tail and neck for better definition.
4. Add the Finishing Touches
Embroider the eye using blue thread. A simple small circle or dot will bring your duck to life.
Tie the ribbon securely around the duck’s neck for that adorable, polished look.
Final Measurements
Your finished duck toy should measure approximately 4″ x 4″ [10 x 10 cm].