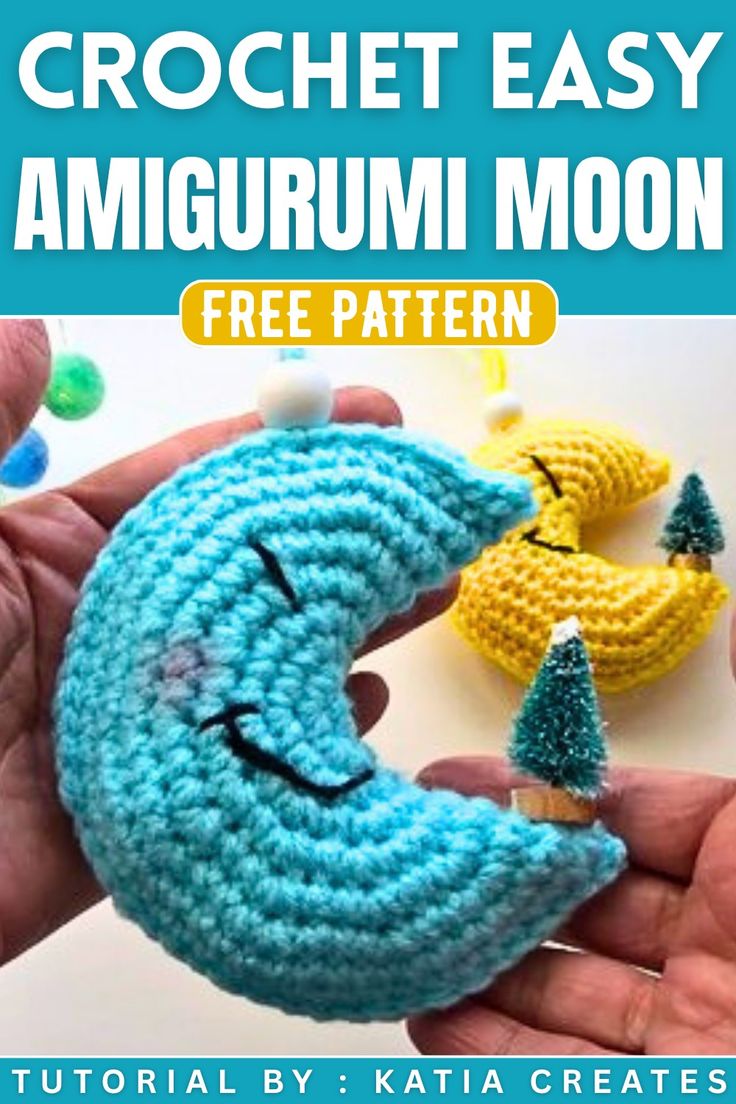
Crochet Amigurumi Moon Ornament
Creating a Crochet Amigurumi Moon Ornament is such a delightful project that brings a touch of whimsy and charm to any space! This adorable ornament is perfect for adding a cozy and magical vibe to your home decor or gifting to a friend who loves handmade treasures. With just a few simple stitches and some colorful yarn, you can craft a cute and cuddly moon that sparks joy and smiles wherever it goes.
Materials:
- Number 4 medium weight yarn (Color: Aqua Turquoise)
- 4 mm crochet hook
- Stuffing
- Scissors
- Tapestry needle
- Black yarn for eyes and mouth
- Hot glue gun
- A small Christmas tree ornament (about 1.5 inches)
Abbreviations:
- ch: chain
- sc: single crochet
- st(s): stitch(es)
- inc: increase (2 single crochets in the same stitch)
- MR: magic ring
Pattern Instructions:
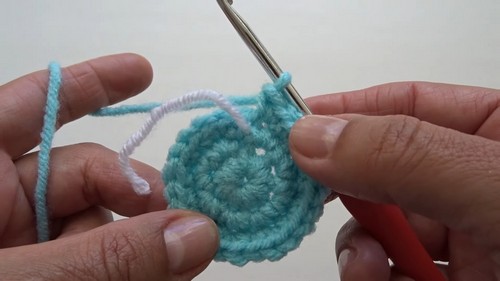
Magic Ring:
Create a magic ring: Hold the tail with your thumb, wrap the yarn around two fingers, crisscross it, and hold with your ring finger.
Insert your hook under the first circle, pick up a loop, yarn over, and pull through.
Chain 1.
Round 1:
Work 8 sc into the magic ring.
Pull the tail to tighten the center.
(8 sts)
Round 2:
Place a stitch marker.
Work 2 sc in each stitch around.
(16 sts)
Round 3:
1 sc in the next stitch, 2 sc in the next stitch; repeat from * to * around.
(24 sts)
Round 4:
1 sc in the next stitch, 2 sc in the next stitch; repeat from * to * around.
(36 sts)
Round 5:
1 sc in the next stitch, 2 sc in the next stitch; repeat from * to * around.
(54 sts)
Round 6:
1 sc in the next 2 stitches, 2 sc in the next stitch; repeat from * to * around.
(72 sts)
Round 7:
1 sc in the next 3 stitches, 2 sc in the next stitch; repeat from * to * around.
(90 sts)
Rounds 8 and 9:
Work 1 sc in each stitch around.
(90 sts per round)
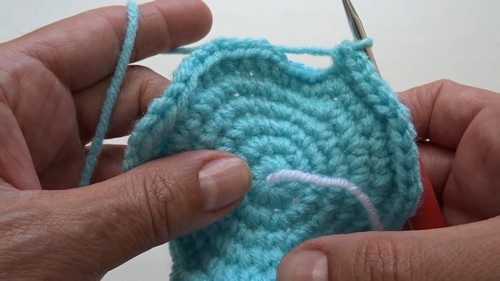
Assembly:
Creating the Moon Shape:
Slip stitch the two ends together by folding your work in half.
Insert your hook into the first stitch on both sides, yarn over, pull through, and pull through the loop on your hook.
Continue slip stitching across until you have an opening left for stuffing.
Stuffing:
Begin stuffing the moon using small pieces of stuffing, filling to your desired firmness.
Once stuffed, continue slip stitching the remaining open stitches.
Finishing:
After completing the slip stitches, chain 1, cut the yarn, and pull out your hook.
Shape the moon as desired
Adding the Facial Features:
Thread a tapestry needle with black yarn.
Embroider the eyes and mouth:
Insert the needle where the third round starts, and secure the yarn.
Create the eye by stitching between the second and third rounds.
Repeat for the other eye.
For the mouth, bring the needle up and out where the third round starts, and down into the second round, creating a smile.
Hiding Tails:
Use the needle to weave in and hide any yarn tails.
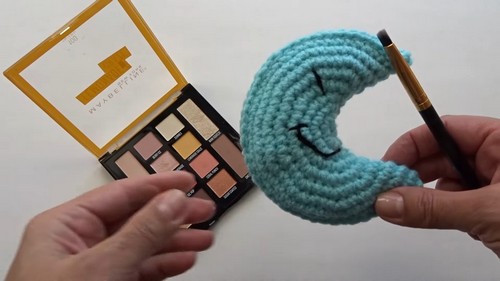
Adding Blush (Optional):
Use a small makeup brush and eyeshadow to add blush to the cheeks.
Hanging the Ornament:
Cut a piece of yarn about 12 inches long.
Decide where you'd like the ornament to hang, typically by the eye.
Pull the yarn through, knot it, and trim any excess.
Adding the Christmas Tree:
Use the hot glue gun to attach the small Christmas tree ornament to the moon.
Your moon ornament is now complete! Enjoy your handmade decoration.