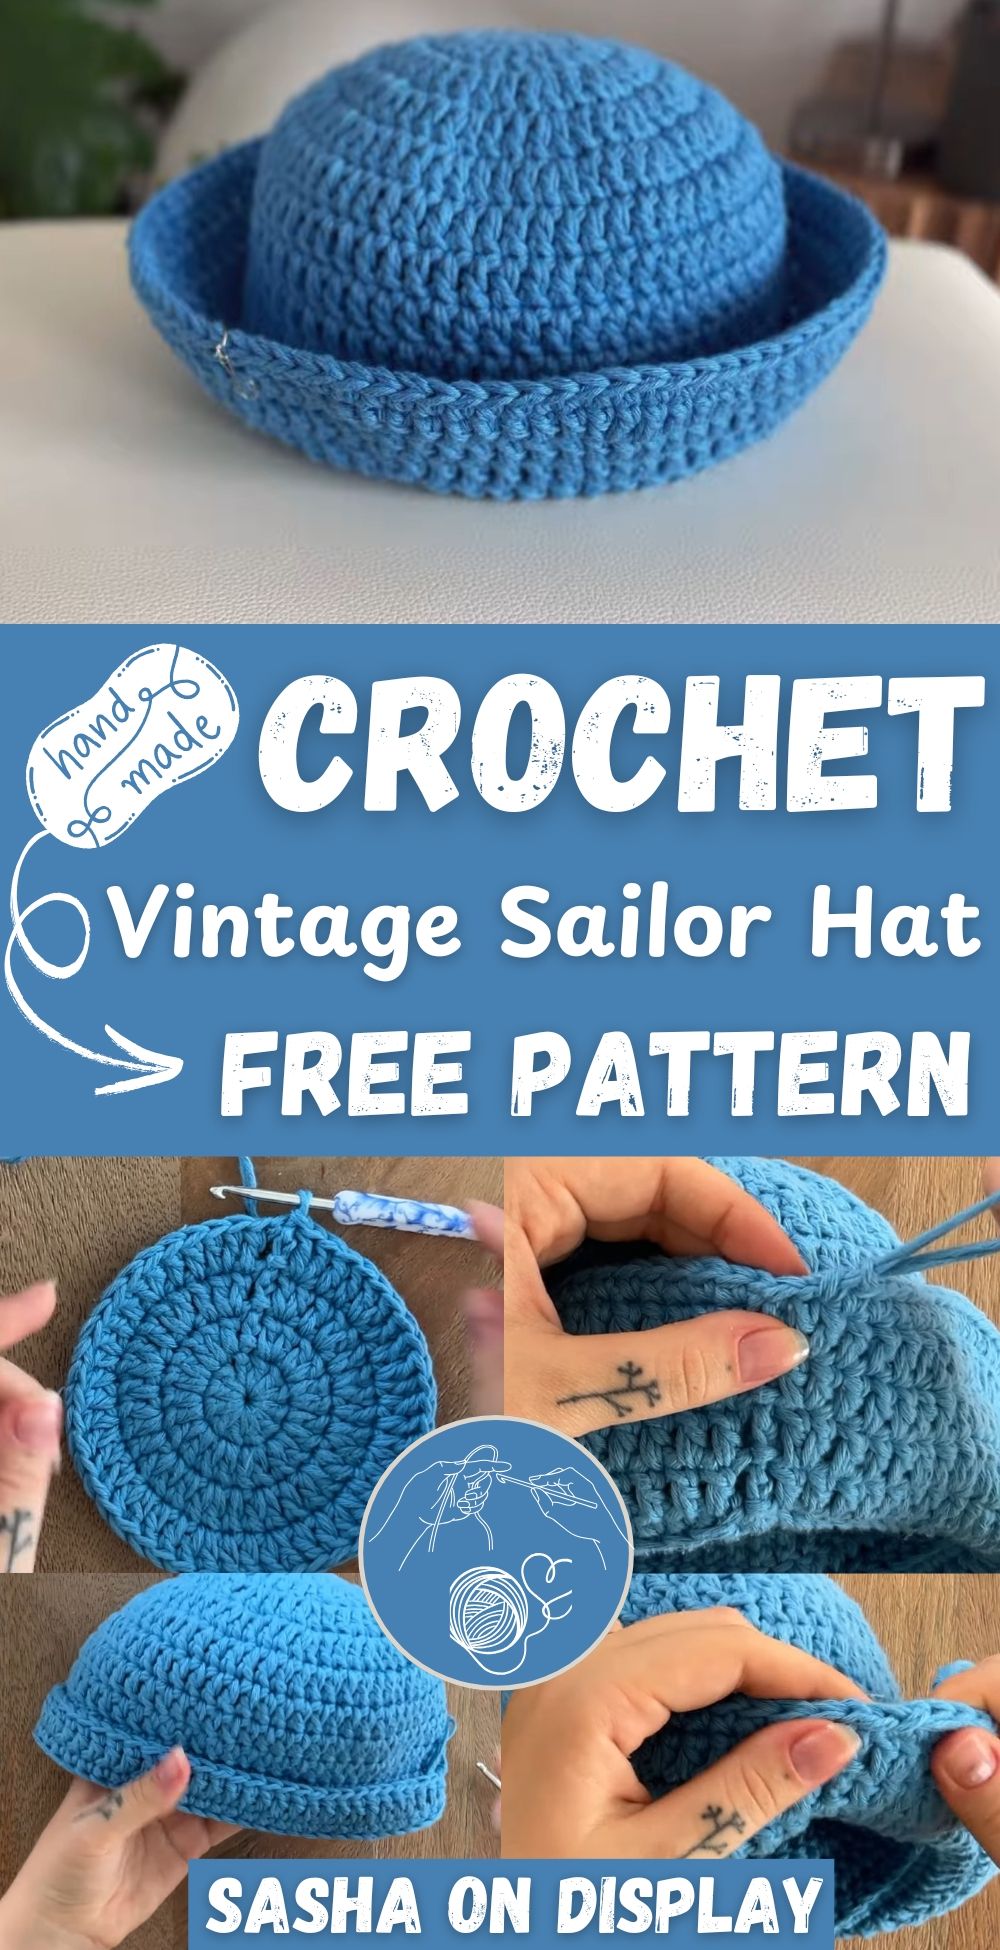
Crochet Vintage-Inspired Sailor Hat
The crochet vintage-inspired sailor hat brings a touch of timeless charm to any outfit. Its classic design exudes a sense of nostalgia and style that is both elegant and quirky. The careful handiwork that goes into creating each hat ensures a high level of craftsmanship and attention to detail. Whether you're strolling along the beach or attending a summer picnic, this hat adds a unique flair to your look. Its versatile nature allows you to pair it with a variety of outfits, making it a fun and fashionable accessory for any occasion. Embrace your inner sailor with this delightful hat that combines the best of vintage aesthetics with modern flair.
Materials
- Thick cotton yarn (use two strands together for sturdiness)
- 4.5 mm crochet hook
- Scissors
- Measuring tape
- Stitch marker
- Threading needle
Head Measurement (To Determine Hat Size)
- Measure the circumference of your head.
- Divide your head measurement by Pi (3.14).
- Subtract 1 to 1.5 cm from the result for a snug fit — this gives you the target diameter for the top of the hat.
- Example: For a 55 cm head, 55 ÷ 3.14 = 17.5 cm, then 17.5 — 1.5 = 16 cm.
Pattern Instructions

Starting the Top
Magic Circle
Make a magic circle with the yarn held double.
Ensure the tail stays on the left so you can tighten the circle later.
Round 1 – Top of the Hat
Chain 3 (counts as first DC).
Work 11 double crochet (DC) into the magic circle.
Pull the loose end to close the center hole.
Slip stitch into the third chain of the beginning chain-3 to close the round.
Total stitches: 12
Round 2 – Increases
Chain 3.
Work 1 DC in the same stitch as the chain (increase).
Work 2 DC into each remaining stitch around.
Slip stitch to close the round.
Total stitches: 24
Round 3 – Increases
Chain 3.
Pattern: 1 DC in next stitch, 2 DC in following stitch.
Repeat the pattern all the way around.
Slip stitch to join.
Total stitches: 36
Round 4 – Increases
Chain 3.
Pattern: 1 DC in each of the next 2 stitches, 2 DC in the third.
Repeat all the way around.
Slip stitch to join.
Total stitches: 48
Round 5 – Increases
Chain 3.
Pattern: 1 DC in each of the next 3 stitches, 2 DC in the fourth.
Repeat around the circle.
Slip stitch to join.
Total stitches: 60
Check your top diameter here. It should be approximately 16 cm. Add another round of increases if needed, increasing every fifth stitch.
Rounds 6–11 – Sides of the Hat
Chain 3.
Work 1 DC in each stitch around (no increases).
Slip stitch to join the round.
Repeat for a total of 6 rounds of no increases.
You should now have 11 rounds in total for the crown and side wall.
Brim of the Hat
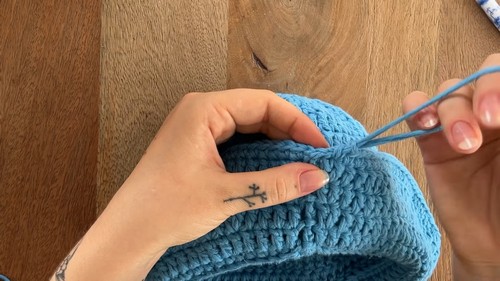
Round 12 – Begin Brim
Turn your work.
Chain 1.
Work 1 single crochet (SC) in back loops only of each stitch around.
Slip stitch to close the round.
Round 13 – Brim Round (No Increase)
Chain 3.
Work 1 DC into every stitch around.
Slip stitch to close the round.
Total stitches: 60
Brim Increases (Rounds 14–16)
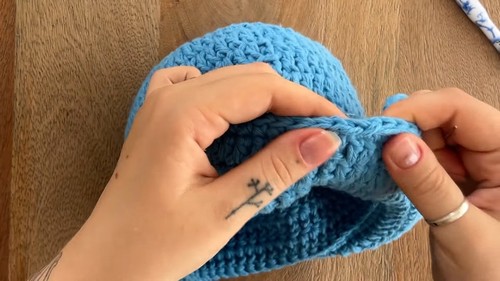
Round 14 – Increase Every 6th Stitch
Chain 3.
Pattern: 1 DC in next 5 stitches, 2 DC in the sixth.
Repeat around.
Slip stitch to join.
Round 15 – Increase Every 7th Stitch
Chain 3.
Pattern: 1 DC in next 6 stitches, 2 DC in the seventh.
Repeat around.
Slip stitch to join.
For Round 16 – Increase Every 8th Stitch
Chain 3.
Pattern: 1 DC in next 7 stitches, 2 DC in the eighth.
Repeat around.
Slip stitch to join.
You can switch to a contrast color yarn for a decorative brim.
Round 17 – Finishing Edge
Chain 1.
Work 1 single crochet in each stitch around the brim.
Slip stitch to join.
Finishing Touches

Fasten Off & Weave in Ends
Cut the yarn, leaving a 10 cm tail.
Pull the loop completely through.
Thread the tail onto a needle.
Insert the needle under both loops of the second stitch from the end.
Pull tight, then insert needle back into the same loop where the yarn emerged, going under the front loop only.
Pull to create a seamless finish.
Weave in the rest of the ends securely, including the starting magic circle tail.
Optional: Add a Pendant
Use a small charm or pendant and a jump ring.
Open the jump ring using two pliers.
Insert the pendant and close the ring securely.
Attach the pendant to the front-right edge of the brim by threading it through both loops.