Crochet Sweet Stripes Laptop Case
Crochet Sweet Stripes Laptop Case is the perfect way to add a touch of style and protection to your tech essentials. With its colorful design and skillfully crocheted pattern, this laptop case is both charming and practical. The sweet stripes not only make it visually appealing but also give it a unique flair that stands out from the typical plain cases. Its soft texture provides a cozy nest for your laptop, keeping it safe from scratches and bumps while on the go. Whether you're heading to a coffee shop or a meeting, this laptop case is sure to turn heads and brighten up your day with its cheerful vibes. Add a pop of color and personality to your everyday tech accessory with the Crochet Sweet Stripes Laptop Case!
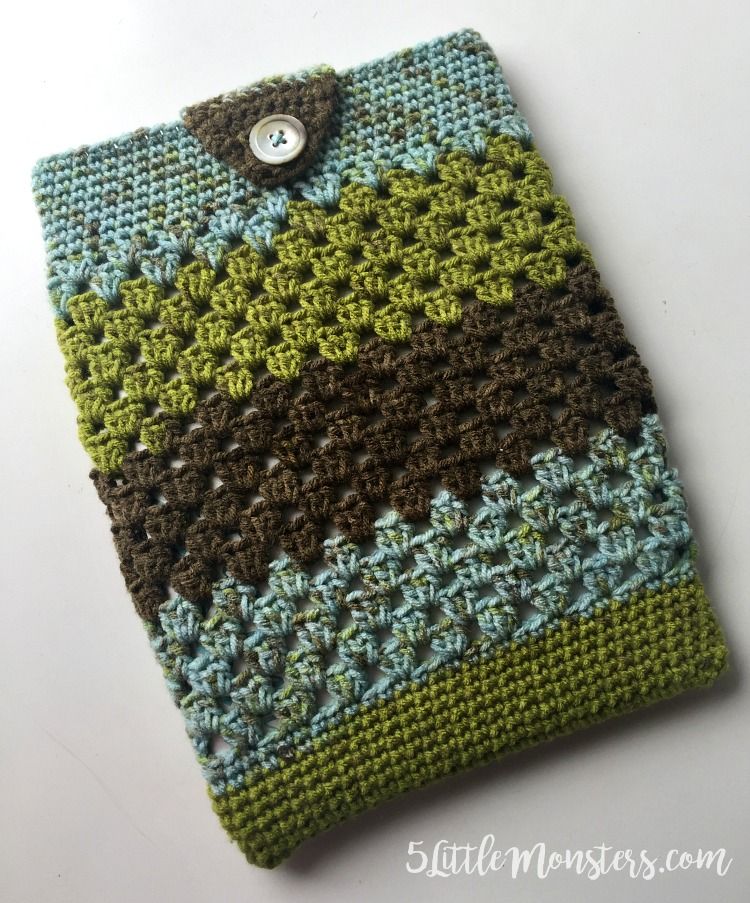
Finished size: approx. 9" x 13" but can easily be adjusted to fit any size laptop
You will need:
- 1 Premier Sweet Roll, I used Wasabi Pop (if you are adjusting the size for a larger laptop you may need more than 1)
- I crochet hook
- large button (about 1" diameter)
- yarn needle
- needle and thread (I used embroidery floss in a matching colors)
Instructions:
This pattern is made based on a multiple of 3, I started with a chain of 30, if you need your case to be larger or smaller you simply need to increase or decrease the starting ch by a multiple of 3. To adjust the length of the case add more rows of granny stitch.
When beginning the case you will work down one side of the starting ch, turn, and work down the other side using the unworked loops from the starting ch. From that point on you will continue working in the round.
ch 30
Round 1: sc in 2nd stitch from hook and each stitch to the end, in the last stitch work 2 more stitches (for a total of 3 stitches in that stitch) turning as you work so that you can begin working in the other side of the ch, sc in other side of each ch previously worked, sc 1 more time in the last stitch for a total of 3 in that stitch (1 at the beginning and 2 at the end), slip stitch to the 1st sc to join (60 sc)
Round 2: ch 1, sc in same stitch as join, sc in each stitch around, sl st to 1st sc to join (60 sc)
Round 3-8: repeat round 2 (60 sc)
Round 9: ch 3 (counts as 1st dc), 2 dc in same stitch, skip 2, [3 dc in next stitch, sk 2] repeat around, sl st to the beginning ch 3 (20 3dc clusters)
Round 10: sl st in the next 2 stitches and into the space between dc clusters, ch 3, 2 dc in same space, [skip 3 stitches, 3 dc in space between clusters] repeat around, sl st to the beginning ch 3 (20- 3 dc clusters)
Round 11-26: repeat round 10 (20- 3 dc clusters)
Round 27: ch 1, sc in that stitch and each stitch around (this time you will be working into the tops of each dc not between stitches), sl st to first sc to join (60 sc)
Round 28-34: ch 1, sc in each stitch around, sl st to first sc to join (60 sc)
Finish off, cut yarn, weave in ends
Find the center of one side of the bag and count 5 stitches to either side, these 10 stitches are where you will add your button tab
Row 1: join yarn to first of the 10 stitches just counted, sc in each of those 10 stitches (10 sc)
Row 2: ch 1, turn, sc in each stitch across (10 sc)
Row 3-6: repeat row 2 (10 sc)
Row 7: ch 1, sc2tog, sc in next 6 stitches, sc2tog (8 sc)
Row 8: ch 1, sc2tog, ch 4, sc2tog (2 sc, ch 4)
Row 9: ch 1, sc2tog working in first stitch and ch sp, 2 sc in ch sp, sc2tog working in ch sp and last stitch (4 sc)
Row 10: ch 1, sc2tog twice (2 sc)
Finish off and weave in ends
Sew button to the front of the bag so that the buttonhole fits over the button.