Crochet Airtag Holder
Crochet AirTag holders are not only functional but also add a touch of personality to your everyday items. Whether you are looking to keep track of your keys, bag, or any other valuables, these handmade accessories are both stylish and practical. With endless color and design possibilities, you can customize your AirTag holder to match your unique style or make thoughtful gifts for friends and loved ones. Crocheting these holders can be a fun and rewarding DIY project, allowing you to showcase your creativity and crafting skills. Plus, the soft yarn used in crochet ensures that your AirTag stays protected from scratches and dings while looking cute and trendy at the same time. So, why not add a touch of handmade charm to your belongings with a crochet AirTag holder?

What you Need
- 3.5mm (size E or 4 US) crochet hook
- Small amount of DK or worsted yarn (wool, acrylic etc)
- Tapestry needle for weaving in ends.
- Tip: Avoid using cotton if possible, because it isn’t elastic so the holder may be too tight at first & then too loose. Wool, acrylic etc works well.
- I find smooth merino works best, because it looks nice and smooth like cotton for a neat finish, but stretches well for a snug fit. I used Drops Merino Extra Fine DK wool in shades 28 North Sea and 30 Mustard.
3 Pattern Options
Basic holder without a loop (10 minutes, easy peasy!)
Holder with little loop built in (15 minutes)
Holder with separate loop sewn on (20+ mins, sturdy loop)
Abbreviations
NB this pattern uses US crochet terms. The equivalent UK crochet stitches are listed in the abbreviation list to help you convert the pattern.
- R – round
- yoh – yarn over/around hook
- st – stitch(es)
- ch – chain
- sl st – slip stitch
- sc – single crochet stitch (UK: double crochet)
- BLO – back loop only – work in just the back loop of the stitch instead of under both loops as usual.
- sc2tog – single crochet 2 stitches together to decrease by 1 stitch (UK: double crochet 2 together)
I use this invisible decrease method: put your hook into the front loop of the next 2 stitches, yoh and pull through both loops, yoh and pull through the 2 loops on your hook
Crochet Airtag Holder Pattern
Total time approx: 15 minutes
Step 1: Crochet the back
R1: Starting with a magic ring, make 6 sc into the ring. Sl st in 1st sc to join. [6 st]
R2: Ch 1, do 2 sc in each st. Sl st in 1st sc to join. [12 st]
Step 2: Crochet optional loop
For holder without loop (option 1 and 3):
R3: Ch 1, (2 sc in st, sc in next st) x 6 times. Sl st in 1st sc to join. [18 st]
For holder with little loop (option 2):
R3: Ch 1, (2 sc in st, sc in next st) x 3 times. Ch 9 (or double your desired loop length) & sl st in 1st ch to make a loop. (2 sc in st, sc in next st) x 3 times. [18 st with 9 ch in middle]
Note: for a long loop, I suggest crocheting the holder without a built in loop and crocheting a separate sturdy loop and attaching it instead (option 3).
Step 3: Crochet the edge
Work this round in the back loops only to give a nice outer edge to the holder.
For holder without loop (option 1 and 3):
R4: Ch 1, sc in BLO of each stitch. Sl st in 1st sc to join. [18 st]
For holder with loop (option 2):
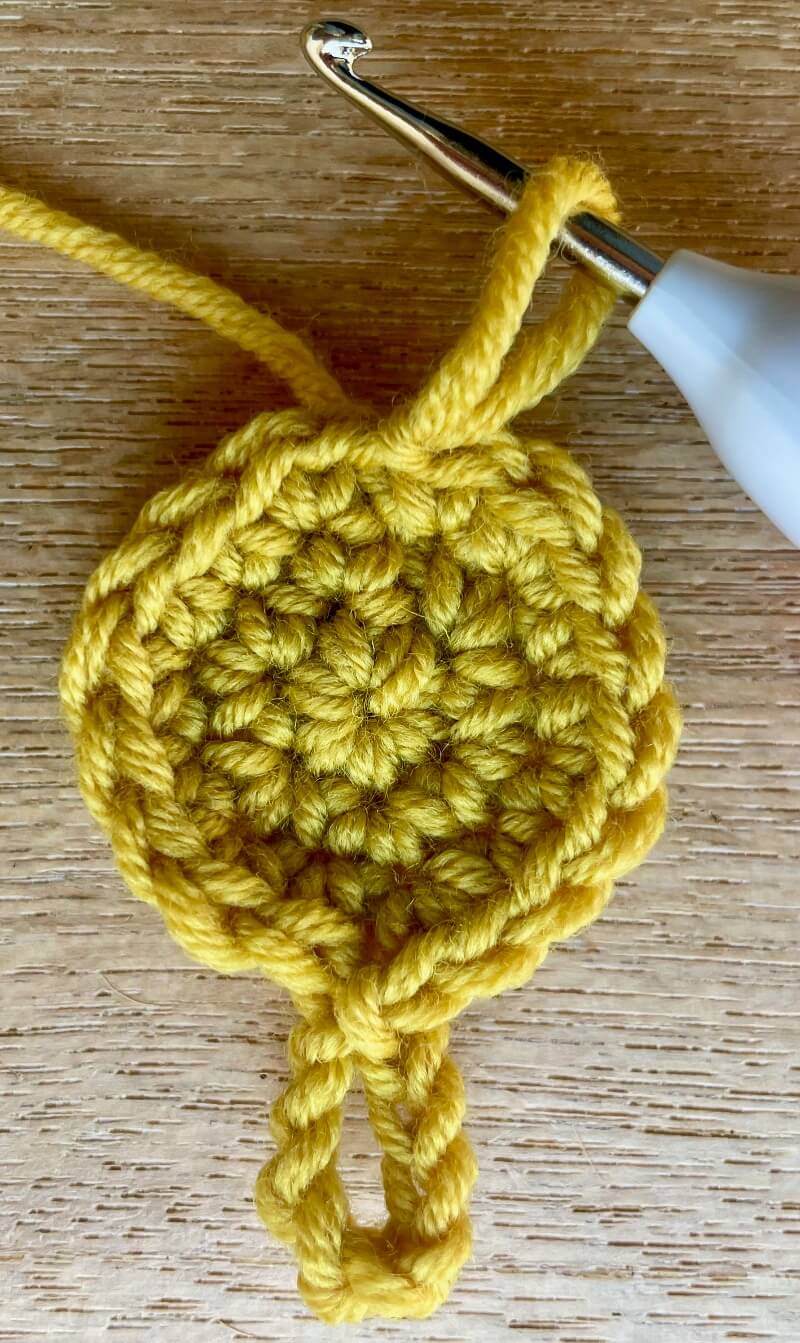
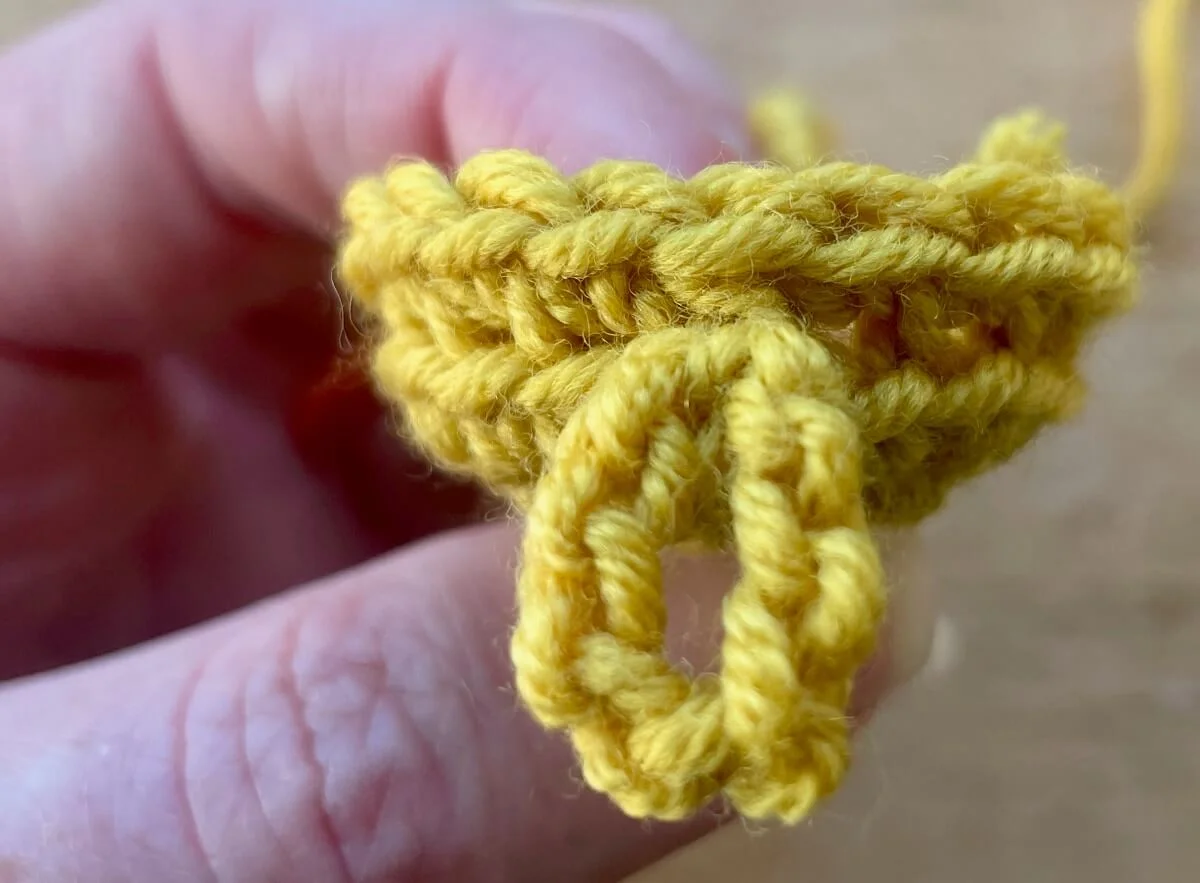
R4: Ch 1, sc in BLO of next 8 st until you reach the chain loop.
To make the next sc, pull the hanging loop down in front, holding it with your thumb & put your hook under a loop at the bottom of each side (i.e. under the back loop of both chains).
Yoh & pull through both loops. Yoh again & pull through the 2 loops on your hook to finish the sc.
Sc in BLO of remaining 9 st. Sl st in 1st sc to join. [18 st]
Note: depending on how you crochet rounds, you may have 9 st before the chain loop & 8 after instead. All that matters is that you still end up with 18 sc.

For the hanging loop holder (option 2), make the middle single crochet stitch by pulling the loop down in front & putting your hook under the back of the 2 chains at the bottom.
Step 5: Crochet the front
R5: Ch 1, (sc2tog, sc in next st) x 6 times. Sl st in 1st sc to join. [12 st]
R6: Sl st in BLO x 12 times.
Fasten off & weave 2 ends in on inside of holder.
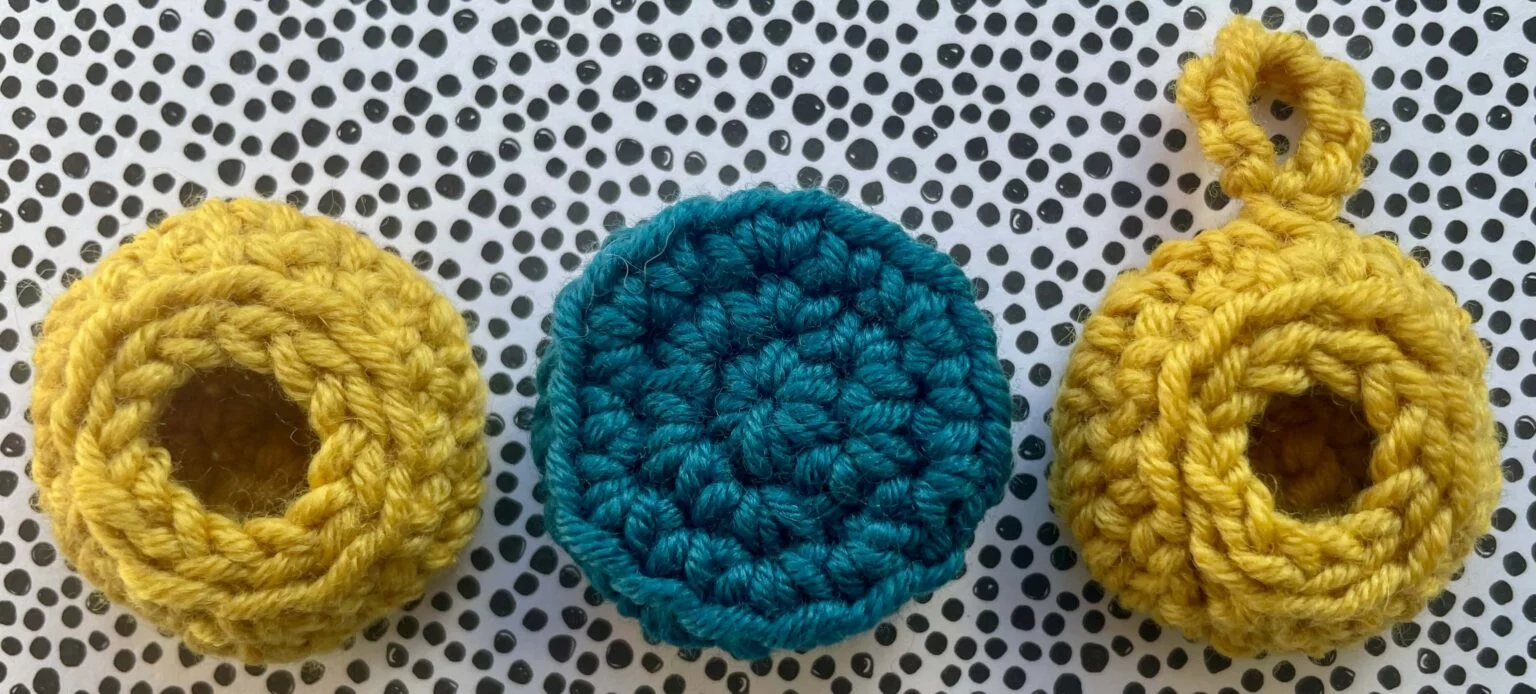
The pic above shows how the empty airtag holders look from the front and back, along with a looped version.
How to Crochet a Separate Hanging Loop (option 3)
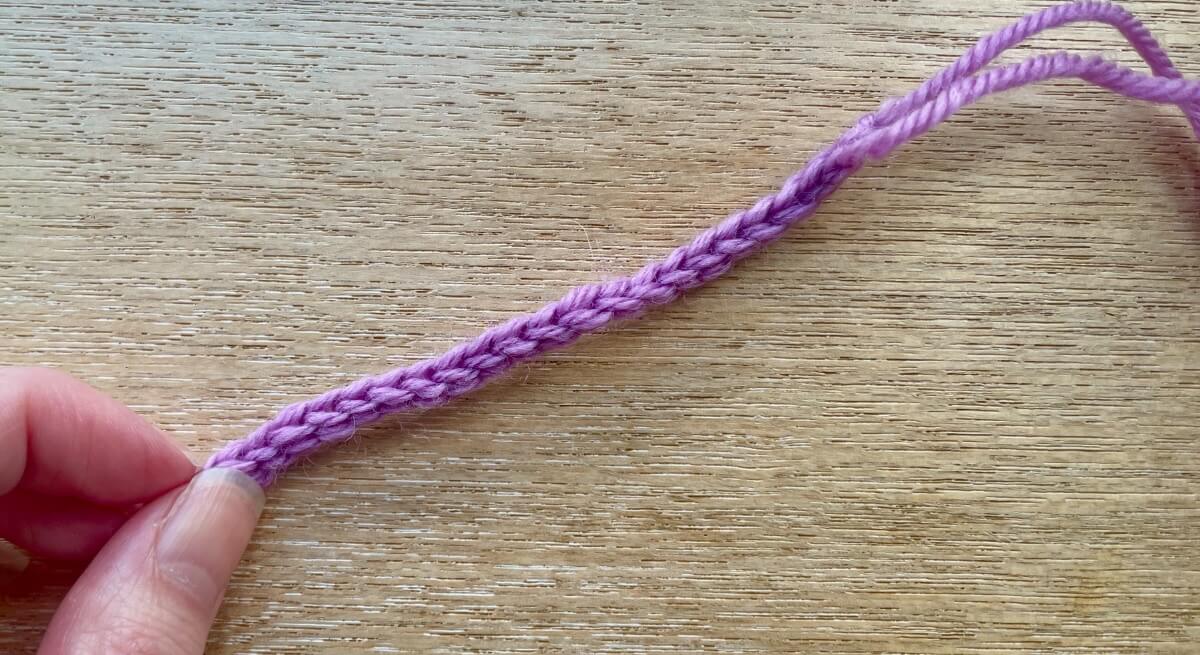
Slip stitch into a length of chains to make a neat sturdy cord of any length
For a longer, more robust hanging loop, crochet the basic Airtag holder (option 1) and then crochet a separate loop as follows:
Leaving a tail for attaching, chain until you have double your desired loop length. I did 23 chains.
Skip the 1st chain, and slip stitch into the rest of the chains.
This is a bit fiddly but makes a nice loop that lays flat & is not too thick.
Leaving a tail for attaching, fasten off.
Fold the loop in half, position it on the airtag holder, lining up with the outer edge & use both yarn tails to sew it in place with a tapestry needle.
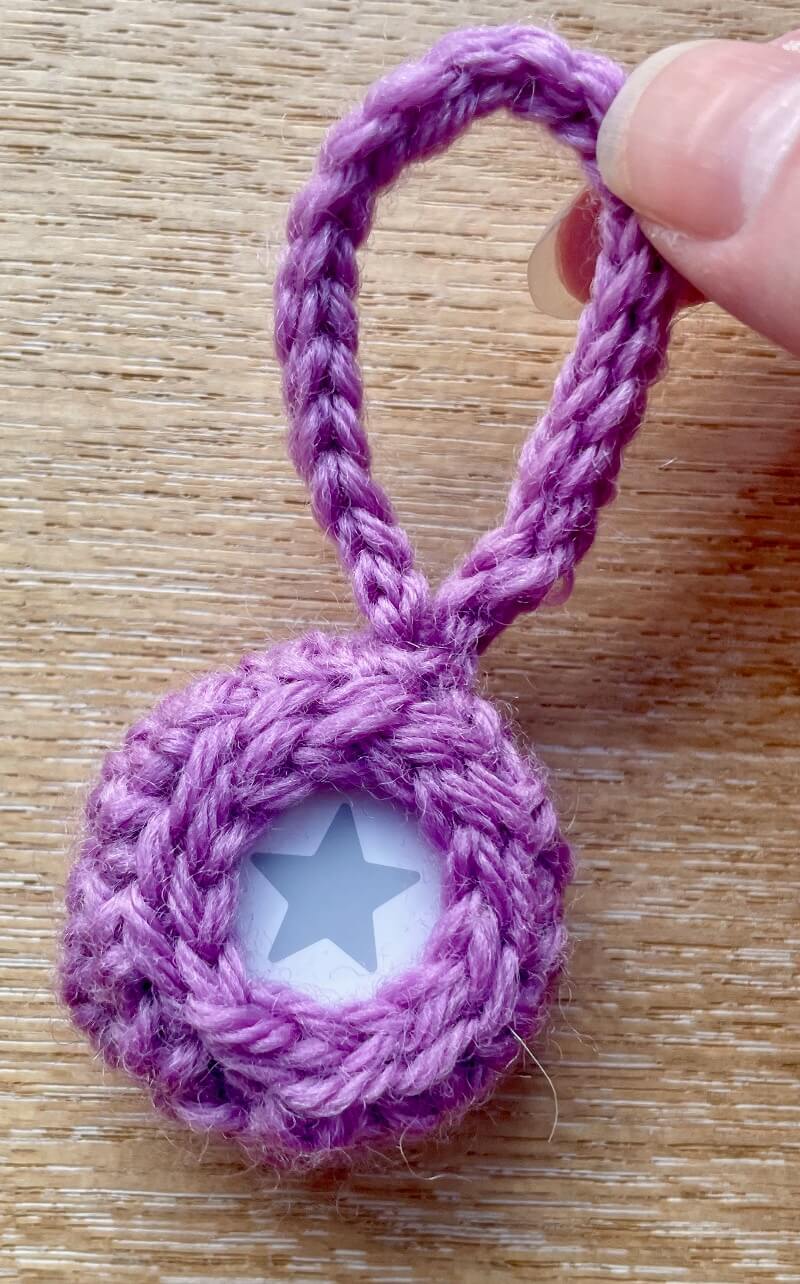
Here’s how the airtag holder looks with a separate sturdy hanging loop (23 chains) attached. Note I used traditional wool for this one (Drops Karisma), so it looks more woolly.