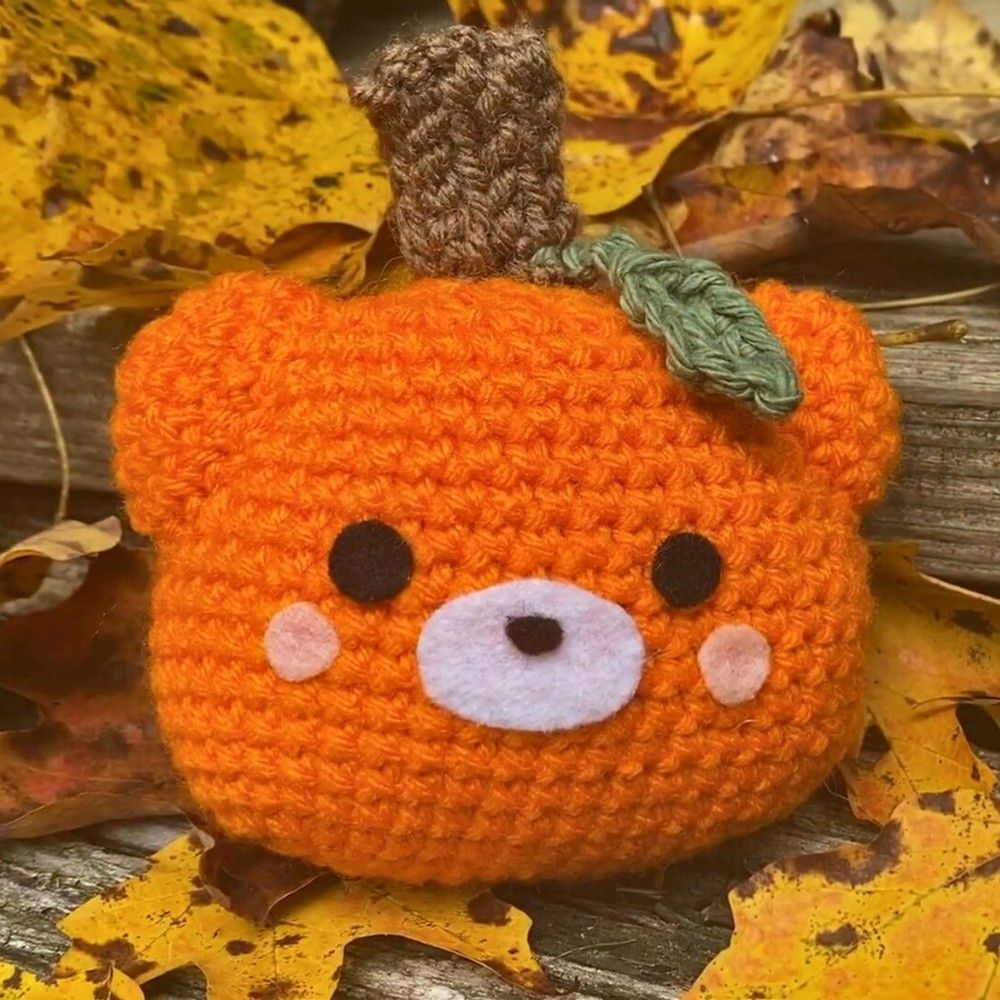
Crochet Pumpkin Bear
The Crochet Pumpkin Bear is an adorable and unique handmade creation that combines the coziness of a bear with the charm of a pumpkin. This delightful craft brings warmth and joy to any space it graces, making it a perfect addition to your fall decor or a thoughtful gift for someone special. With its soft yarn texture and cute design, the Crochet Pumpkin Bear is sure to bring a smile to your face and add a touch of whimsy to your home. Embrace the cozy vibes and festive spirit with this lovable crocheted creation that embodies the magic of the autumn season in the most charming way.
Materials and Preparation
To create this adorable Crochet Pumpkin Bear, you’ll need the following materials:
Yarn:
- Main body and ears: Worsted weight (Level 4) yarn in orange (e.g., Red Heart yarn).
- Stem: Worsted weight yarn in brown (e.g., any scrap yarn).
- Leaf: Worsted weight yarn in green (e.g., Peaches & Cream yarn).
Felt Sheets (Optional for Face):
- Black for the eyes.
- Pink for the blushing cheeks.
- White for the mouth.
Tools:
- Crochet Hook: 5.0 mm (or 5.5 mm depending on your preference for size).
- Yarn Needle: Metal or plastic (not a sewing needle).
- Scissors: To cut yarn and felt.
- Polyfill Stuffing: To fill the bear and shape it.
- Low-Temperature Hot Glue Gun: To attach felt pieces (fabric glue can be used as an alternative).
- Placeholder or Stitch Marker: You can use an actual stitch marker or household items like paper clips or safety pins.
Abbreviations and Notes
Here are the abbreviations used in the pattern:
- SC: Single Crochet
- INC: Increase (2 SC in the same stitch)
- DEC: Decrease (crochet 2 stitches together)
- CH: Chain
- ST: Stitch
Notes and Tips:
Work in continuous rounds unless instructed otherwise. Use a stitch marker to mark the beginning of each round.
Tight stitches are important for amigurumi, but don’t crochet so tightly that it becomes difficult to work into your stitches.
If using felt: ensure all your shapes are cut to the desired size before attaching.
Gauge, Approximate Size, and Pattern Notes
Gauge:
10 SC x 10 rows = approximately 2” x 2” using a 5.0 mm hook with worsted weight yarn.
Approximate Size:
The finished pumpkin bear measures approximately 4–5 inches tall, depending on the hook size. Adjusting the hook or yarn can increase or decrease the size.
Special Notes:
Stuff your pumpkin firmly for defined shaping, but don’t overstuff to avoid stretching the stitches.
Flipping your work inside out before stuffing ensures a cleaner look for the final product.
Step-by-Step Pattern
Body Section
The main pumpkin body is worked in continuous rounds following the steps below:
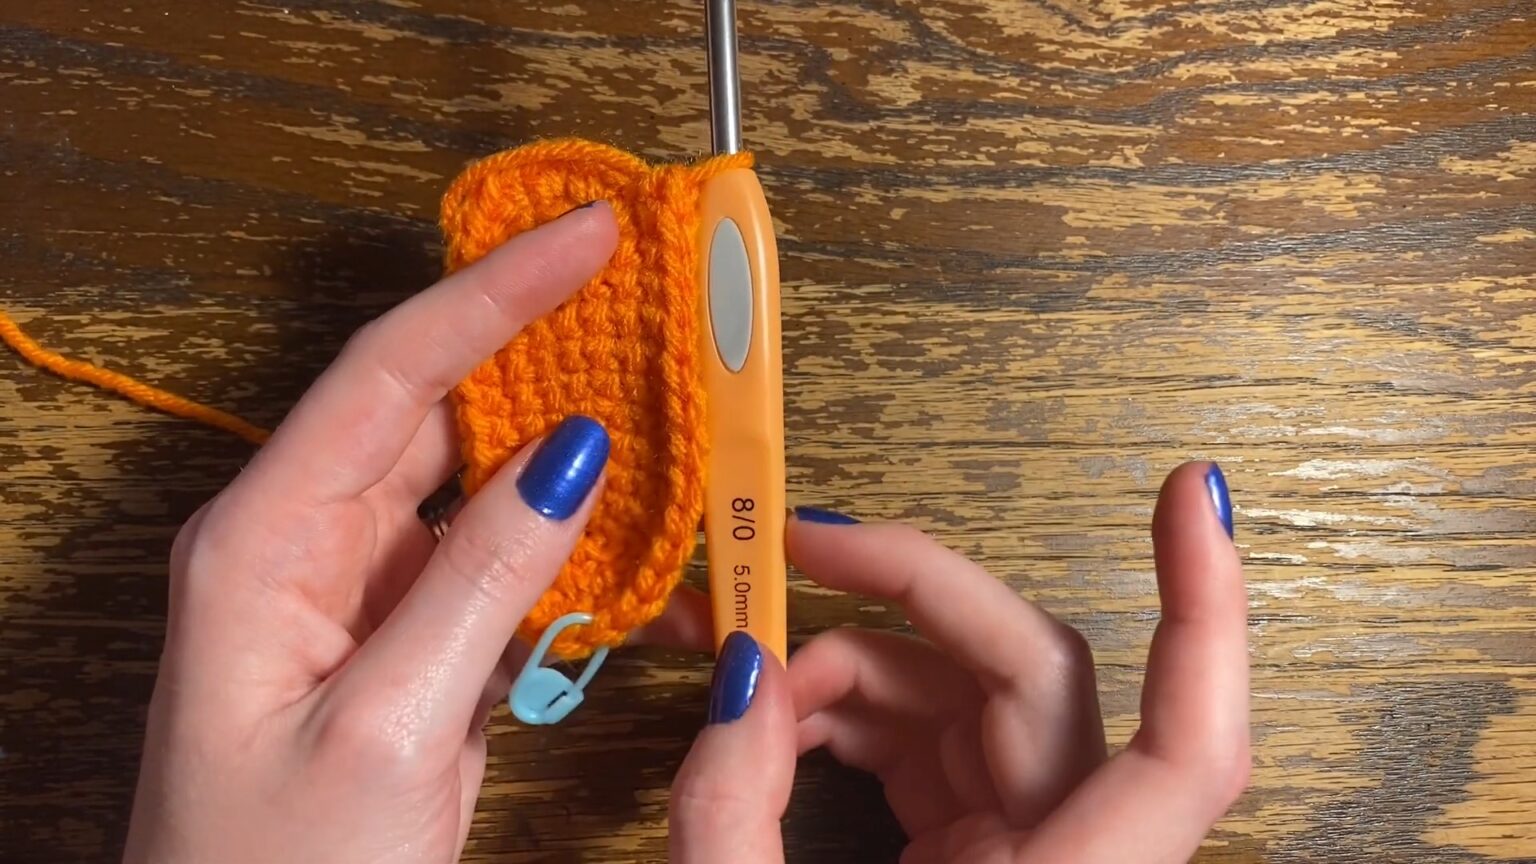
Round 1: Start with a slip knot. CH 11.
Round 2: SC into the second CH from the hook and SC across (10 SC). Rotate your work to crochet on the opposite side of the CH and SC 10 more into this side (20 SC).
Round 3: INC in the first ST, SC 8, INC three times (6 total SCs in those stitches), SC 8, INC twice (ending with 28 SC).
Round 4: SC 13, INC four times, SC 14, INC four times (44 SC).
Round 5–10: SC in each stitch around (44 SC). Check off each round as you finish!
Round 11: DEC, SC 20, DEC again, then SC to complete the round (42 SC).
Round 12–17: Repeat the DEC process, decreasing every few stitches as the pattern specifies, until 30 stitches remain.
Tip: Shape your pumpkin with even stuffing so it sits nicely.
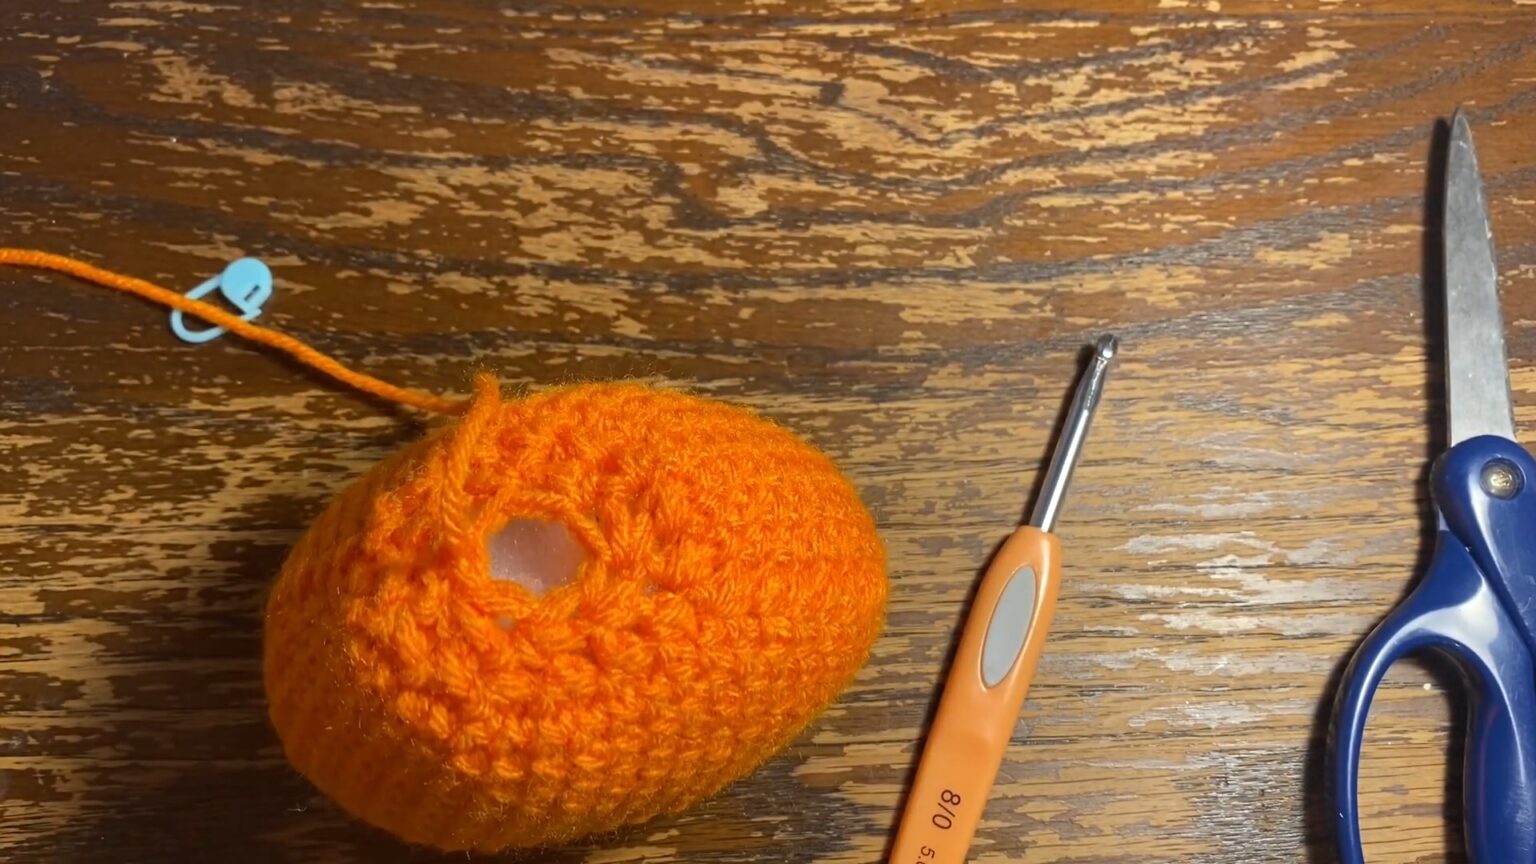
Round 18: DEC all the way around (15 stitches remain). Add more stuffing as needed.
Round 19 (Final): DEC all the way around again, leaving 7–8 stitches. Slip stitch to close, leave a long tail, and weave in the yarn.
Your pumpkin body is complete!
Stem
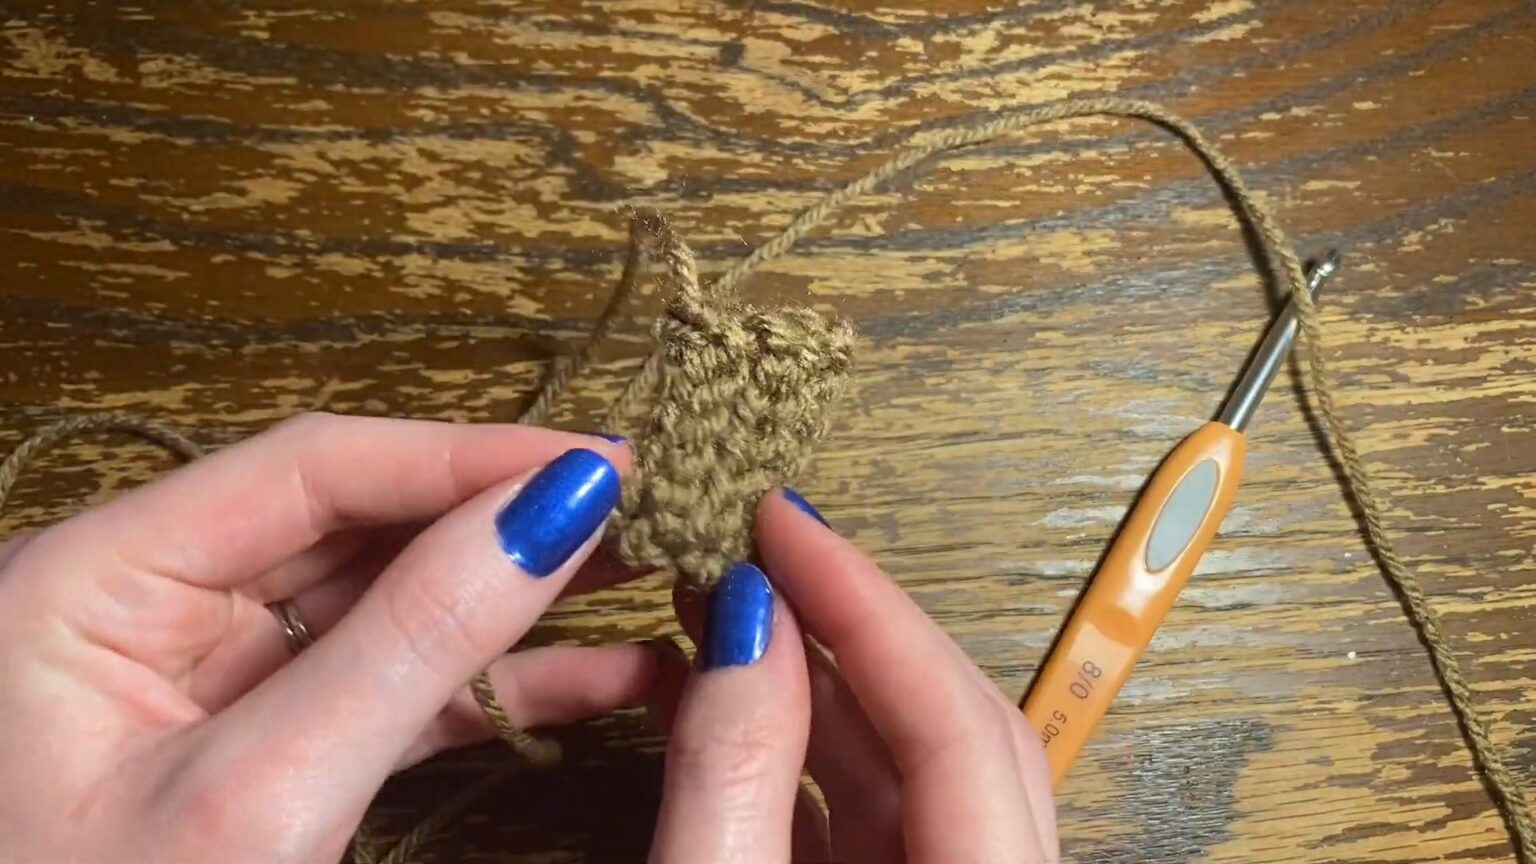
The stem is created with slip stitches and single crochets:
Start with a slip knot and loosely CH 6.
Slip Stitch (SL ST) into each CH across.
Chain 1, flip, and SL ST into the front loops only for the next row (this creates ridges).
Repeat the above step until your stem wraps neatly into a round piece (length of 5 SL ST rows is generally sufficient).
Seam the ends together, shape into a tube, and sew into the top middle of your pumpkin body.
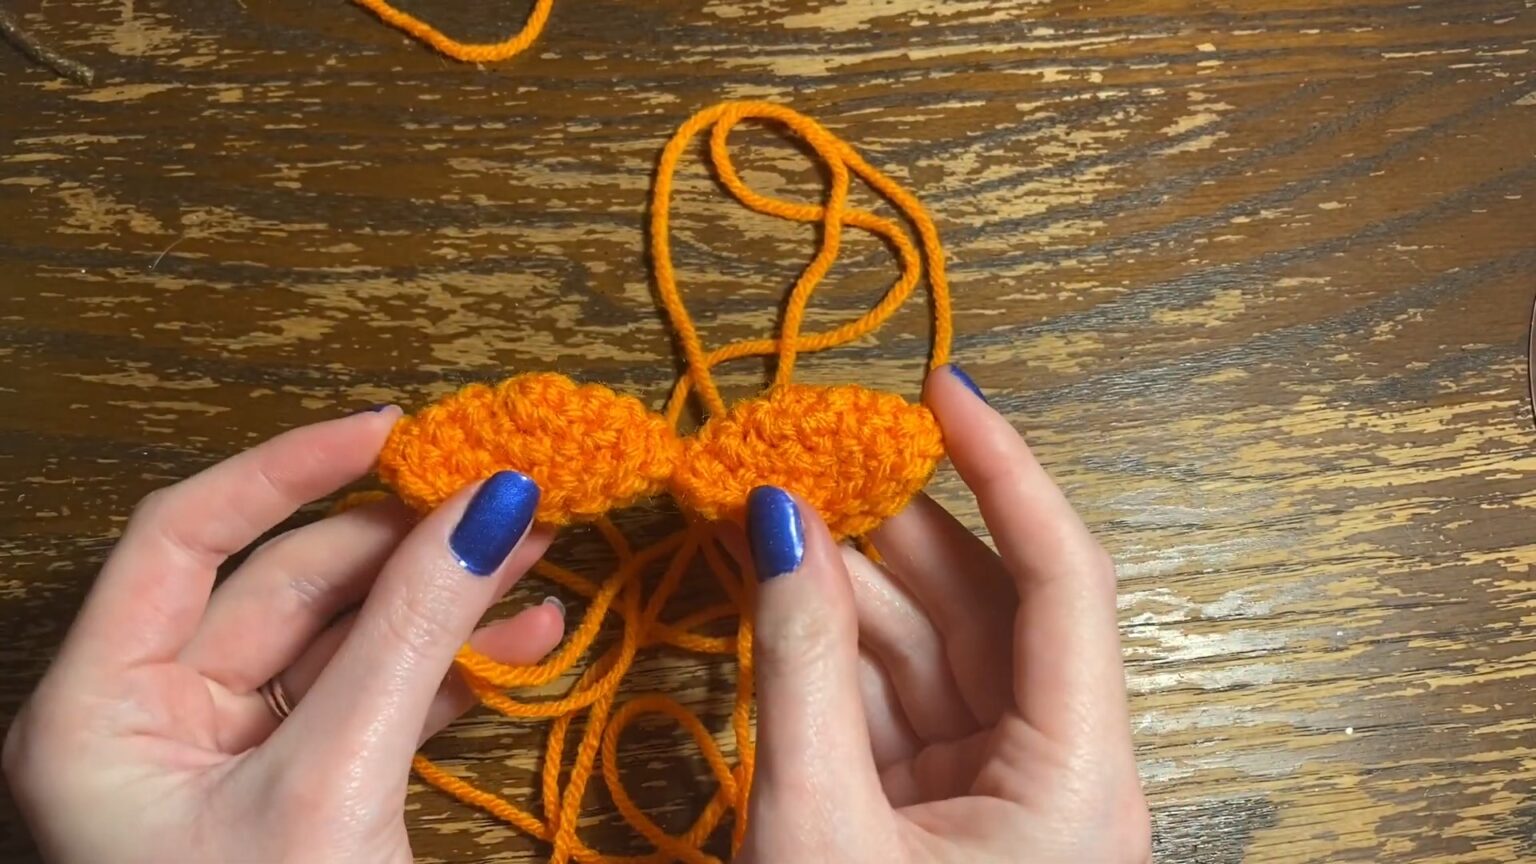
Ears (Make 2)
Begin with a Magic Circle, CH 1, and work 6 SC into the circle. Pull tight to close the loop.
Round 2: INC in each stitch (12 SC total).
Round 3: (INC, SC into next stitch) repeat around (18 SC).
Round 4: SC into each stitch around (18 SC).
SL ST to close, leaving a long tail for sewing. Attach the ears to the sides of the pumpkin.
Tip: Add a tiny ball of polyfill for firmer ears before sewing.
Leaf
For a crocheted leaf (optional):
Start with a long tail for sewing. Work a slip knot with the green yarn and CH 8.
SC into each CH across one side of the chain. Rotate, and work SC stitches back across the other side of the chain.
Tie off, shape the leaf, and use a yarn needle to attach it near the top of the stem.
Alternatively, cut a leaf shape out of green felt and glue it near the stem.
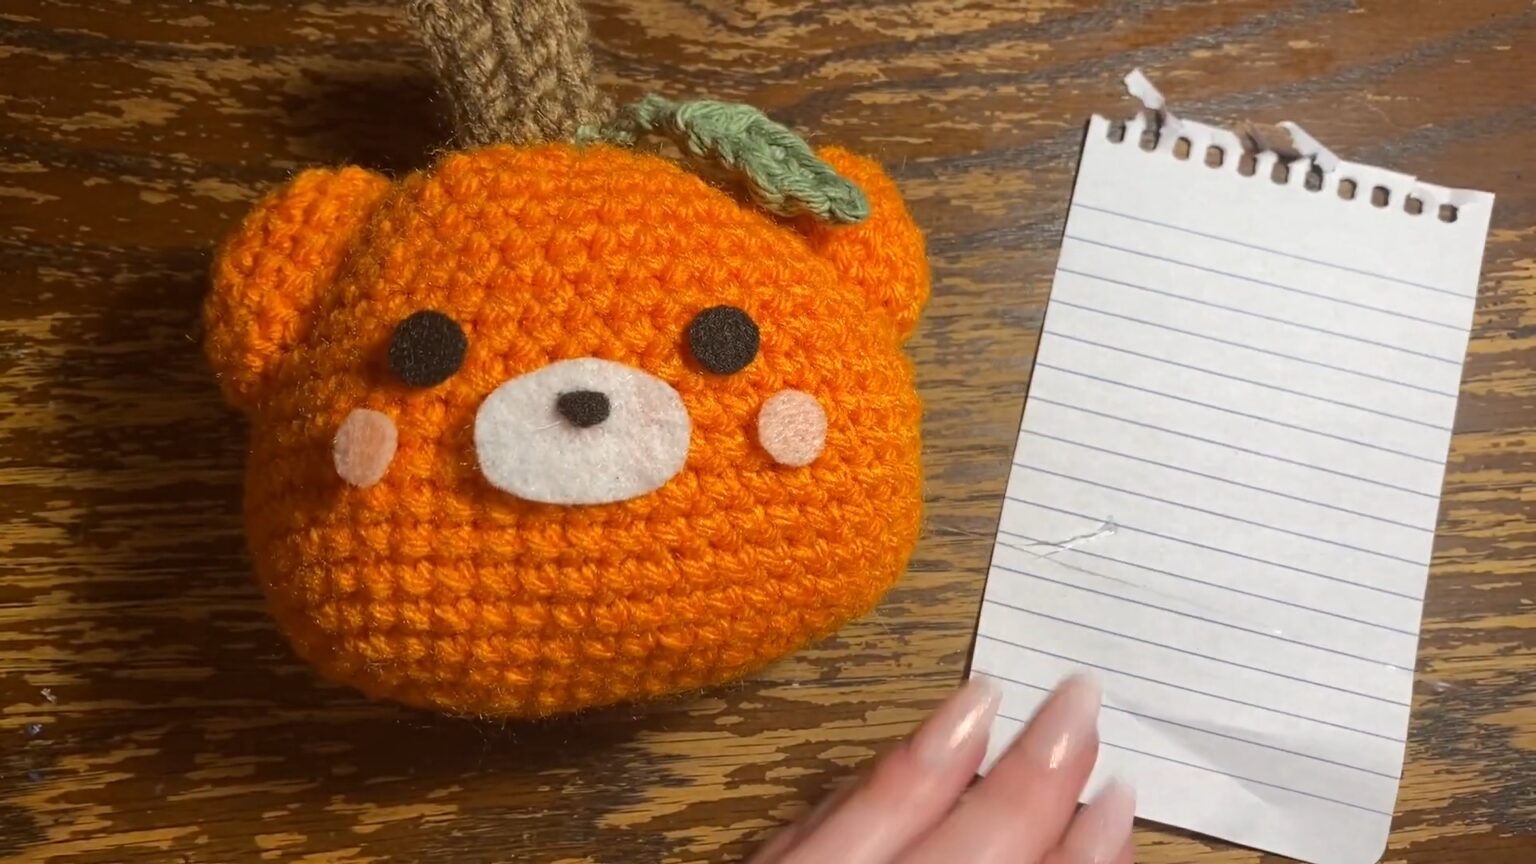
Face and Finishing Touches
Eyes and Cheeks: Cut two black circles for the eyes from felt, and two smaller pink circles for the cheeks.
Mouth: Cut a white oval with a nose shape at the top center.
Arrange the pieces on the body to your liking, then glue each in place using a hot glue gun (or fabric glue).
Key to Success
Use worsted weight yarn for a firm yet soft structure.
Select felt or yarn to personalize the face and leaf details.
Keep stitches consistent for even shaping.
Follow pattern instructions closely and ensure row stitch counts match.
Add filling to achieve your desired firmness and a polished look.