


How to Crochet Adorable Baby Loafers — Easy Step-by-Step Pattern
Crochet baby loafers are the cutest and coziest tiny shoes you can make for a new arrival, a baby shower gift, or a keepsake. This pattern uses common stitches and a simple sole-to-upper construction suitable for crocheters comfortable with basic shaping. Follow the steps below and refer to the material list and abbreviations before you begin.
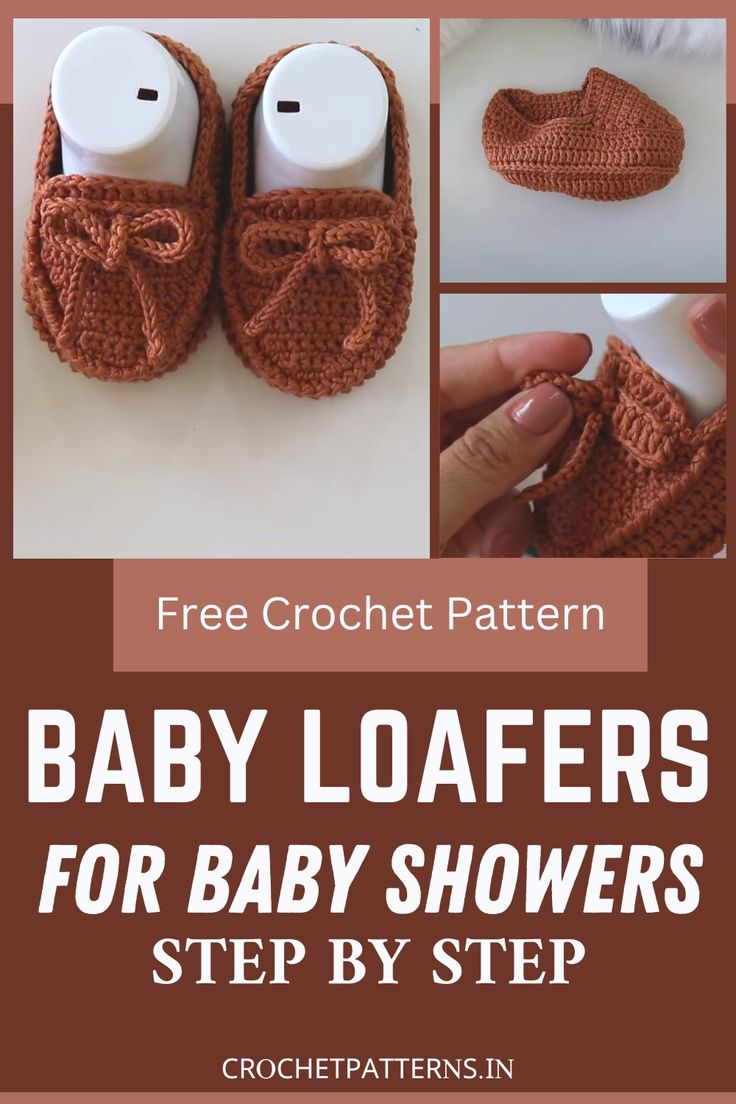
Finished crocheted baby loafers — a soft, handmade pair perfect for gifting.
Material List
- Yarn: Medium-weight yarn
- Crochet Hook: 2.2 mm hook or a suitable size to achieve gauge for your chosen yarn
- Scissors: For cutting yarn
- Yarn Needle: For weaving in ends and sewing pieces together
- Stitch Marker: To mark the start of rounds or important stitch placements
- Buttons or Embellishments (optional): For decorative detail
Abbreviations
- ch — Chain
- sc — Single Crochet
- hdc — Half Double Crochet
- dc — Double Crochet
- sl st — Slip Stitch
- bpSc — Back Post Single Crochet
- st(s) — Stitch(es)
- inc — Increase (two stitches in the same stitch)
- dec — Decrease (combine two stitches into one)
- rnd(s) — Round(s)
Pattern note: This pattern uses US terminology.
Step-by-step Pattern
Starting the Sole
Beginning Chain: Start with a slip knot and chain 19.
First Round: Skip 3 chains and into the fourth chain from the hook make a double crochet. Continue with a double crochet into each chain until the last chain. In the last chain, make 5 double crochets to round the end. Work back down the other side of the foundation chain, placing double crochets in each chain; in the final chain (the starting chain) make 2 double crochets. Join to the first double crochet with a slip stitch to close the round.
Shaping the Sole
Increasing Rounds: For the next rounds, increase at each end to shape the sole. Work a combination of sc, hdc, and dc as needed to create a smooth curve; adjust stitch counts slightly if needed to maintain an even shape. Continue rounds until the sole reaches the desired length for the baby size you are making.
Upper Shoe
Building Sides: Work a round of single crochets evenly around the edge of the sole without increasing. This creates the starting edge for the sides of the shoe.
Post Stitches for Texture: Introduce back post single crochets (bpSc) in the next round to add texture and structure; this indicates the beginning of the upper part of the shoe.
Constructing the Upper Part
Double Crochet Rows: Work several rows of double crochets atop the textured edge, keeping the stitch count consistent to build the sides upward. These rows form the body of the loafer.
Shaping the Toe and Heel
Toe Shaping: Begin decreasing across the center of the toe area by working decreases (dec) in targeted stitches so the toe rounds and narrows. Continue until the toe reaches the desired shape.
Heel Formation: Maintain the stitch pattern near the heel and reduce or stop increasing so the heel holds its shape against the foot.
Top Edge and Finishing Border
Top Edge: Finish the upper edge with a neat border such as a slip stitch round or a reverse single crochet (crab stitch) for a clean, finished look.
Final Touches
Cord or Strap: Create a cord or strap by chaining to a comfortable length and optionally slip stitching back along it to thicken. Fasten off leaving a tail for sewing.
Attaching the Strap: Sew the strap securely to the sides of the loafer at the chosen height. Depending on preference, this can serve as a decorative band across the top of the foot or an ankle closure.
Finishing: Weave in all ends securely. Add optional buttons, beads, or other embellishments to the strap or side for decoration.
Tips
- Check the fit by comparing the sole to the baby's foot or a template; adjust the number of rounds for a larger or smaller sole as needed.
- Use softer yarns for newborns to ensure comfort, and avoid embellishments that could be a choking hazard for very young babies.