Crochet Water Bottle Carriers
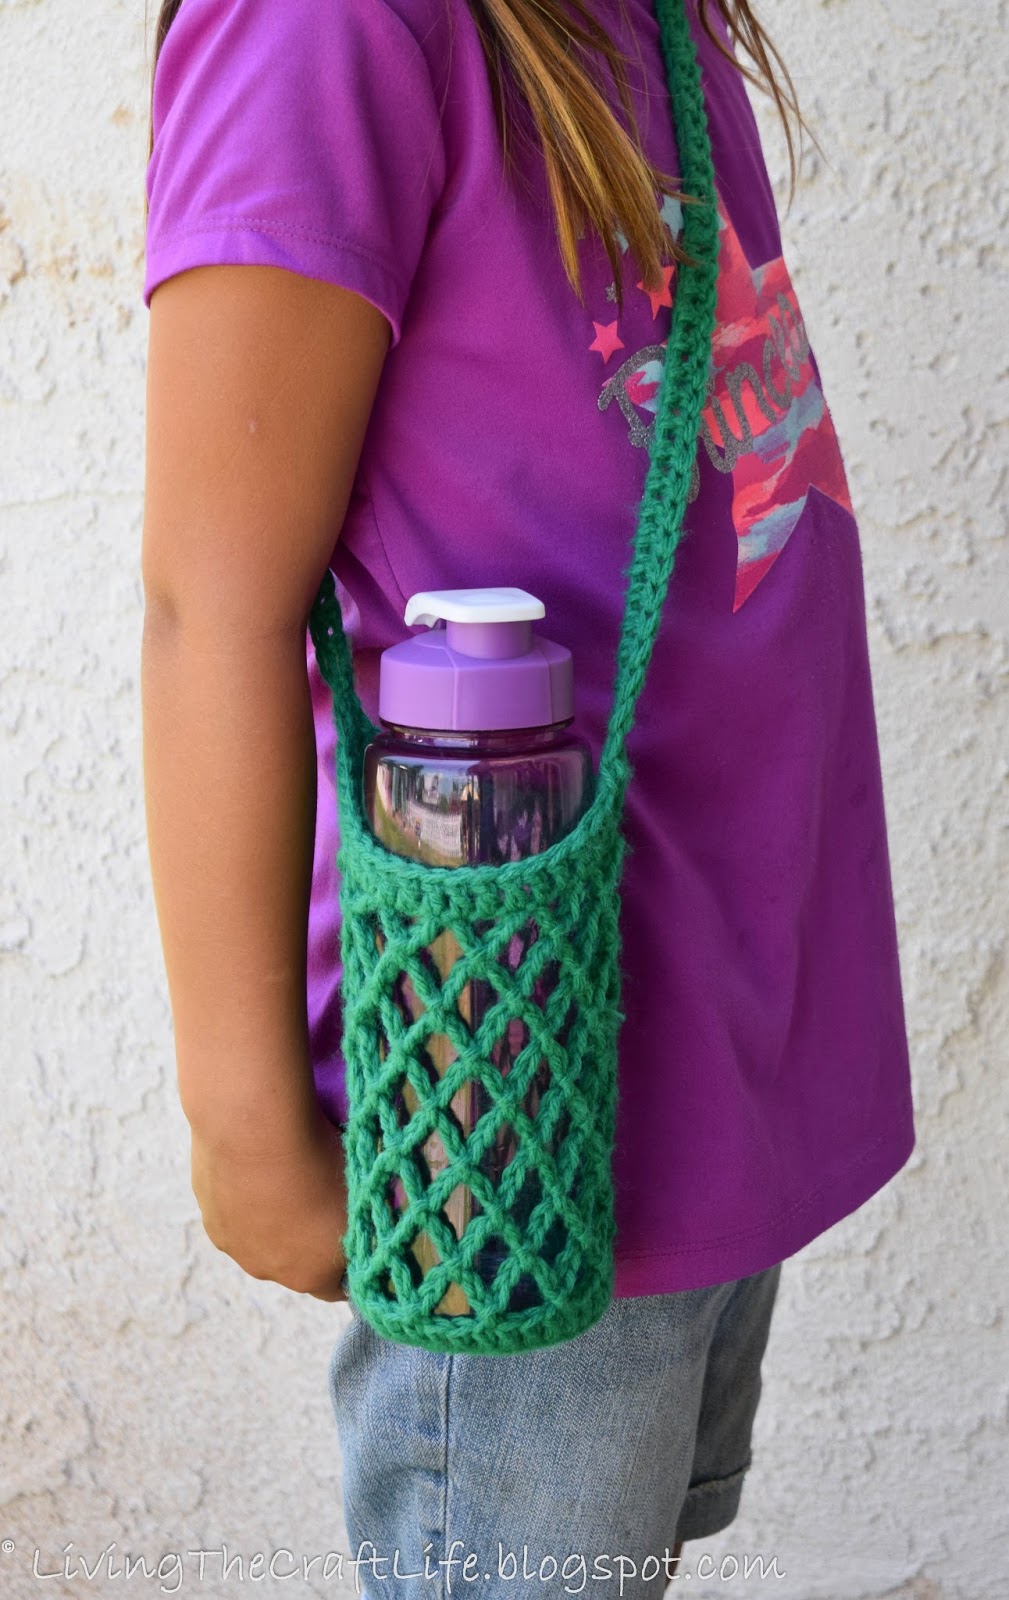
Discover the art of crafting stylish and practical crochet water bottle carriers! These unique accessories are not only functional but also add a touch of creativity to your everyday life. With just a few simple crochet stitches, you can create a carrier that perfectly fits your water bottle, making it easy to carry around wherever you go. Crochet water bottle carriers also make for thoughtful and unique gifts. Handmade with love, they show that you've put time and effort into creating something special for your loved ones. Whether it's for a friend's birthday, a holiday present, or a surprise gesture, a crochet water bottle carrier is sure to be appreciated and cherished.
Materials:
Size H hook
Worsted weight yarn
Yarn Needle
Gauge: Pattern should fit most standard-sized bottles. With the weight of the water bottle, this stretched to about 9" tall. If you want one for smaller bottles, remove some row 6 repeats, or for taller, add some row 6 repeats.
Pattern:
Starting with magic circle, ch 3, and dc 11 in the ring. Sl st to top of ch-3. (12 sts)
Round 2: Ch 3, and dc in same st, 2 dc in each st around, Sl st to top of ch-3. (24 sts)
Round 3: Ch 3, and dc in same st, *1 dc in next st, 2 dc in next st, repeat from * around. Sl st to top of ch-3. (36 sts)
Round 4: Ch 3, dc in the BACK LOOP of each stitch round. Sl st to top of ch-3.(36 sts)
Round 5: *Ch 5, sk 2 sts and sl st into next st. Repeat from * around, ending with a sl st into the beginning stitch.
Round 6: Sl st into the first three chains from the previous round's ch-5, then *ch 5 and sl st into the next ch-5 space. Repeat from * around. Sl st into the 3rd sl st at the beginning of the round.
Repeat round 6 until you get the desired height. I repeated 6 times for the taller water bottles my kids had.
Round 13: Sl st into the first three chains from the previous round's ch-5, *ch 2, sl st into ch-5 space, repeat from * around and sl st into the 3rd sl st at the beginning of the round.
Round 14: Ch 3, dc in each st around (36 sts)
Now, make the strap according to the size you want.
Kids Less than 6, ch 75, Kids 6+ ch 85, Teens/adults ch 100. You can adjust accordingly.
After making the chain, make sure you keep the chain straight (no twisting) and counting stitches backwards, attach the chain to the 16th stitch counting counterclockwise (usually you work clockwise in the round, but for this count 16 counterclockwise), with slip stitch looking upside down on the piece. Sl st into the next two sts, still working counter clockwise, and dc into each ch of the strap all the way to the other side. Hopefully you kept your chain straight or your strap will be twisted! Sl st and tie in the ends to secure the strap in place.
You're finished!