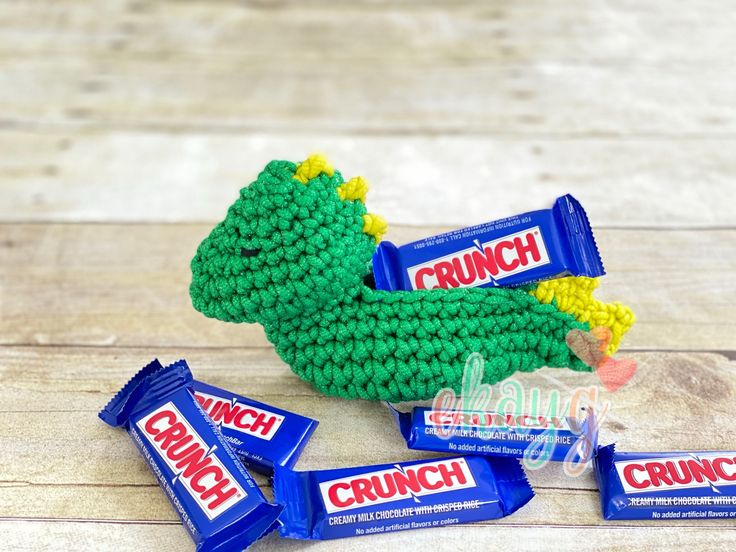
Crochet Dinosaur Scrubby
The Crochet Dinosaur Scrubby is an adorable and practical addition to your kitchen or bathroom essentials. With its charming design and functional use, this little dinosaur will make washing dishes or scrubbing in the shower a delightful experience. Its soft texture is gentle on your skin, while the durable yarn ensures it stands the test of time. Whether you're a crochet enthusiast or just someone who appreciates cute and useful items, the Crochet Dinosaur Scrubby is sure to bring a smile to your face every time you reach for it.
Materials:
- YARN BEE, SCRUB-OLOGY, SCRUB IT! (5) – Green – 1 oz (27 yds)
- YARN BEE, SCRUB-OLOGY, SCRUB IT! (5) – Lime Green – approximately 3 yds
- Small amount of black cotton yarn for the eyes
- Crochet Hook, H – 5mm
- Scissors
- Large eye tapestry needle
Terms and abbreviations to know:
- magic ring
- rnd, rnds – round, rounds
- st, sts – stitch, stitches
- sl st – slip stitch
- sk – skip
- sc – single crochet
- hdc – half double crochet
- tr – triple crochet
- inc – increase, 2 sc sts in same st
- tog – together
- FLO – front loop only
- picot
Ch 3
Sk 2nd ch from hook
Sl st into 3rd ch from hook
sc2tog – this is a sc decrease, combining 2 sts into only 1
Insert hook into the next stitch.
Pull up a loop.
Insert hook into the next st.
Pull up a loop.
Yarn over and pull through all 3 loops.
Notes: The body of the Dinosaur Scrubby is worked from the bottom up, in the rnd, with no joining. The dinosaur back is left open, with no stuffing, to place the soap in for clean, creative fun! Use it as a bath toy, a soap saver, a dish scrubby, or just a fun soap dish! This pattern is so simple!
Dinosaur Scrubby
Body – beginning at the bottom, with A
Begin with a magic ring.
Rnd 1: 6 sc in magic ring; 6 sts
Rnd 2: inc in each st around; 12 sts
Rnd 3: (inc, sc in next st)6x; 18 sts
Rnd 4: (inc, sc in next 2 sts)6x; 24 sts
Rnd 5: (inc, sc in next 3 sts)6x; 30 sts
Rnd 6: sc in next 14 sts, 3 sc tog in each of the next 2 sts, sc in next 14 sts; 34 sts
Rnd 7: sc in next 16 sts, 3 sc tog in each of the next 2 sts, sc in next 16 sts; 38 sts
Rnd 8: sc in next 18 sts, 3 sc tog in each of the next 2 sts, sc in next 18 sts; 42 sts
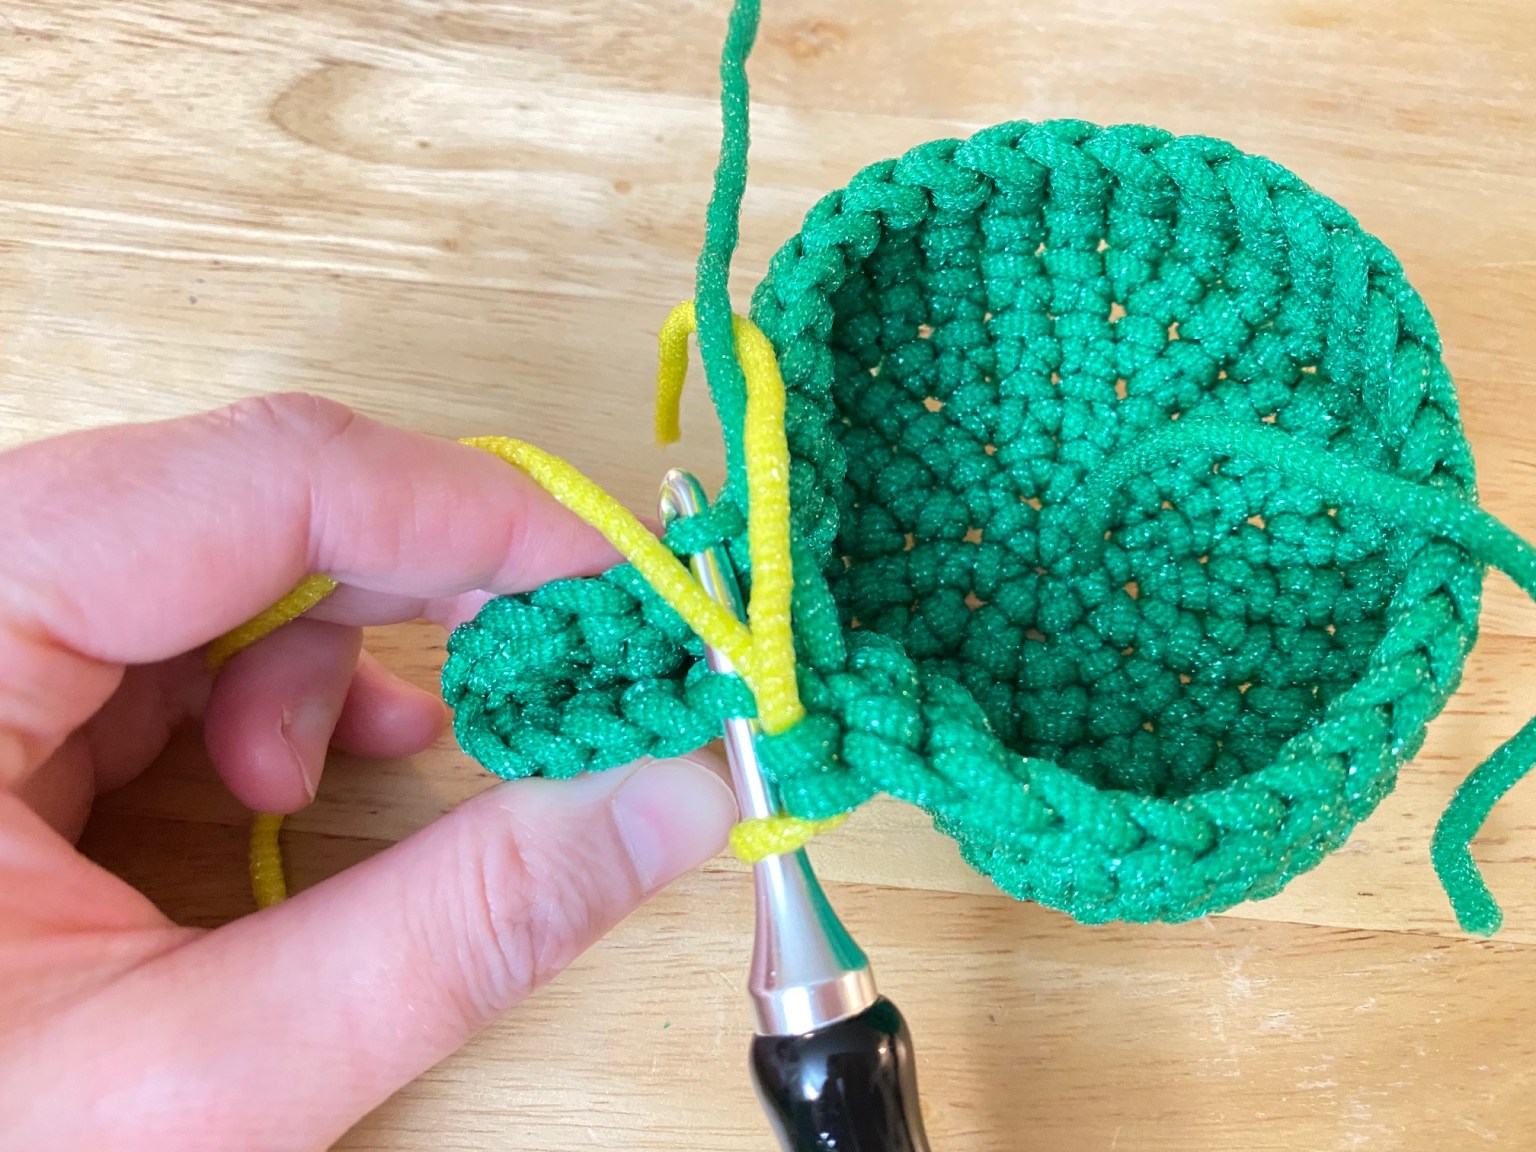
Rnd 9: sc in next 15 sts, pulling lime green through to complete the last st, but do not fasten off green, working the spikes through the back loops of the next 6 sts AND the front loops of the 6 sts across from them, to close the tail, [sc in next st, (hdc, picot, hdc) in next st, sc in next st]2x, sl st in last st, fasten off the lime green, and pick up green on the other side of the tail, pull green through first st after the tail, sc in next 14 sts
Rnd 10: sc in next 6 sts, sk over 9 sts, the tail, and next 9 sts, sc in next 6 sts; 12 sts
Rnd 11: (inc, sc in next st)6x; 18 sts
Rnd 12: (inc, sc in next 2 sts)6x; 24 sts
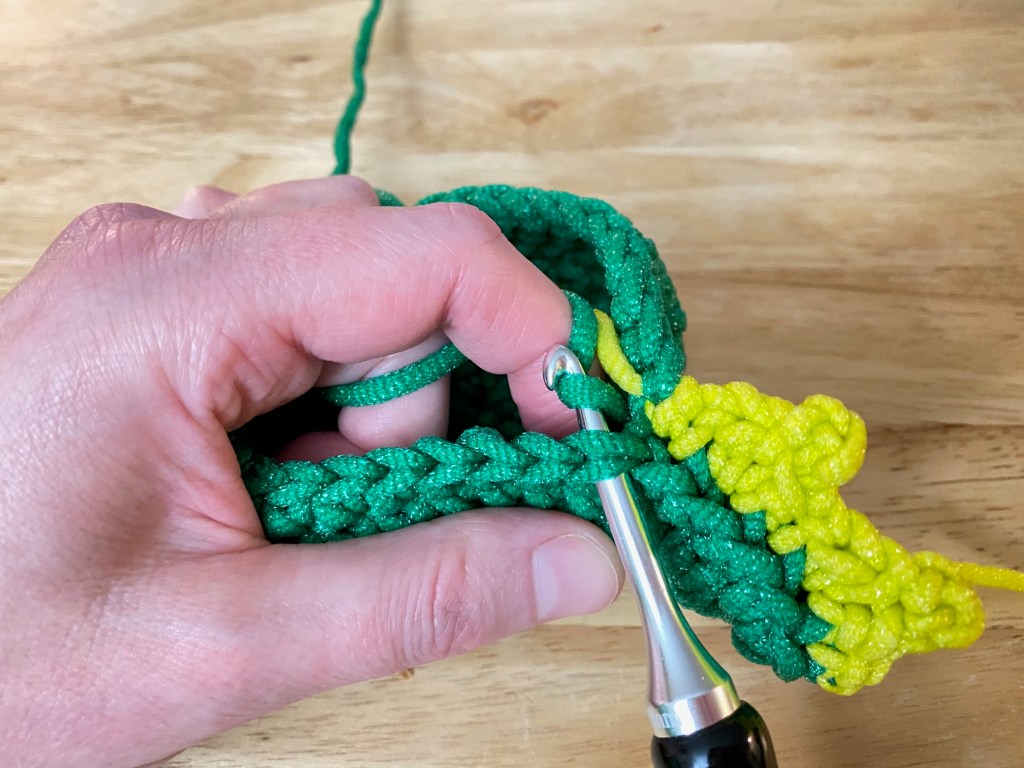
*Note: all tr sts are in lime green. Change colors by pulling the new color through to complete the last st before the color change.
Rnd 13: 3 inc, sc in next 10 sts, in lime green tr, sc in next 10 sts; 27 sts
Rnd 14: sc in each st around; 27 sts
Rnd 15: sc2tog 3x, sc in next 5 sts, sc2tog, sc in next 3 sts, in lime green tr, sc in next 2 sts, sc2tog, sc in next 4 sts, sc2tog; 21 sts
Rnd 16: sc2tog 2x, sc in next 15 sts, sc2tog; 18 sts
Rnd 17: sc2tog, sc in next 4 sts, sc2tog, sc in next 2 sts, in lime green tr, sc in next st, sc2tog, sc in next 4 sts; 15 sts
Rnd 18: (sc2tog, sc in next 3 sts)3x; 12 sts
Before closing, use black cotton yarn to sew on the eyes, about rnds 14-15. Then knot and tuck all ends inside the head. I weaved in some of them, but even though you aren’t stuffing the head, weaving in ends isn’t necessary, as long as they’re securely knotted. Using your tapestry needle, weave the final tail through the front loop of each st of the last rnd, and pull closed. Knot and weave inside the head. Weave in ends from the beginning and the tail, and any of the visible strands.