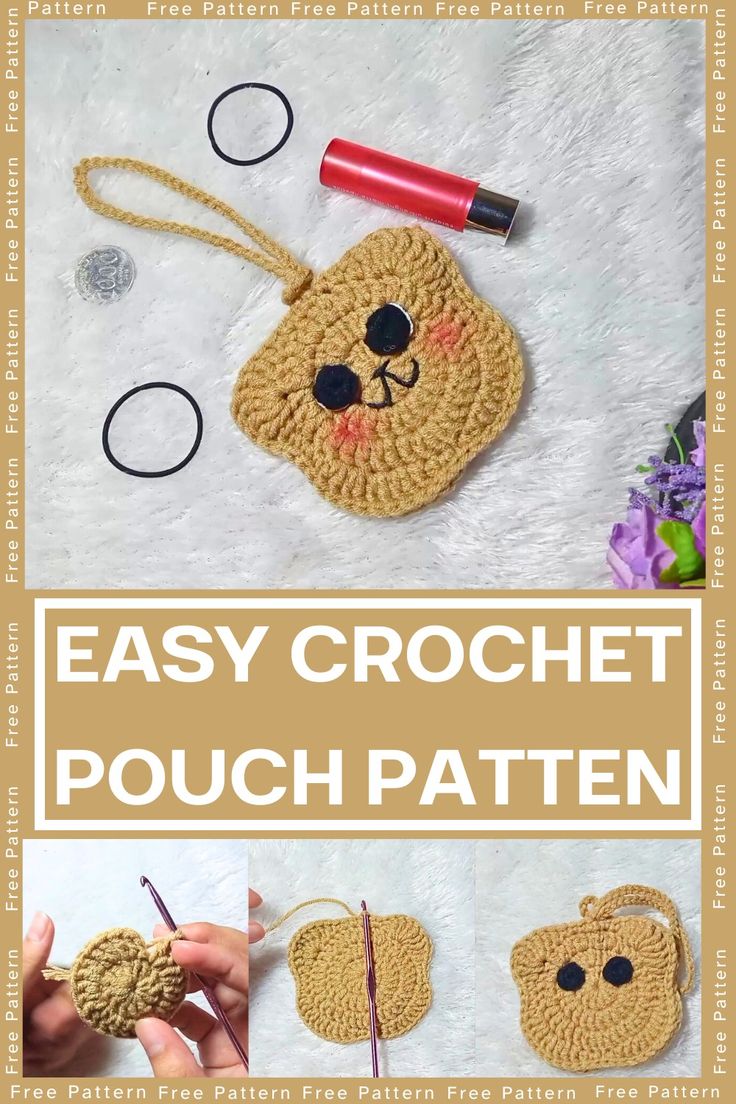
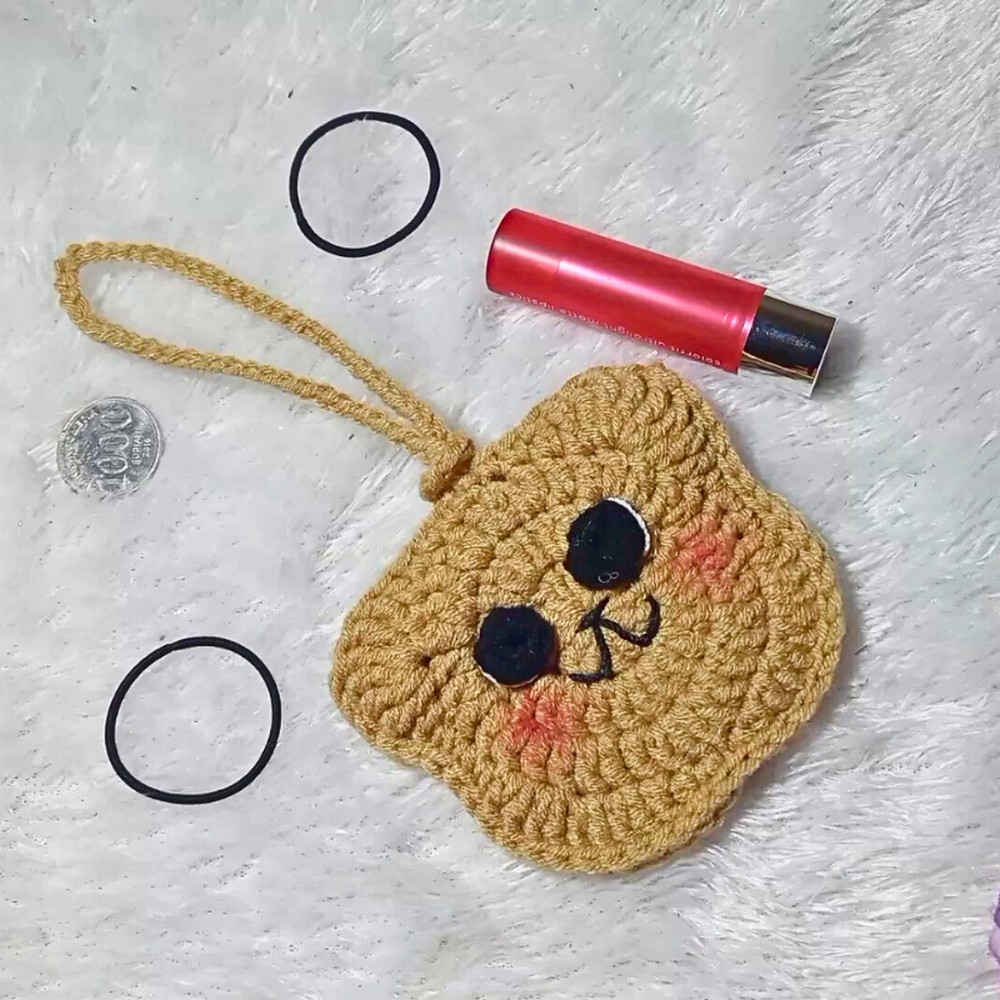
Crochet Mini Handmade Coin Purse/Pouch
Looking for a cute addition to your accessories collection? Look no further than this adorable Crochet Mini Handmade Coin Purse/Pouch! Handcrafted with love and attention to detail, this charming little pouch is perfect for storing your coins, small trinkets, or even as a lovely gift for a friend. With its intricate crochet design and compact size, it's a practical yet stylish way to keep your essentials organized. Treat yourself to this delightful handmade creation and add a touch of charm to your everyday life!
Materials and Preparation
To create this beautiful Crochet Mini Pouch (or coin purse), you’ll need the following materials:
Yarn:
- Black and brown milk cotton thread
- White polyeri thread
- Black thread (for detailing)
- Hook: 3.5 mm crochet hook
Additional Tools:
- Scissors
- Tapestry needle (for tidying up loose threads)
Yarn Weight: Choose lightweight or medium yarn for a sturdy yet flexible result.
Abbreviations and Notes
Here are abbreviations used in the pattern:
- MR: Magic Ring
- CH: Chain
- SC: Single Crochet
- DC: Double Crochet
- TR: Treble Crochet
- SL ST: Slip Stitch
- INC: Increase (adding stitches to widen the piece)
Notes:
- Use a Magic Ring for creating circular crochet pieces efficiently.
- Be mindful of stitch counts mentioned for symmetry and structure.
- Always secure yarn ends and tidy up for a neat finish.
Gauge, Approximate Size, and Pattern Notes
Gauge:
Although not explicitly mentioned, it’s recommended you test your gauge. For a snug mini pouch, try 14 DC per 4 inches.
Approximate Size:
The finished pouch measures approximately 3–4 inches in diameter when closed.
Special Techniques:
The pattern uses Magic Ring to start, and treble crochet clusters for decoration techniques.
Gauge Swatch:
A swatch isn’t necessary for this project, but practicing Magic Ring and treble crochet clusters may help.
Step-by-Step Pattern
Follow these instructions to create the pouch step-by-step:
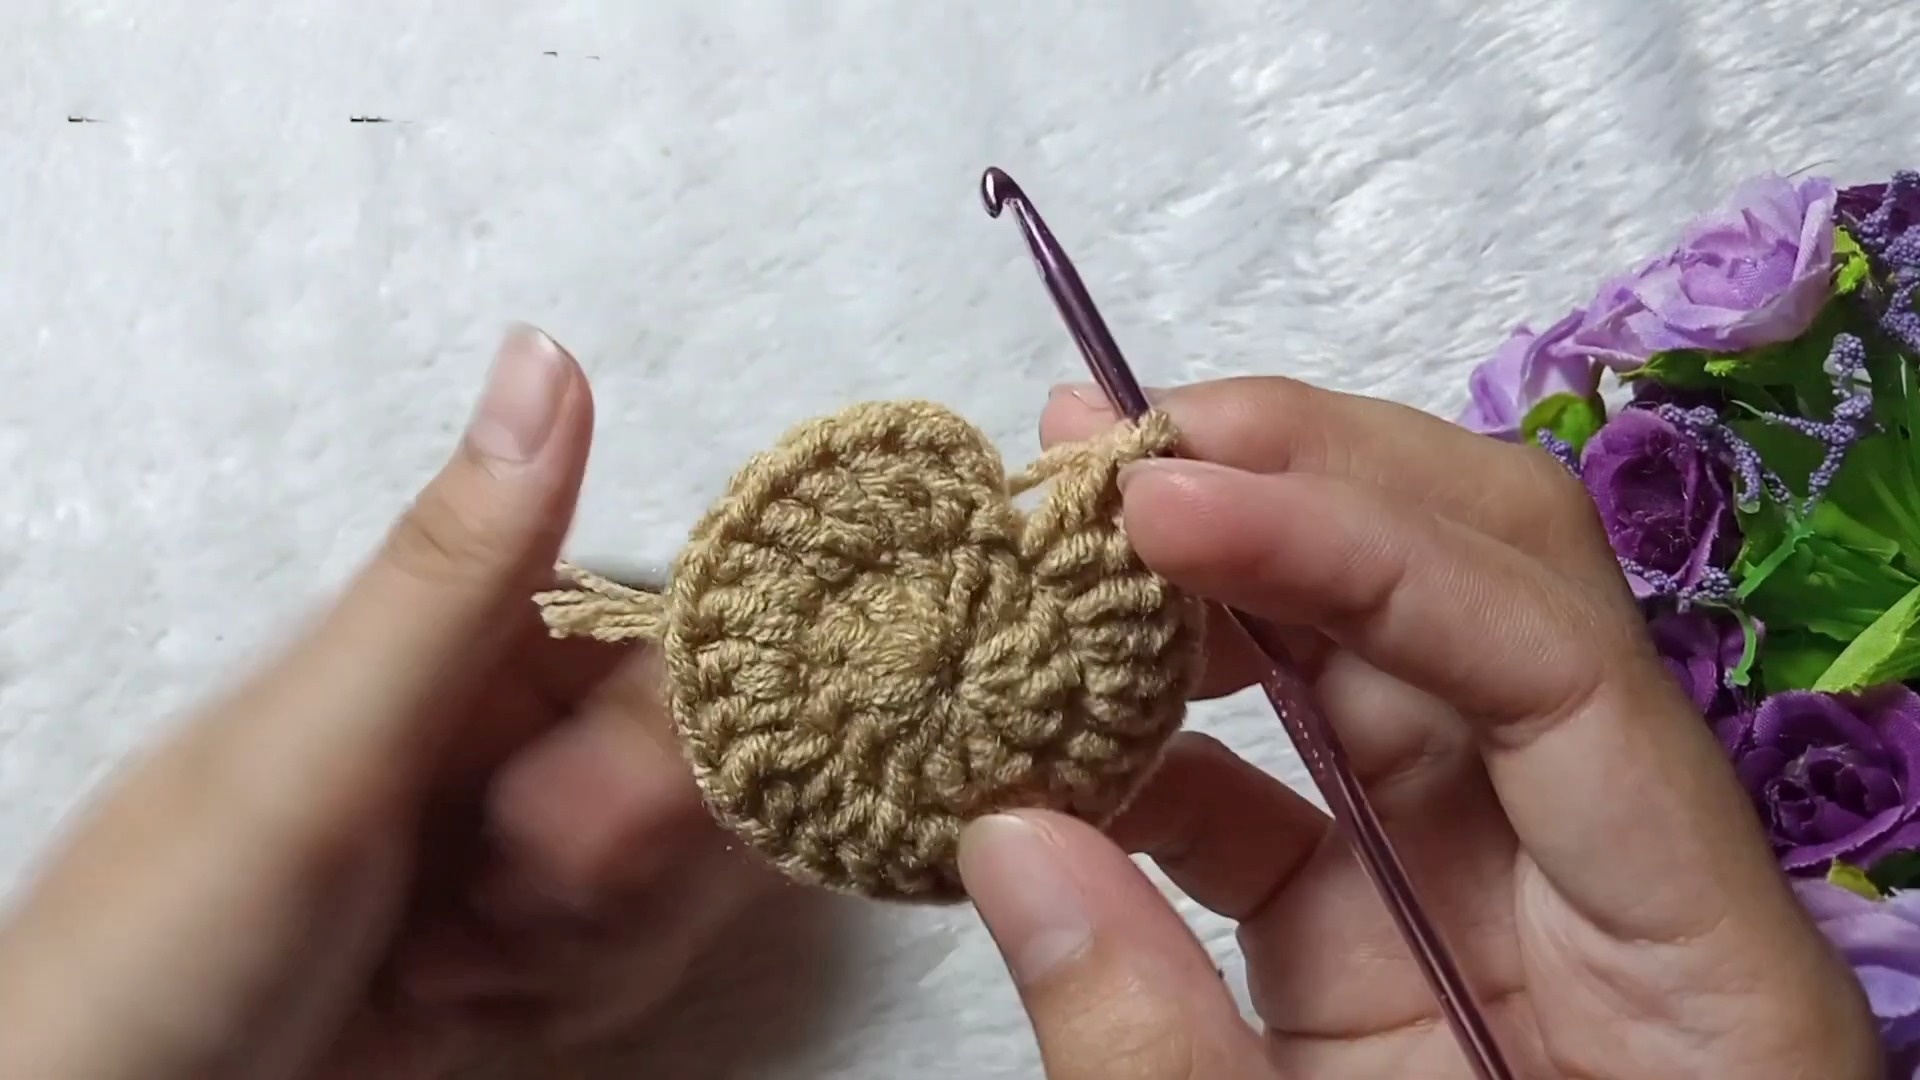
Base of the Pouch
Start With a Magic Ring (MR):
Make a MR and secure it tightly.
Round 1:
CH 2 (counts as the first stitch).
Work 12 DCs inside the MR.
Join the round with a SL ST at the top of the first DC.
Round 2 (Increase Round):
CH 2.
Work 2 DCs into each stitch around (increase in every stitch).
SL ST in the first DC to finish the round.
Round 3:
CH 2.
Work 1 DC in the first stitch and 2 DCs in the next stitch (INC). Repeat this formula around.
SL ST to close the round.
Decorative Layer
Round 4:
CH 1.
Work 4 SCs in sequence, then add:
1 DC in the next stitch
1 TR in the following stitch
5 TRs in the same stitch (form a cluster for decoration).
Continue with:
1 TR in the next stitch
1 DC in the next stitch
Single crochets (SCs) to complete the stitch count symmetry.
Repeat Round 4 to build decorative scallops around the edge.
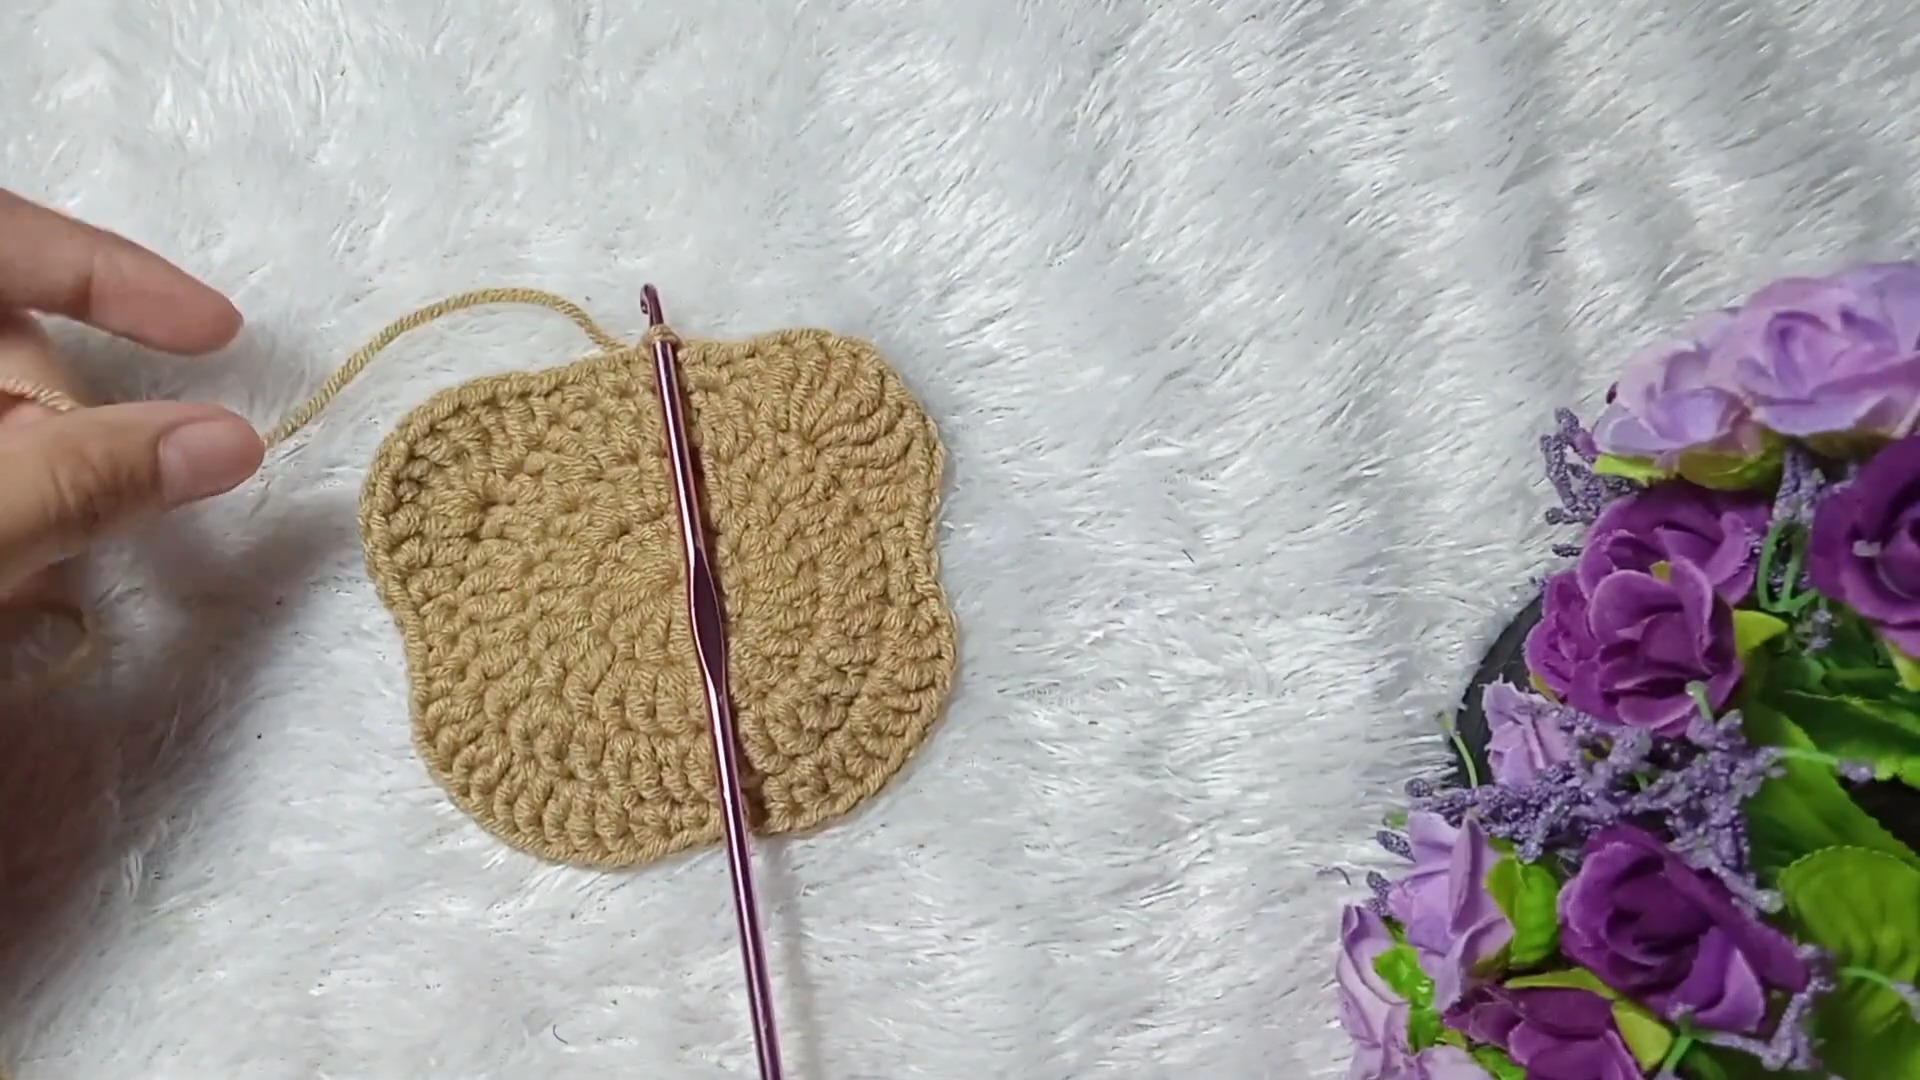
Creating Two Pieces
Make two identical pieces using the same formula above as the base and decorative scallop edge.
Joining the Pieces
Slip Stitch to Join:
Using black thread, start joining the pieces by working SL STs in the third part of the treble crochet clusters (from Round 4). This creates an aesthetic border.
Tie Off:
Make a final chain after completing the round, cut the thread, and tidy up loose ends.
Adding Details (Optional)
Create Chains for Straps or Accessories:
CH 55 for a strap, secure with SL ST and cut the thread.
Alternatively, you can add smaller decorative chains (e.g., CH 7 rings).
Add Eyes (Decoration):
Use Magic Rings to crochet a small «eye» detail:
CH 1, SC inside the MR, join with SL ST, then cut the thread.
Final Touches
Trim and tidy up all loose threads with the tapestry needle.
Check symmetry and stitch count for perfection.
Add additional decorations or embellishments, as desired.