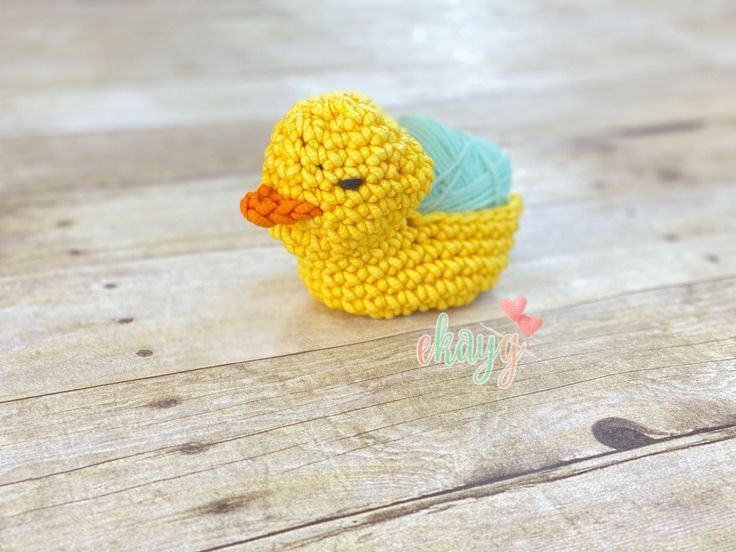
Crochet Ducky Scrubby
The Crochet Ducky Scrubby is an adorable and practical addition to any kitchen or bathroom. With its bright yellow color and cute duck design, this handmade scrubby is sure to bring a smile to your face while helping you clean up. Made with soft and durable yarn, this little ducky is perfect for gently exfoliating your skin or scrubbing away tough messes. Its compact size and handy loop make it easy to hang dry after use, ensuring it stays fresh and ready for the next cleaning session. Say goodbye to boring sponges and hello to the fun and functional Crochet Ducky Scrubby!
Materials:
- YARN BEE, SCRUB-OLOGY – Lemon – a little over 1 oz
- YARN BEE, SCRUB-OLOGY – Orange – small amount for beak
- Small amount of black cotton yarn for the eyes
- Crochet Hook, H – 5mm
- Scissors
- Large eye tapestry needle
Terms and abbreviations to know:
- magic ring
- rnd, rnds – round, rounds
- st, sts – stitch, stitches
- sl st – slip stitch
- sk – skip
- sc – single crochet
- inc – increase, 2 sc sts in same st
- hdc – half double crochet
- dc – double crochet
sc2tog – this is a sc decrease, combining 2 sts into only 1
Insert hook into the next stitch.
Pull up a loop.
Insert hook into the next st.
Pull up a loop.
Yarn over and pull through all 3 loops.
Notes: The body of the Ducky Scrubby is worked from the bottom up, in the rnd, with no joining. It is made entirely in one piece, with the beak as part of the continuous rnd. The duck back is left open, with no stuffing, to place the soap in for clean, creative fun! Even though the duck is left open, without stuffing, I didn’t weave all ends in perfectly. Some can just be securely knotted inside the head, and tied off. Weave in any visible ends well. Use it as a bath toy, a soap saver, a dish scrubby, or just a fun soap dish!
Ducky Scrubby
Body – beginning at the bottom, with A
Begin with a magic ring.
Rnd 1: 6 sc in magic ring; 6 sts
Rnd 2: inc in each st around; 12 sts
Rnd 3: (inc, sc in next st)6x; 18 sts
Rnd 4: (inc, sc in next 2 sts)6x; 24 sts
Rnd 5: (inc, sc in next 3 sts)6x; 30 sts
Rnds 6-8: sc in each st around; 30 sts
Rnd 9: sc in next 14 sts, 3 sc in each of the next 2 sts, sc in next 14 sts; 34 sts
Rnd 10: sc in next 6 sts, sk next 20 sts, sc in next 6 sts; 12 sts
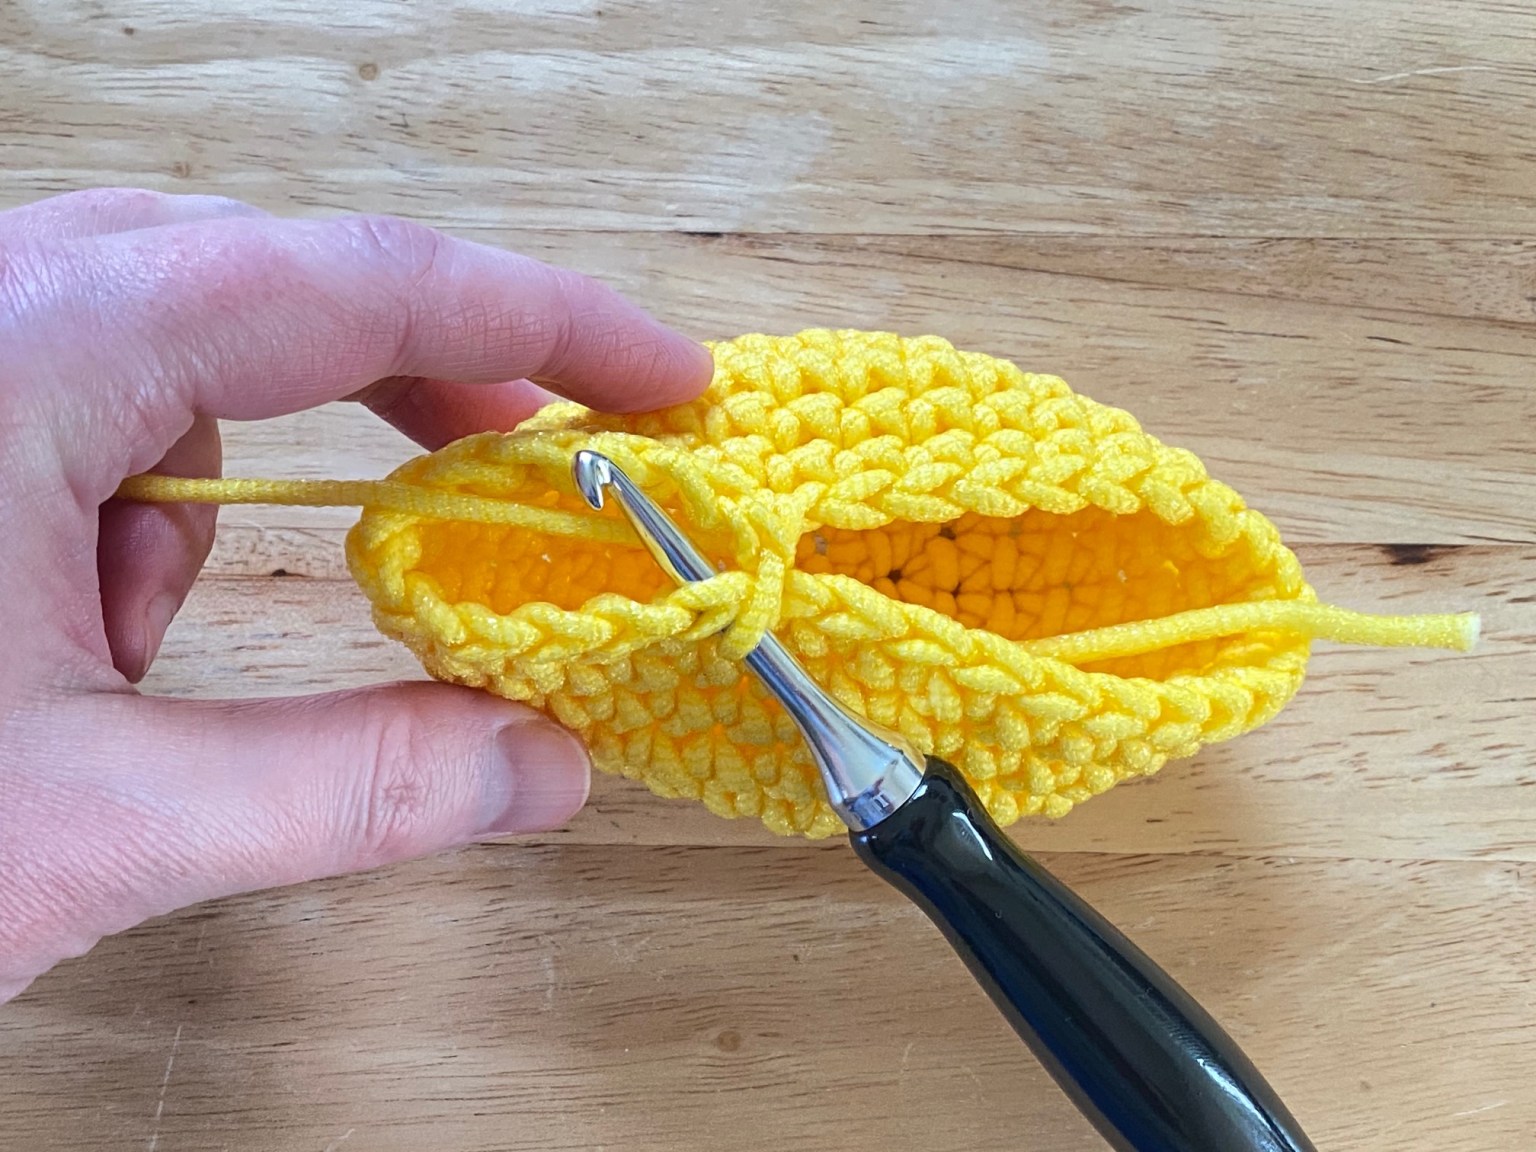
Rnd 11: (inc, sc in next st)6x; 18 sts
Rnd 12: (inc, sc in next 2 sts)6x; 24 sts
Rnd 13: sc in each st around; 24 sts
Rnd 14: sc in next 4 sts, pull orange through to complete last st, drop yellow, but don’t cut, in orange, ch 4, turn and hdc in 3rd ch from hook, dc in last orange ch, turn work so that you are laying that dc across the last 4 yellow sts just worked, and with orange sl st into the last st of rnd 13,
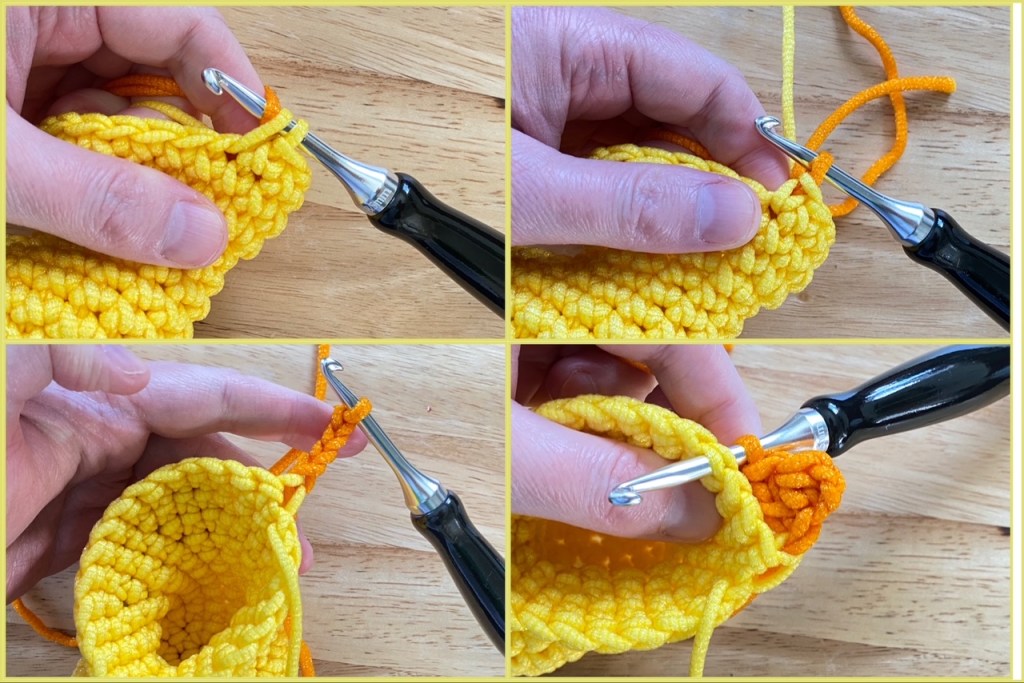
Cut orange, knotting the ends off inside the duck’s head, pick yellow back up where you left off, and sc in the remaining sts around; still 24 sts around, including the skipped yellow sts, and NOT including the beak (see pictures 2-4 for the process of the beak)
*NOTE: your last st of rnd 14 should be in the same st where you attached the side of the beak.
Rnd 15: your first sts will be using the skipped yellow sts behind the beak, and then continuing on around (sc2tog, sc in next 6 sts)3x; 21 sts

Rnd 16: (sc2tog, sc in next 5 sts)3x; 18 sts
Rnd 17: (sc2tog, sc in next 4 sts)3x; 15 sts
Rnd 18: (sc2tog, sc in next 3 sts)3x; 12 sts
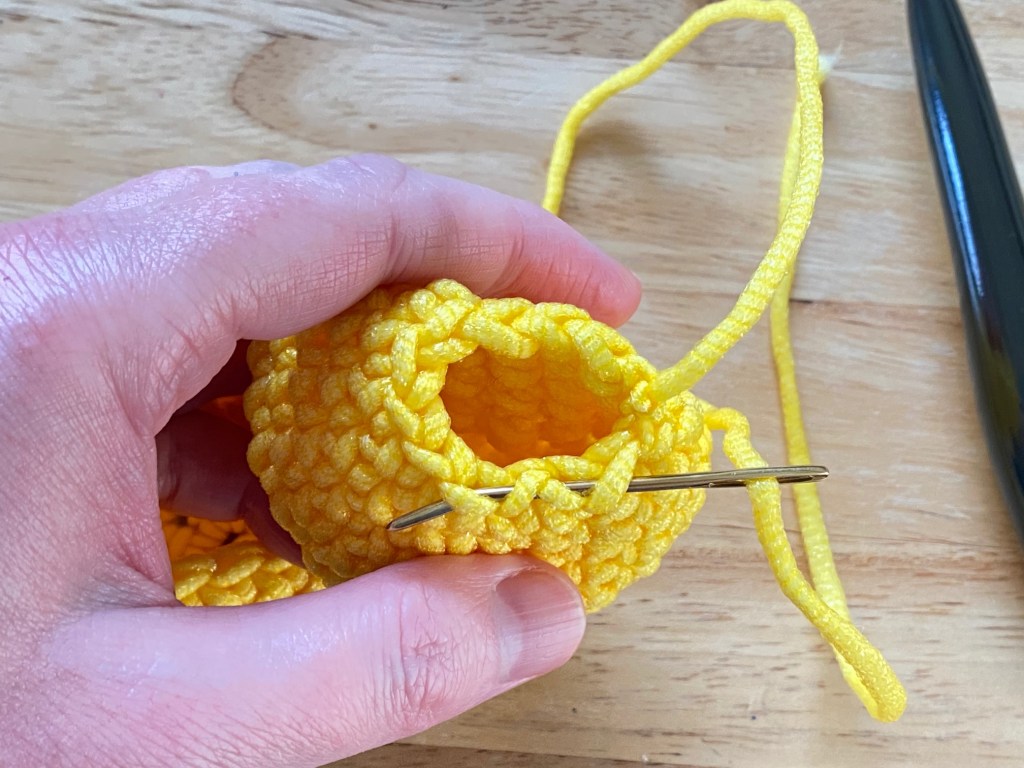
Fasten off, leaving a bit of a tail to sew closed.
Before closing, use black cotton yarn to sew on the eyes, about rnd 14. Wrap the cotton yarn around 1 sts about 4 or 5 times. Then knot and tuck all ends inside the head. I weaved in some of them, but even though you aren’t stuffing the head, weaving in ends isn’t necessary, as long as they’re securely knotted. Using your tapestry needle, weave the final tail through the front loop of each st of the last rnd, and pull closed. Knot and weave inside the head. Weave in ends from the beginning and the tail, and any of the visible strands.
Knot, and weave in end, inside the head and body.