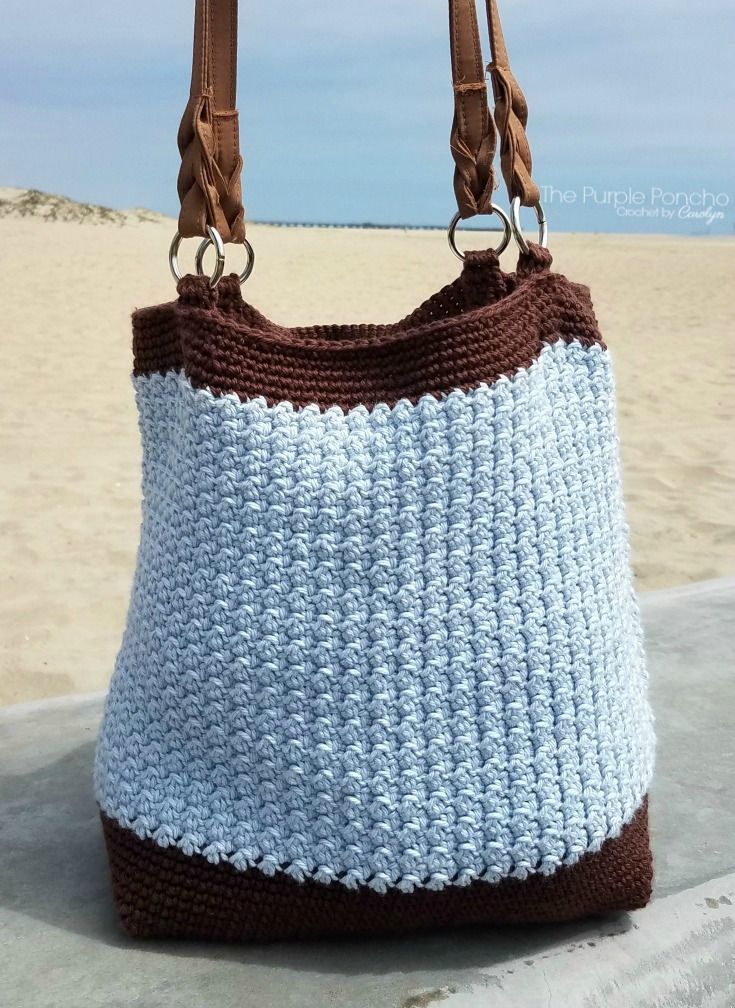
Crochet Driftwood Tote Bag
Looking for a unique and eco-friendly accessory to elevate your style this season? Look no further than the Crochet Driftwood Tote Bag! Hand-crafted with love and care, this tote bag combines the charm of driftwood accents with the intricacy of crochet detailing, creating a one-of-a-kind piece that will surely turn heads wherever you go. Not only is this tote bag stylish, but it also showcases a commitment to sustainability by repurposing materials in a creative way. Get ready to add a touch of bohemian chic to your outfit with this charming Crochet Driftwood Tote Bag!
Skill Level:
Intermediate
Size:
10 ½ inches tall by 14 inches wide.
*Note: I used all of Color A, and did not have any leftover. If you’ll be making the handles instead of buying them, you’ll need another skein of Color A.
Supplies:
- I Love This Cotton
- Color A: 20 Brown (1 skein, 180 yards) – see *Note above
- Color B: 300 Pale Denim (2 skeins, 360 yards)
- Everything Mary Braided Microfiber Handle (1) set
- Hook: F (3.75 mm)
- Stitch Markers: Quantity (4)
- Tape Measure or Gauge Ruler
- Yarn needle
Yarn Information:
- I Love This Cotton
- Yarn Weight: 4 – Medium
- Solid Skein: 180 yards / 165 meters
- Unit Weight: 100 grams (3.5 ounces)
- Fibers: 100% Cotton
Gauge:
18 rows and 18 sts = 4 inches in single crochet.
I crochet on the loose side, so you may need to go up on the hook sizes if you crochet tightly. Gauge is not critical to the bag.
Abbreviations: In US Terminology
- ch – chain
- hdc – half double crochet
- dc – double crochet
- RS – right side
- sc – single crochet
- sc2tog – single crochet 2 stitches together
- sl st – slip stitch
- st(s) – stitch(es)
- WS – wrong side
Special Stitches & Placement:
Single Crochet 2 Together (sc2tog) – insert hook in st, yo, pull through, insert hook in next st, yo, pull though, yo, pull through all 3 loops on hook. (1 sc2tog made).
Notes:
1. Tote is worked from the bottom up.
2. Worked in Rounds AND in Rows.
3. Slip stitches do NOT count as a stitch throughout.
4. Stitch counts are in ( ) at the ends of the Rounds or Rows.
Pattern Starts Here
BOTTOM
Color A – Ch 121.
Round 1: (RS) Starting in 2nd ch from hook, 1 sc in each st across, sl st to beginning sc to form a ring, careful not to twist sts. (120 sc). Place stitch marker in 1st sc of Round 1 to mark beginning stitch of rounds.
Round 2: 1 sc in each st around, do not turn. (120 sc).
Round 3-18: Repeat Row 2. End Round 18 with a sl st to beginning sc. End off yarn. (120 sc).
BODY
NOTE: Change to Color B.
Worked in Rows for Rows 19-55.
Joining with sl st to previous Row does NOT count as a st.
Place dc in previous row sl st, and sl st in previous row dc.
Standing dc can be replaced with Ch 3, and it would count as 1 dc.
Color B-
Row 19: RS facing, place slip knot on hook, place 1 standing dc in sl st just made (see Note above), sl st in next st, *1 dc in next st, sl st in next st*, repeat *-* around ending with sl st to beginning dc.(120 sts; OR 60 sl st, 60 dc).
Row 20: Turn,1 dc in next st, 1 sl st in next st*, repeat *-* around ending with sl st to beg dc. (120 sts OR 60 sl st, 60 dc).
Rows 21-55: Repeat Row 20. End off yarn at the end of Row 55. (120 sts, OR 60 sl st, 60 dc).
TOP
NOTE: Change to Color A.
Worked in Rows for Rounds 56-60.
Keep RS facing throughout, do not turn.
Standing sc can be replaced with Ch 1 and 1 sc in same st.
Row 56: With RS facing, 1 standing sc in same st, 1 sc in each st around, ending with sl st to beginning sc. (120 sc). Do not turn.
Rows 57-58: 1 sc in each st around, sl st in beginning sc. (120 sc).
Row 59: *1 sc in next 13 sts, sc2tog*, repeat *-* around, ending with sl st to beginning sc. (112 sc).
Row 60: Repeat Row 57. (112 sc) End off yarn, weave in ends.
BOTTOM SEAMING:
Cut a 24 inch piece of Color A and thread on yarn needle. Attach to WS of bag bottom corner, line up sts in Row 1, whip stitch each st together across bottom of bag. End off yarn, weave in ends.
BOTTOM SHAPING
With WS facing, fold the bottom to make 2 points, with the seam in the middle. Count approximately 8 rows from point towards the center, place a piece of tape along 8th row. Cut a piece of yarn 12 inches long, thread yarn needle. Place a running stitch along the piece of tape from one end to the other, using it as a guide to keep your stitches evenly lined up. Repeat for the other end. Weave in ends. Turn bag RS out.
For Store Bought handles-
HANDLE TABS: Make 4
Mark bag for handle tab placement. Lay bag flat with front side facing up. Starting at one edge, count 8 stitches towards center, mark with stitch marker in 8th st, do the same on the back side of bag. Repeat for other side. (4 stitch markers).
Color A- Ch 4.
Row 1: 1 sc in 2nd ch from hook, 1 sc in next 2 sts. (3 sc).
Rows 2-10: Ch 1, turn, 1 sc in next 3 sts. (3 sc).
End off yarn leaving a 6 inch tail for attaching to the bag.
ATTACHING HANDLE TABS:
Place 1 tab through the ring of the purse handle, thread yarn needle with 6 inch tail. Sew both ends of tab to Row 56, starting at each stitch marker, on the inside of bag. Repeat for all 3 tabs. Secure by knotting and weaving in end.
(OPTIONAL) CROCHET HANDLES: (WILL NEED MORE OF COLOR A TO COMPLETE)
Use the same instructions above for the handle placement. With front of bag facing, place a slip knot on hook, 1 standing sc at stitch marker on the right side, 1 sc in next 2 sts. Repeat Row 2 of Handle Tabs above until desired length. Slip st to same side of bag, starting 2 sts over from the left stitch marker. Repeat for the other side.
End of Pattern.