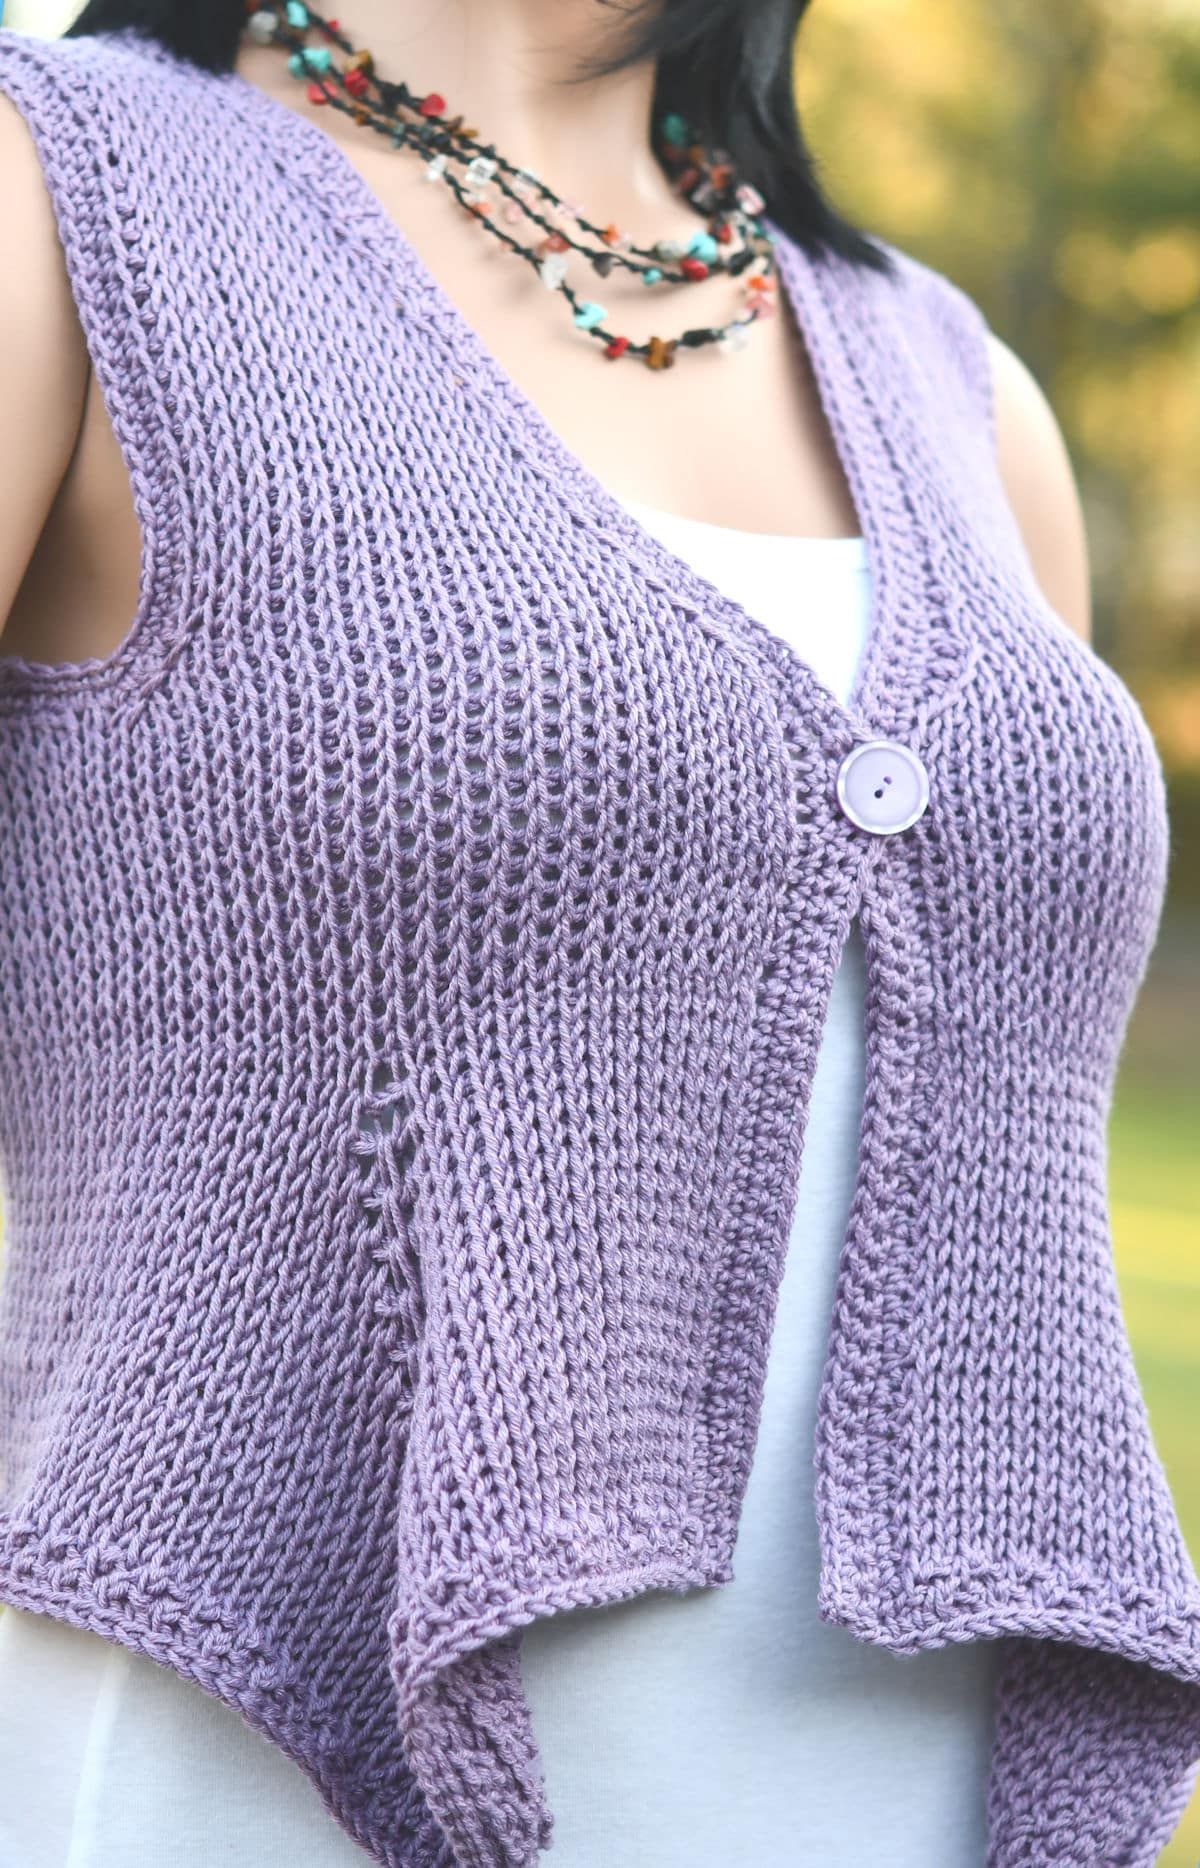
Crochet Cascade Mitered Vest
The Crochet Cascade Mitered Vest is a delightful addition to any wardrobe! This stylish and unique vest features a stunning cascade design that adds a touch of elegance to any outfit. With its mitered construction, this vest offers a fun and engaging project for crochet enthusiasts of all skill levels. The design allows for a flattering fit that drapes beautifully, making it a versatile piece for both casual and more formal occasions. Whether you're looking to add a pop of color to your ensemble or simply want a cozy layering piece, the Crochet Cascade Mitered Vest is sure to become a staple in your collection. Get ready to crochet your way to a chic and trendy look with this eye-catching vest!
Materials
- Suggested Tunisian Crochet Hook Size K-10 1/2 (6.5mm), or size needed to meet gauge. You will need an extender cord to extend the length of the hook by at least 18″.
- Suggested Crochet Hook size H-8 (5mm) for button band and armhole trim.
- Yarn Needle for weaving ends and seaming.
- Button one size 7/8″ round button.
- Sewing Thread and Needle for sewing on the button.
Gauge
In Tunisian Knit Stitch, 15 stitches for 16 rows measures 4″ x 4″.
Special Stitches
Tunisian Knit Stitch (tks): Insert hook, from front of work to back of work, between the front and back vertical bars of the same stitch, yarn over, pull loop through, keeping loop on hook.
Tunisian Reverse Stitch (trs): With hook behind work, insert hook from side to side (right to left if you’re right handed and left to right if your left handed) under back vertical bar, always keeping hook to back of work, yarn over, pull loop through, keeping loop on hook.
Last Stitch of a Row: The last stitch of each row is worked into the outer 2 vertical bars. It’s basically a knit stitch with an extra loop on the outside of the insertion stitch. You don’t want to work under only one vertical bar since it will cause the loop to stretch too much. Working under both loops makes a nice, clean, sturdy edge.
Working Into a Yarn Over (m1): When working into a yarn over, you will be working as for Tunisian Knit Stitch. The front and back vertical bars will be spread apart, but it’s still a Knit Stitch. The pattern indicates that this is a Make 1 (m1) because it became very confusing to read when saying “tks in yo, yo, tks in tks, yo, tks in yo”. The “Make 1” is technically incorrect, but it’s this way for ease of reading. As a pattern writer, it’s sometimes necessary to do something the “wrong” way to make it easier to understand.
Binding Off: Binding off is a knitting term for completing the final row in Tunisian crochet. It closes up a gap at the top. The standard bind off is working a slip stitch across each stitch. You can see more in these videos and choose the bind off method you prefer
Special Instructions for Decreasing
Decreasing at Beginning of Row (beg dec): Working as for Tunisian Knit Stitch, insert hook into two stitches at once, yarn over, pull lp through.
Decreasing at End of Row (end dec): Skip next st, using hook tip, pull front vertical bar of next stitch toward you until it overlaps the skipped stitch, complete Tunisian Knit Stitch through both sts at once.
Provisional Cast On
One technique in this crochet pattern is something you may have never seen in Tunisian crochet. I adapted it from the knitting technique of the same name.
This technique is introduced so that you can start your project going in one direction, bind off, then turn it over and work in the opposite direction without having a bulky joining.
It’s very simple so I’ll just explain it in basic terms here with more concise instructions in the actual pattern. A provisional cast on is nothing more than a chain worked in scrap yarn, preferably in another color, but in the same yarn weight. You start by picking up loops in this scrap yarn chain strip.

Instructions
Working full circumference in one piece, the lower mitered hem portion is made first, working in the direction of top to bottom.
Once complete, turn upside down to begin working from the waist.
Split for the armholes by working the First Front.
Join yarn to complete the Back.
Finally, join yarn to complete the Second Front.
Seam the shoulders, trim the armholes and inner edge with single crochet. Attach button adjacent to buttonhole. Block as desired.
My Crochet Pattern Notes
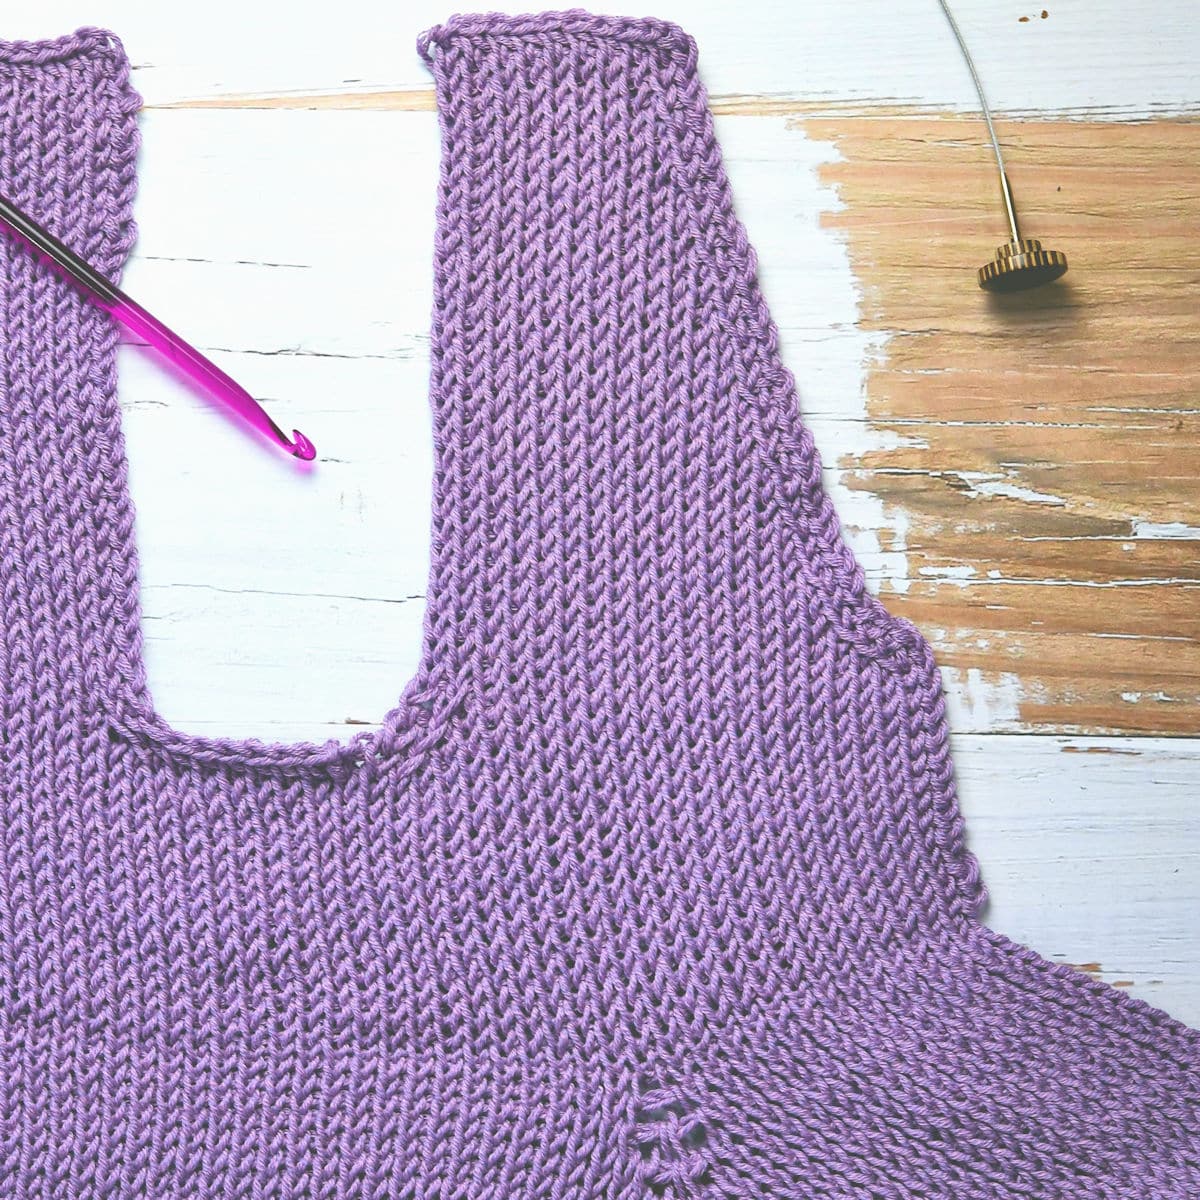
Flat lay of sleeveless vest before shoulders are seamed
This entire project is made in one piece, in a modular fashion. The lower part of the vest is made with increasing for the mitered hem, working from top to bottom. The project is then turned upside down and stitches are picked up to work in the opposite direction for the fronts and back. The shoulders are seamed and trim is added.
You can choose either the mitered hem or a straight hem (not shown). Instructions are provided for both with or without the mitered hem.
Finished Sizes
The model size is intended to fit up to 32″ bust (size small) with 1″ negative ease (there is some stretch).
The pattern is written for sizes small (up to 32″), medium (up to 36″), large (up to 40″), 1X (up to 44″), 2X (up to 48″) and 3X (up to 52″). The first number in all instructions will be for the smallest size in that section and the rest of the sizes will be in parenthesis. If there is only one number, it’s the same for all sizes.
The sizes for garments are never intended to be perfect for every single body type. Review the schematic showing the measurements to determine whether you will need to make adjustments.
Other Abbreviations
This crochet pattern is written in US crochet terminology.
beg=beginning; ch=chain; dec=decrease; lp(s)=loop(s); prev=previous; RS=right side; rem=remaining; rep=repeat; sc=single crochet; sk=skip; sl=slip; st(s)=stitch(es); yo=yarn over.
Pattern Instructions
Notes
1) For each row, skip the first vertical bar (the one with the first loop of the row).
2) For each row, closing is as follows: chain 1, [yarn over, pull through 2 loops on hook] across.
3) See Special Stitches above for information on working the last stitch of a row. It’s important to go under two loops of that last stitch to maintain stability. The instructions here will indicate that it’s a Tunisian Knit Stitch since that is the actual designation; just make sure to go under those two loops at the end.
Lower Portion of Vest
Note: If you prefer to make this Vest without the mitered hem, proceed to the Waist, without working this Lower Portion.
Row 1: (See above additional introduction to Provisional Cast On.) With scrap yarn and Tunisian hook, ch 118 (135, 147, 161, 177, 191) loosely, fasten off. Go back to the first ch of this strip of ch, sk the first 5 ch, with Tunisian hook, pull up lps in back horizontal bar of next 108 (125, 137, 151, 167, 181) ch, leaving rem 5 ch, unworked, close (see Notes). Note: If you don’t go back to the first part of the chain strip to start pulling up loops, your chain won’t unravel in the right direction. It’s not the end of the world if you do, though, since you can just pull up the loops on one hook and transfer them to another hook to get them in the right direction.
Row 2: Tks (see Special Stitches above) across, close: 108 (125, 137, 151, 167, 181) lps.
Row 3: (Begin Miters) 13 (14, 16, 17, 19, 20) tks, [14 (15, 17, 18, 20, 21) lps now on hook], yo, tks to last 14 (15, 17, 18, 20, 21) sts, yo, tks across, close: 110 (127, 139, 153, 169, 175) lps.
Row 4: *Tks up to yo, [yo, m1 (see Special Stitches above), yo] in yo, rep from * once more, tks across, close: 114 (131, 143, 157, 173, 179) lps.
Row 5: *Tks up to yo, m1, yo, tks, yo, m1, rep from * once more, tks across, close: 118 (135, 147, 161, 177, 183) lps.
Rows 6-20: Rep row 5. On final row, 178 (195, 207, 221, 237, 243) lps.
Note: The next 2 rows have no increasing at the points. It produces a little curve towards the body. If you don’t like how it looks for you, you can either skip the 2 rows or do 2 more rows of the established increasing.
Row 21: *Tks up to yo, m1, tks, m1, rep from * once more, tks across, close: 178 (195, 207, 221, 237, 243) lps.
Row 22: [Tks, trs (see Special Stitches above)] to last st, tks in last st, close: 178 (195, 207, 221, 237, 243) lps.
Row 23: [Trs, tks] to last st, tks in last st, close: 178 (195, 207, 221, 237, 243) lps.
Row 24: Bind off all sts (see instructions above with videos). Inserting hook as for tks, (or any bind off you like), sl st across each st, fasten off.
Waist
For No Mitered Hem Only
If you are making the Vest without the mitered hem, work as follows:
Row 1: Ch 108 (125, 137, 151, 167, 181), insert hook in second ch from hook, yo, pull lp through, [insert hook in next ch, yo, pull lp through] across, close: 108 (125, 137, 151, 167, 181) lps.
Row 2: [Tks, trs] to last st, tks in last st, close: 108 (125, 137, 151, 167, 181) lps.
Row 3: [Trs, tks] to last st, tks in last st, close: 108 (125, 137, 151, 167, 181) lps.
Row 4: Tks across, close: 108 (125, 137, 151, 167, 181) lps.
Rep row 4 until 37 (39, 41, 45, 47, 47) rows completed from beg. Sk the rem and continue to First Front.
Turn work upside down to begin working in opposite direction from row 1. With RS facing you, carefully remove provisional chain, one chain at a time, placing each loop on Tunisian hook, close. (Not counted as a row here, since it was already counted as row 1 in the beginning.) It helps to mark this row with a stitch marker or scrap yarn to keep your place.
Row 1: Tks across, close: 108 (125, 137, 151, 167, 181) lps.
Rep row 1 until 14 (16, 18, 22, 24, 24) rows completed for Waist.
First Front
Row 1: Work beg dec (see Special Stitches above), 18 (21, 24, 27, 30, 33) tks, work end dec (see Special Stitches above), tks in last st, close, leaving rem sts unworked: 22 (25, 28, 31, 34, 37) lps.
Row 2: Work beg dec, tks to last 3 sts, work end dec, tks in last st, close: 20 (23, 26, 29, 32, 35) lps.
Rep row 2 until 3 (4, 5, 6, 7, 9) rows completed for First Front: 18 (19, 20, 21, 22, 21) lps.
Next 2 rows: Tks across, close: 18 (19, 20, 21, 22, 21) lps.
Next row: Work beg dec, tks across, close: 17 (18, 19, 20, 21, 20) lps.
Rep prev 3 rows until 27 (25, 29, 33, 34, 33) total rows completed for First Front: 10 (12, 12, 12, 13, 13) lps.
Next 3 (7, 3, 1, 2, 3) rows: Tks across, close: 10 (12, 12, 12, 13, 13) lps. Fasten off after final row. Note that I didn’t bind off at the top of the shoulders. I found that it made a nicer seam when working without the bind off. See seaming instructions below, when complete.
Back
Row 1: Returning to the last row before the First Front, join yarn with sl st in first unworked st. Bind off with sl st across the next 6 (8, 10, 12, 14, 14) sts (1 lp remains on hook), work beg dec, 42 (47, 51, 55, 61, 61) tks, work end dec, tks in last st, close, leaving rem sts unworked: 46 (51, 55, 59, 65, 65) lps.
Note: Stop here briefly and count the unworked stitches remaining on the other side to make sure you have 30 (35, 40, 45, 50, 53). You don’t want to get the entire Back finished only to find out your count is off.
Next 1 (1, 2, 2, 4, 4) rows: Work beg dec, tks to last 3 sts, work end dec, tks in last st, close: 44 (49, 51, 55, 57, 57) lps.
Next row: Tks across, close: 44 (49, 51, 55, 57, 57) lps.
Rep prev row until 26 (28, 28, 30, 32, 34) total rows completed for Back: 44 (49, 51, 55, 57, 57) lps.
First Shoulder
Row 1: 11 (13, 13, 13, 14, 14) tks, close, leaving rem sts unworked: 12 (14, 14, 14, 15, 15) lps.
Row 2: Tks to last 3 sts, work end dec, tks in last st, close: 11 (13, 13, 13, 14, 14) lps.
Row 3: Rep row 2: 10 (12, 12, 12, 13, 13) lps.
Row 4: Tks across, close: 10 (12, 12, 12, 13, 13) lps, fasten off.
Second Shoulder
Row 1: Returning to the last row before the First Shoulder, join yarn with sl st in first unworked st. Bind off with sl st across the next 20 (21, 23, 27, 27, 27) sts (1 lp remains on hook), 11 (13, 13, 13, 14, 14) tks, close: 12 (14, 14, 14, 15, 15) lps.
Row 2: Work beg dec, tks across, close: 11 (13, 13, 13, 14, 14) lps.
Row 3: Rep row 2: 10 (12, 12, 12, 13, 13) lps.
Row 4: Tks across, close: 10 (12, 12, 12, 13, 13) lps, fasten off.
Second Front
Row 1: Returning to the last row before the Back, join yarn with sl st in first unworked st. Bind off with sl st across the next 6 (8, 10, 12, 14, 14) sts (1 lp remains on hook), work beg dec, tks to last 3 sts, work end dec, tks in last st, close: 22 (25, 28, 31, 34, 37) lps.
Row 2: Work beg dec, tks to last 3 sts, work end dec, tks in last st, close: 20 (23, 26, 29, 32, 35) lps.
Rep row 2 until 3 (4, 5, 6, 7, 9) rows completed for Second Front: 18 (19, 20, 21, 22, 21) lps.
Next 2 rows: Tks across, close: 18 (19, 20, 21, 22, 21) lps.
Next row: Tks to last 3 sts, work end dec, tks in last st, close: 17 (18, 19, 20, 21, 20) lps.
Rep prev 3 rows until 27 (25, 29, 33, 34, 33) total rows completed for Second Front: 10 (12, 12, 12, 13, 13) lps.
Next 3 (7, 3, 1, 2, 3) rows: Tks across, close: 10 (12, 12, 12, 13, 13) lps. Fasten off after final row.
Seaming
With yarn needle, seam shoulders, matching st for st. I preferred to use an adaptation of the Kitchener Stitch in knitting.
With the RS of your work facing you, insert hook under the vertical bars of one stitch then insert your hook under the vertical bars of the corresponding stitch on the other side. Repeat across. It’s not exactly Kitchener Stitch, but it’s fairly close and produces a nice seam.
Armhole Trim
Round 1: With RS facing you and regular crochet hook, join yarn with sl st at bottom of armhole, ch 1, sc evenly around, sl st to first sc.
Round 2: Ch 1, sc in each sc around, skipping sts as necessary at the curves to keep it from ruffling. Fasten off.
Rep rounds 1-2 for opposite Armhole.
Button Band
Row 1: With RS facing you and regular crochet hook, join yarn to begin working along inner edges and around the neck (not the lower hem), ch 1, sc around, turn.
Row 2: Mark one buttonhole position on the actual right side of vest, ch 1, sc in each sc around, skipping sts as necessary at the curves to keep from ruffling, except at buttonhole position, [ch 2, sk 2 sc], turn.
Row 3: Ch 1, sc in each sc around, skipping sts as necessary at the curves to keep from ruffling, except at buttonhole position, 2 sc in ch-2 sp, fasten off.
Finishing
Weave in all ends. With sewing needle and thread, attach button adjacent to buttonhole. Block as desired. I used a light steam blocking while the vest was hanging on a hanger.
Schematic

These measurements are taken after blocking.