Apps we think you'll love
Helpful apps for your crafts, hobbies & everyday life


DIY Crochet Flower Beanie Hat — Easy Pattern with Step-by-Step Assembly
Add a touch of handmade charm to your wardrobe with this Crochet Flower Beanie Hat. This easy-to-follow pattern uses simple stitches and a colorful applique flower and leaf to create a cozy, stylish beanie you can finish in an afternoon. The pattern is worked flat and seamed, so you can adjust length and circumference as you go for a perfect fit.
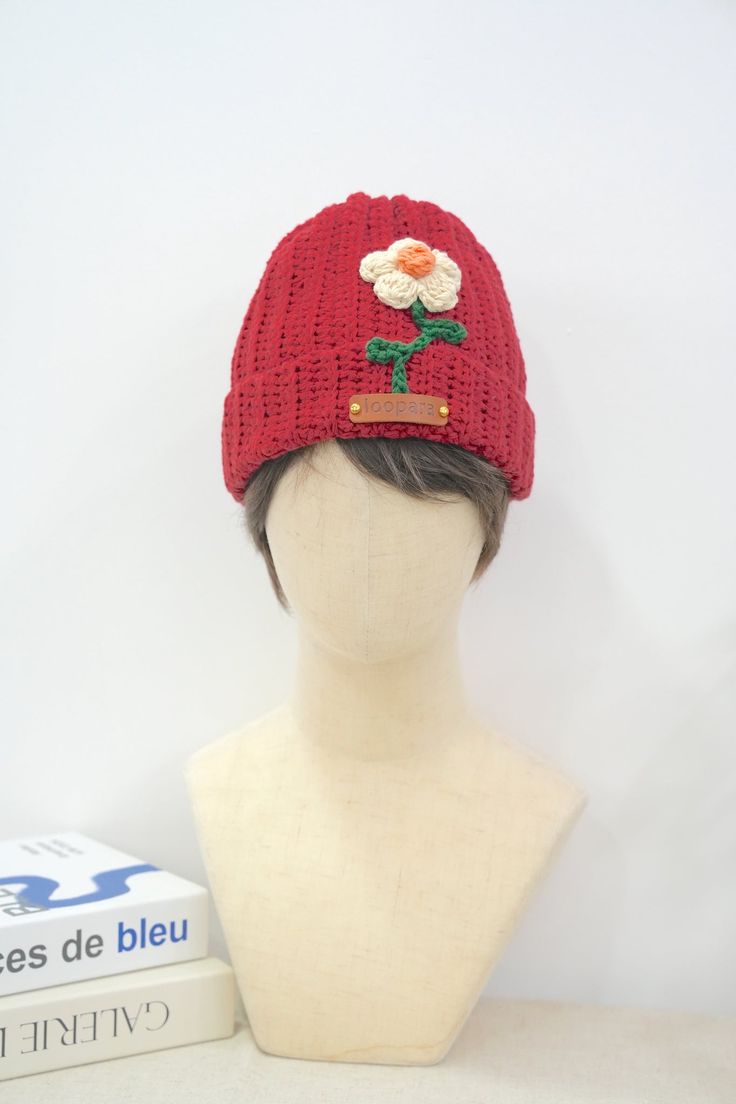
Materials Needed:
- Yarn – Loopara 4ply combed cotton (Apricot 05, Green 18, Orange 48, and Red 70)
- Hook – 4.0mm
- Stitch Marker
- Scissors
- Hot Melt Adhesive
- Leather Label
Stitches & Abbreviations (for reference): ch = chain, sc = single crochet, hdc = half double crochet, dc = double crochet, sl = slip stitch, BLO = back loop only.
How to Crochet the Hat Body
- R1: Ch 47, 40 hdc in 2nd ch from hook, 6 sl, ch.
- R2: BLO (6 sl, 40 hdc, ch).
- R3: BLO (40 hdc, 6 sl, ch).
- Rep rounds 2-3 until piece fits head circumference — try the piece on as you go to get the desired snugness (cotton relaxes with wear).
How to Crochet the Flower Petals
- R1: Magic ring, 10 sc, sl.
- R2: [Ch 4, (3 unfinished dc, 3 unfinished dc in next st, yo and pull through all loops, ch 4, sl)] 5 times, fasten off, weave in ends.
How to Crochet the Flower Center
- With new color: Ch 4, 5 unfinished dc, yo and pull through all loops, ch 4, sl, fasten off, weave in ends.
How to Crochet the Leaf
- Ch 15, back 10 with third loop, ch 12, back 10 with third loop, ch 5, fasten off.
Crochet Flower Beanie Hat Assembly
- Turn the hat inside out and begin seaming from the wrong side, working through the back loops that are furthest from you. Keep your working yarn above the hook.
- Match the stitches one by one as you seam up the side until you reach the edge.
- Leave a long tail, fasten off, and begin seaming the crown.
- Using a yarn needle, weave through the top half-stitches alternating between front and back.
- After completing one round at the crown, pull the yarn tight and secure with a knot.
- Adjust the crown pleats into shape and begin securing the crown shape.
- Sew two rounds to secure the crown pleats, weave in ends, and turn the hat right side out.
- The hat body is now complete.
- Attach the flower and leaf — pin them first to confirm placement before sewing or using hot melt adhesive.
- Your beautiful flower beanie is finished!
Crochet Tips:
- When measuring the hat circumference, try it on as you go. The beanie should feel slightly snug since cotton yarn tends to relax with wear.
- When making the petals, keep your tension consistent for all chain-4 spaces to ensure evenly sized petals.
Assembly Tips:
- When seaming the sides, use stitch markers to line up your rounds first — this helps match any ribbing or pattern repeats and prevents misalignment.
- When attaching the flower and leaf, pin them in place and try the hat on to check placement before sewing them down.
Enjoy gifting or wearing your handmade Crochet Flower Beanie Hat — a bright, cheerful accessory that highlights simple crochet techniques and colorful yarn choices.
No comments
Write a comment