Apps we think you'll love
Helpful apps for your crafts, hobbies & everyday life


Make a Vintage Red Crochet Beret: Free Pattern & Step‑by‑Step Instructions
Add a touch of vintage flair to any outfit with this Crochet Vintage Red Beret Hat. This easy-to-follow pattern produces a classic beret silhouette with attractive vertical texture lines created by front-post double crochets. The design is worked holding two strands of Loopara 4ply combed cotton together for a slightly thicker fabric and rich color. Follow the materials list and round-by-round instructions below to crochet your own stylish beret.
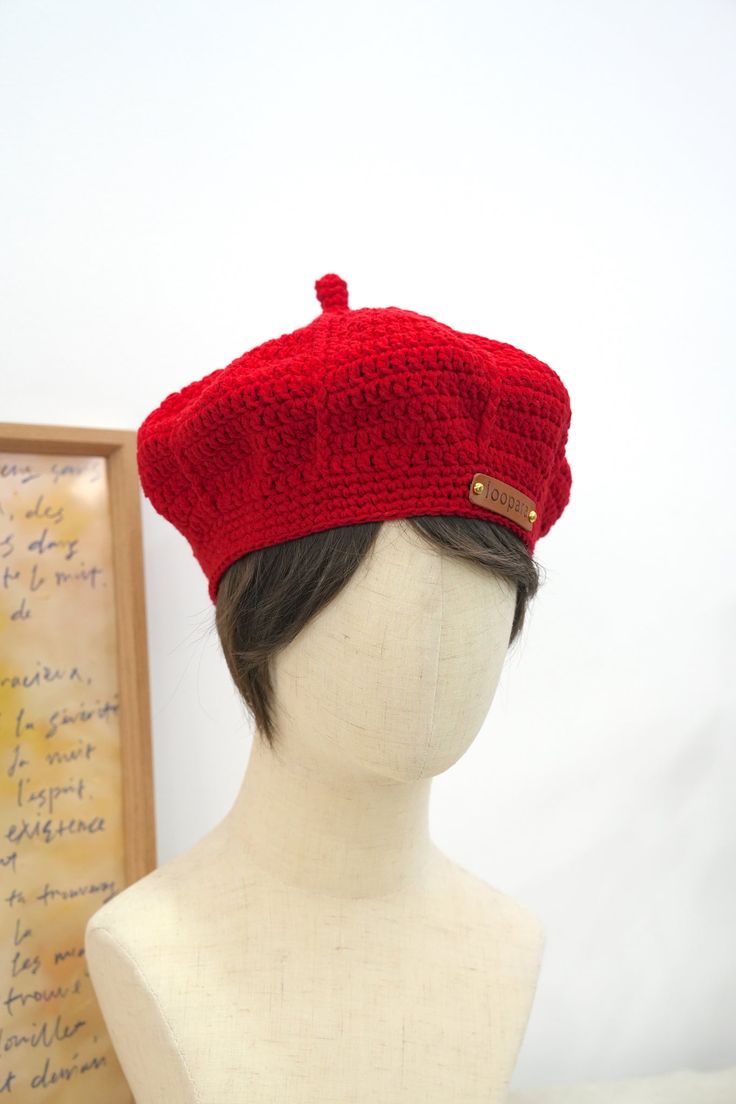
Materials Needed:
- Yarn – Loopara 4ply combed cotton (Red 67)
- Hook – 4.0mm
- Stitch Marker
- Scissors
- Yarn needle
- Leather Label
How to Crochet the Hat Crown
- R1-4: Ch 1, 6 sc, sl, ch.
- R5: Ch 1, (sc, sc inc) 3 times, sl.
- R6: Ch 1, (2 sc, sc inc) 3 times, sl.
How to Crochet the Hat Body
- R1: Ch 3, [2 dc, (dc, fpdc)] 4 times, sl.
- R2: Ch 3,[dc inc, (dc, fpdc)] 8 times, sl.
- R3: Ch 3,[3 dc, (dc, fpdc)] 8 times, sl.
- R4: Ch 3, [4 dc, (dc, fpdc)] 8 times, sl.
- R5: Ch 3, [2 dc, dc inc, 2 dc (dc, fpdc)] 8 times, sl.
- R6: Ch 3,[3 dc, dc inc, 3 dc (dc, fpdc)] 8 times, sl.
- R7: Ch 3, [4 dc, dc inc, 4 dc (dc, fpdc)] 8 times, sl.
- R8: Ch 3, [5 dc, dc inc, 5 dc (dc, fpdc)] 8 times, sl.
- R9-13: Ch 3, 112 dc (continue fpdc in established positions), sl.
- R14: Ch 3, [5 dc, dc2tog, 4 dc, dc2tog, fpdc] 8 times, sl.
- R15: Ch 3,[4 dc, dc2tog, 3 dc, dc2tog, fpdc] 8 times, sl.
- R16-19: Ch 1, 80 sc, sl. Fasten off, weave in ends.
- Finishing: Attach the leather label and your hat is complete.
Crochet Tips:
- When working the hat body, keep your front post double crochets aligned vertically to create beautiful texture lines.
- Count your stitches after each round to maintain the perfect beret shape, and avoid pulling your yarn too tight.
- This beret is crocheted with two strands of yarn held together throughout the pattern.
- To adjust fit: try a different hook size or block the finished beret gently to relax and shape the fabric.
No comments
Write a comment