

Crochet the Ariel Top: Easy Striped Crop Top Pattern with Button or Zipper Back
Make a fun and stylish Ariel Top with simple single crochet stripes and a ribbed shoulder band. This beginner-friendly pattern uses two colors and can be finished with either buttons or a zipper at the back. Use your measurements to customize fit and length — the pattern below explains how to work the body, add the back extension, and attach the shoulder band.
If you fancy trying out a fun and stylish crochet project, diving into the world of making the Ariel Top could be a delightful adventure! Crocheting this piece can be a rewarding experience, combining creativity with the joy of crafting your very own fashionable top. With your favorite yarn colors and some dedicated time, you can create a unique and charming top that suits your personal style perfectly. So, grab your crochet hook, put on some music, and let's get started on this exciting journey of crafting the Ariel Top!
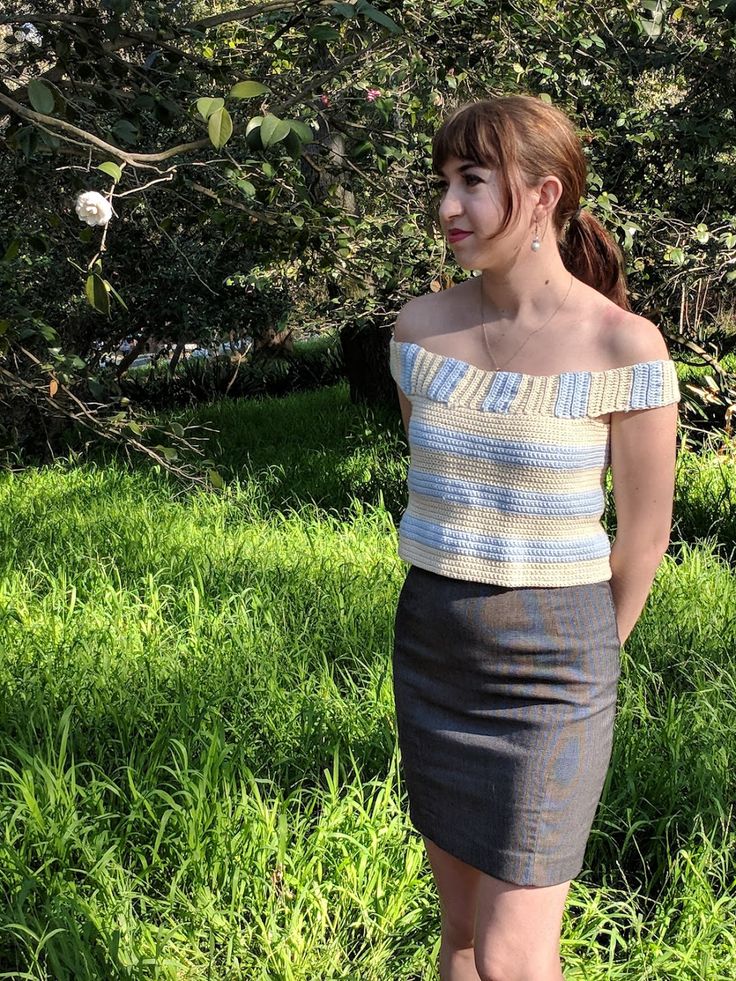
Caption: Finished Ariel Top laid flat showing blue and beige stripes.
Materials:
- Gazzal XL Baby Cotton in Mild Blue (3 DK Weight)
- Gazzal Baby Cotton in Beige (2 Sport Weight)
- 3.5mm Crochet Hook
- Set of Buttons OR a Zipper equal to the length of your top
Measurements you will need (measure on your body):
- Around under the bust (you will subtract approximately 7 inches for the back zipper/button extension)
- From underarm to desired length
- Around the shoulders (subtract a couple inches so the band fits snugly)
- From the front of the armpit to the back of the armpit (to size the armhole width)
Abbreviations
- SC – Single Crochet
- HDC – Half Double Crochet
- C1 – Color 1
- C2 – Color 2
Note: You don’t have to use the same colors I chose — pick two colors you like together.
This top is made of two sections sewn together: the Body Section and the Shoulder Band. Begin with the Body Section.
The Body Section
This section is worked in single crochet with color changes for stripes.
Foundation:
Work a foundation chain close to your around-under-the-bust measurement minus the 7-inch extension allowance. The chain does not need to be any particular multiple.
Row 1:
Work SC in C1 across the foundation chain. Chain 1 and turn.
Rows 2–8:
Work SC in C1 across each row until the last stitch of row 8. To join C2 invisibly, work the last SC of row 8 up to two loops on the hook, then pull through with C2 instead of C1.
Notes on yarn weights: I used C2 that was one weight heavier than C1, which made the blue stripes slightly thicker. If your C2 is the same weight as C1, keep stripe row counts equal.
Rows 9–15 (or 8 rows if C2 equals C1 in weight):
Work SC in C2 across each row. To return to C1, change color on the last SC of the stripe as described above.
Continue alternating colors until the body reaches the desired length. When finished, tie off.
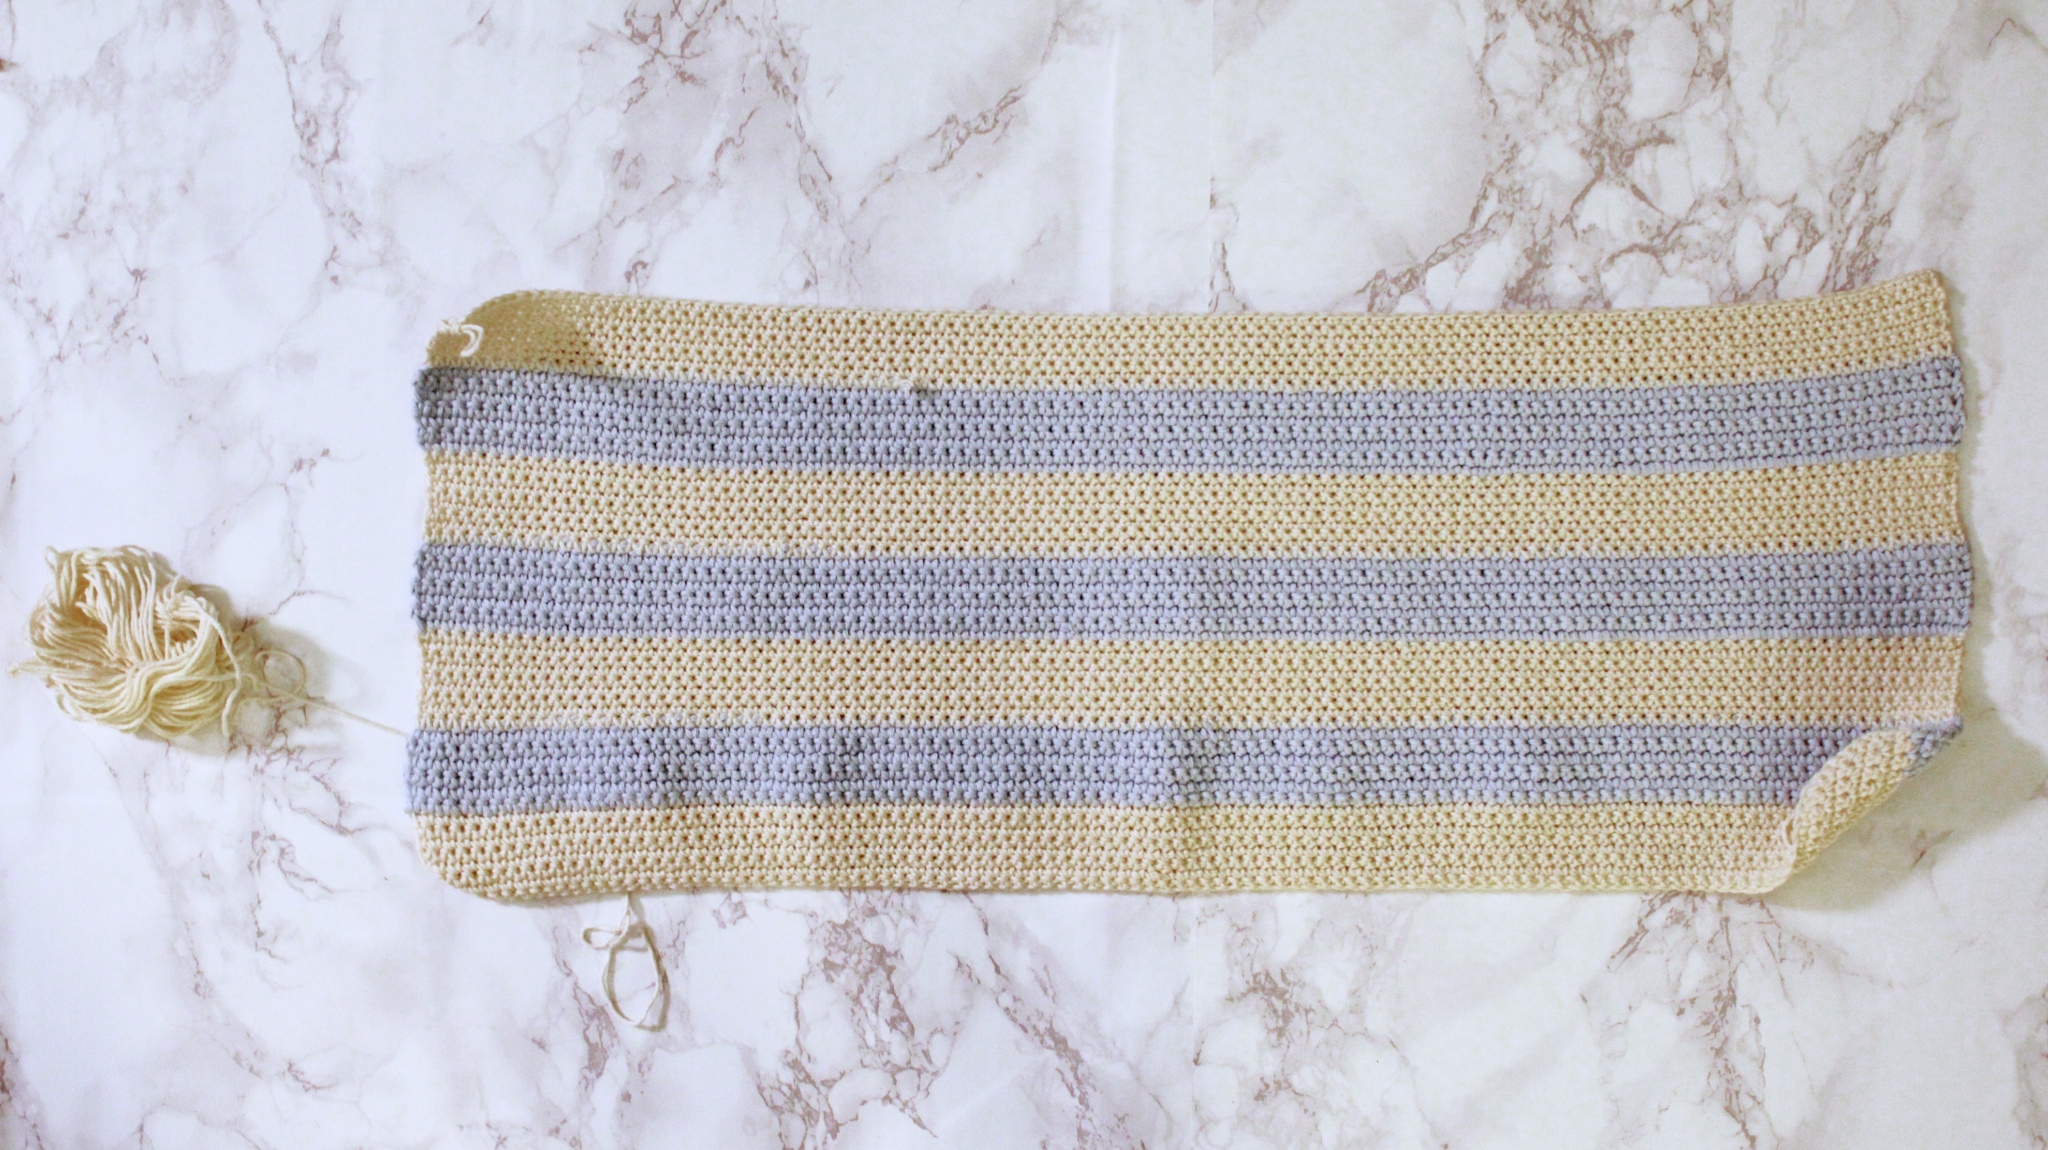
Caption: Close-up of the striped single-crochet body section showing color changes and texture.
Back / Extension Section
Instead of wrapping the stripes completely around, add a back extension panel for buttons or a zipper.
Row 1:
Working along the side/ends of the Body Section, work SCs in C1 evenly across the side edge. Chain 1 and turn.
Rows 2–7:
Work 1 SC in C1 into each stitch across the previous row. Chain 1 and turn until the last stitch of row 7. To switch to C2, change color on the last SC as before.
Rows 8–11 (if C2 is same weight as C1, work 7 rows of C2 instead of 3):
Work SC in C2 for the specified rows, changing back to C1 at the end of row 11.
At this point you can prepare the extension for buttons or for a zipper.
If you choose buttons:
Rows 12–16:
Work 1 SC in C1 across each row. Chain 1 and turn.
Row 17 (buttonholes):
Decide how many stitches to skip per button (I skipped 2 for each button). Use this formula to plan spacing:
(TOTAL STITCHES ON EXTENSION – TOTAL STITCHES SKIPPED) / SPACES = STITCHES BETWEEN BUTTON HOLES
Example: extension = 52 stitches, skipping 2 per button × 4 buttons = 8; (52 – 8) / 3 = 14.66. You may need to adjust by a stitch or two to make spacing practical.
Rows 18–20:
Work SC in C1 across each row, working the same number of SC into each skipped space when you reach the rows with buttonholes so the front side remains aligned. Tie off at row 20.
Repeat the same steps on the other side, but when you reach the buttonhole row on that side, work it as a normal row of SC so that buttons will fasten to a solid edge.
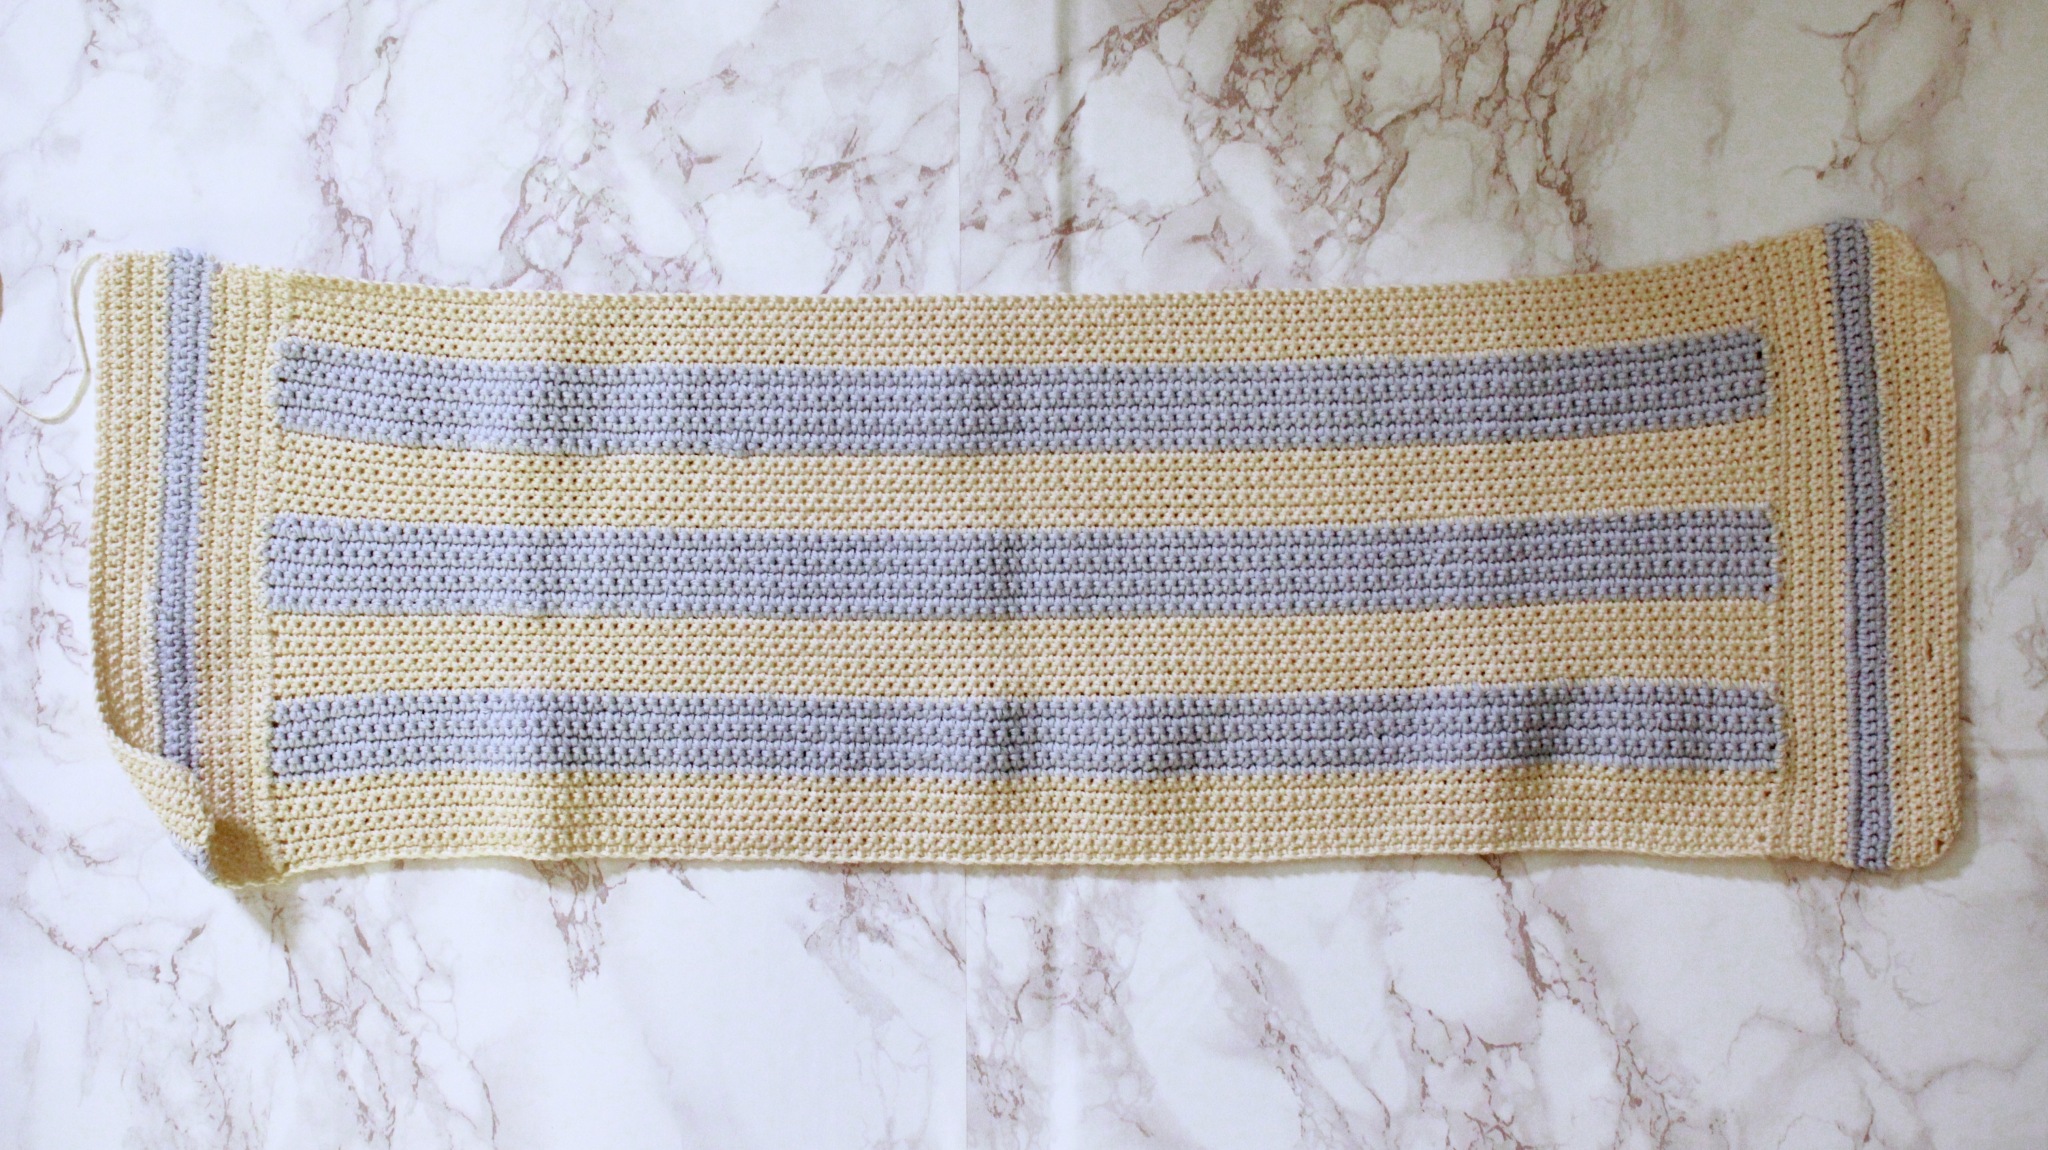
Caption: Back extension panel prepared for buttons or a zipper, showing stripe continuation and the extension edge.
If you choose a zipper:
Rows 12–20:
Work 1 SC in C1 across each row and tie off at row 20. Repeat for the other side; you will add the zipper when constructing the finished garment.
At this point the Body and Extension are done. Next, make the Shoulder Band.
Shoulder Band
The band uses your around-the-shoulders measurement (minus a couple inches for snugness). It is ribbed for stretch and worked in HDC.
Foundation:
Chain the length equal to the thickness you'd like for the band plus 2 chains.
Row 1:
Starting in the 3rd chain from the hook, work 1 HDC into each chain across. Chain 1 and turn.
Row 2:
Work 1 HDC into each stitch across, working into the third loop of the HDC stitches of the previous row to create ribbing. Chain 1 and turn. (Chain 1 or 2 preference varies; I used chain 1.)
Rows 3–6:
Repeat Row 2 for 4 more rows. At the end of row 6, switch to C2 on the last stitch as done previously.
Rows 7–11:
Repeat the ribbed HDC in C2 for 4 rows. Switch back to C1 at the end of row 11 and continue the pattern: 6 rows C1, 4 rows C2, repeating until the band matches your around-shoulders measurement.
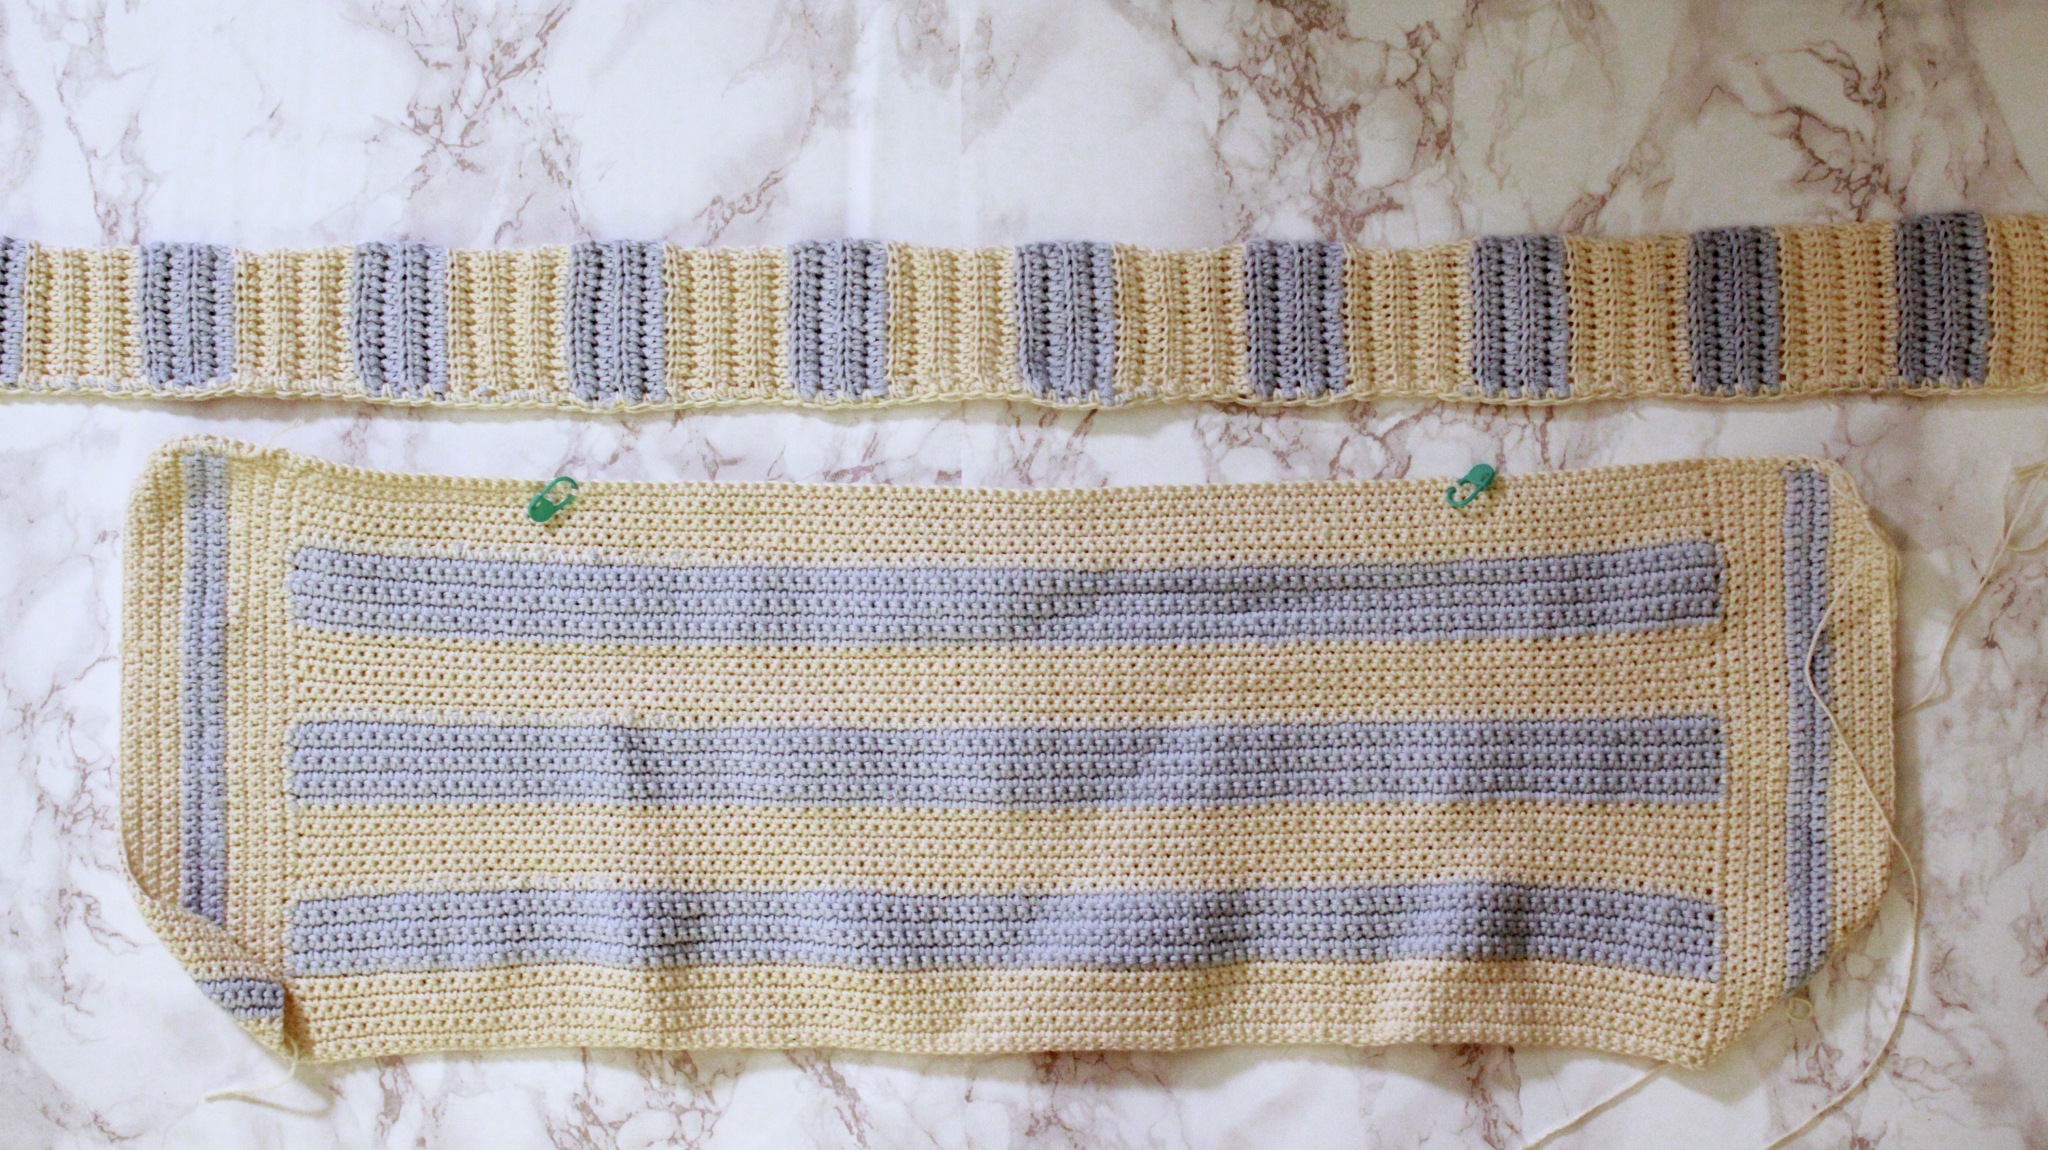
Caption: Ribbed shoulder band in progress with stripe pattern and stitch markers visible.
Place two stitch markers on the body section to mark armhole locations. I found these by wrapping the piece and placing them near the front of the armpit, then balancing their positions so they are an equal number of stitches from the ends.
Sew the band onto the Body piece only between the two stitch markers. Line the band evenly so the meeting points mirror each other on both sides of the markers. When sewing, work all sewing on the same side — this will be the inside of the top so seams are hidden.
Use your front-to-back armpit measurement to find how wide the armhole should be: from a stitch marker, measure that distance along the fabric and place another stitch marker in the corresponding stitch; repeat for the other side and ensure both sides have the same number of stitches between markers.
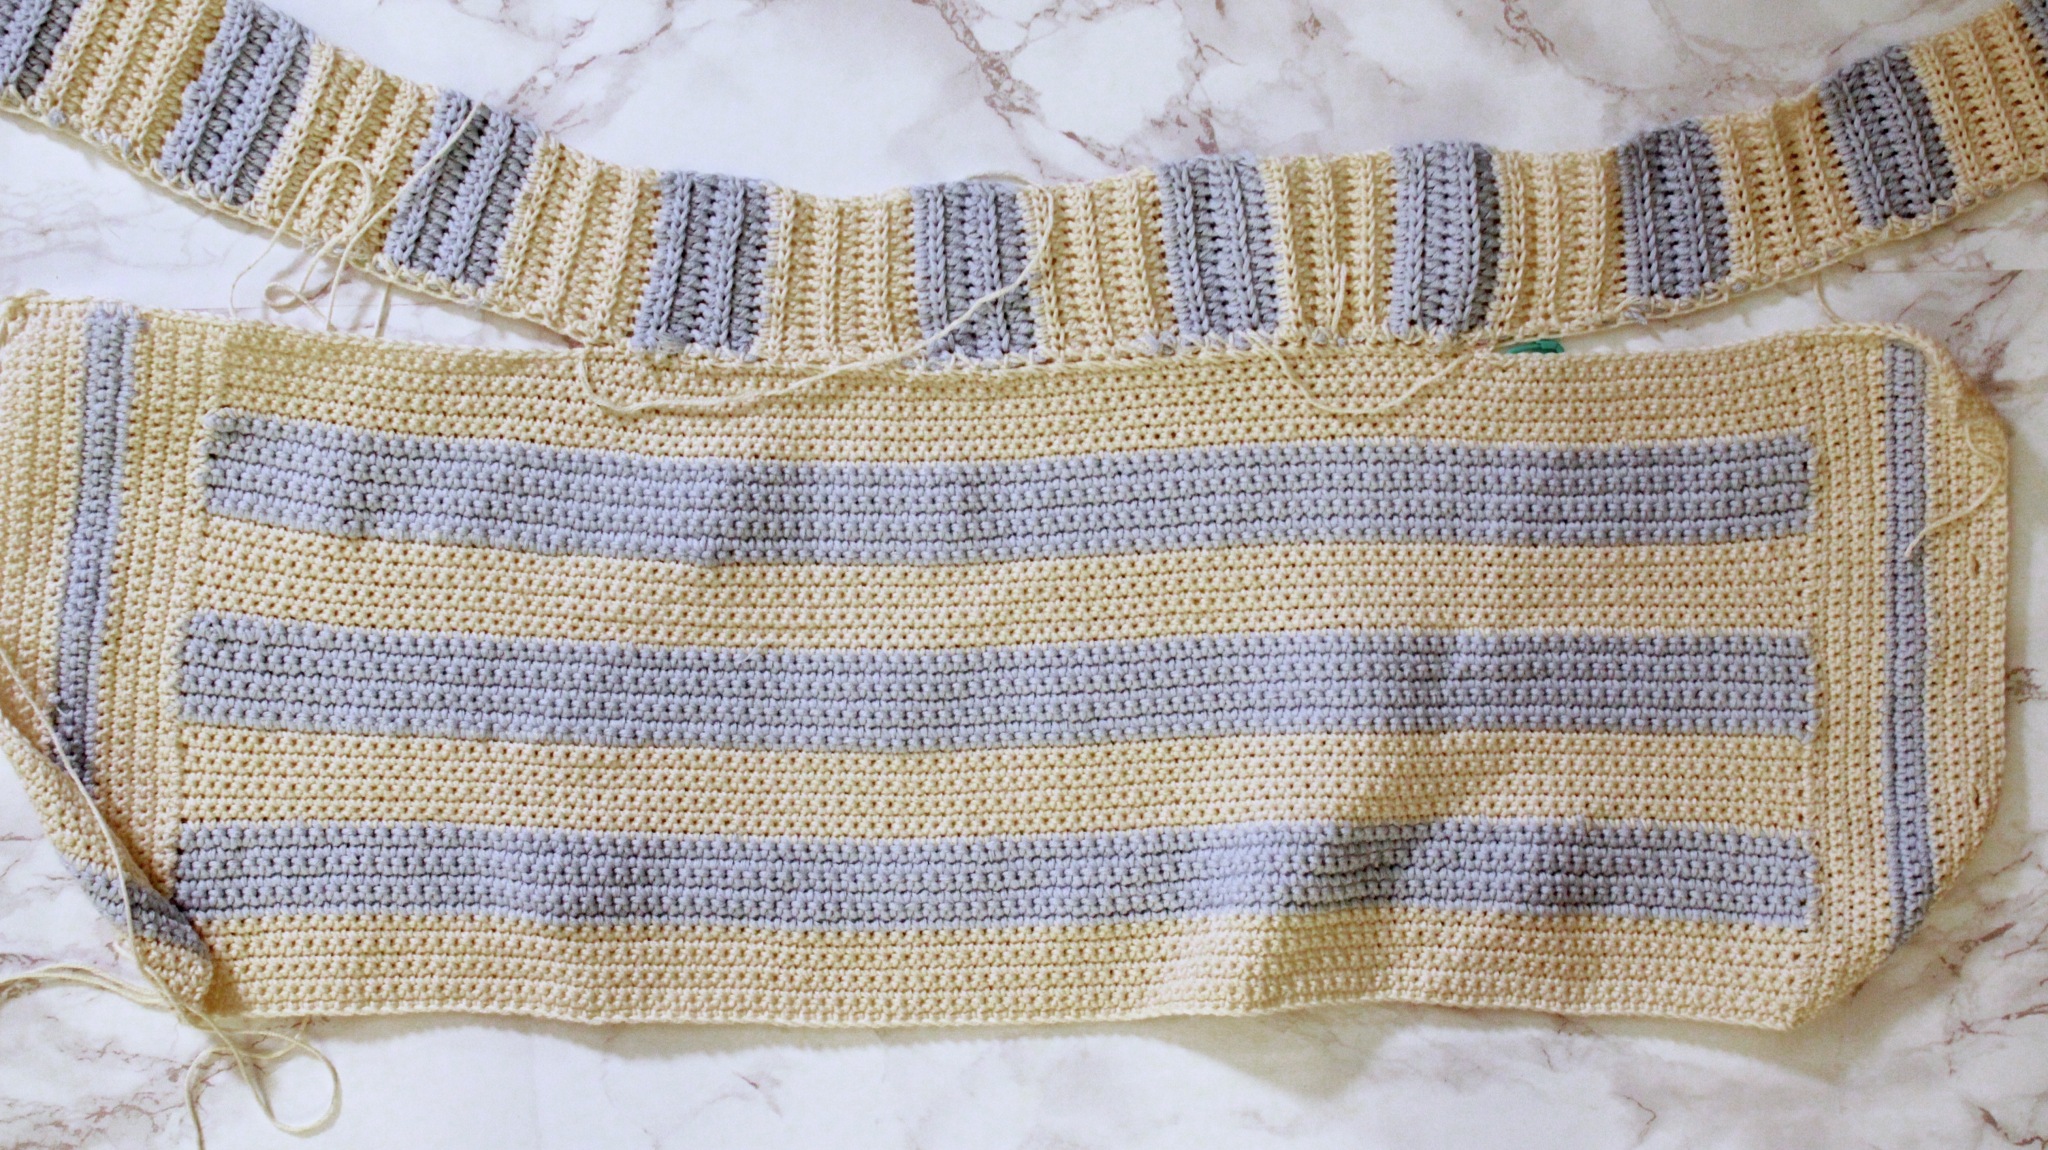
Caption: Measure and mark armhole width from front to back armpit before sewing the band.
Now sew the ends of the band onto the ends of the body section. Because it is usually easiest to sew from right to left, attach the ends carefully and evenly so the band sits comfortably on your shoulders and the armholes align with the stitch-marker placements.
Finishing tips:
- Weave in all loose ends securely.
- If using a zipper, sew it in carefully so stripes align; if using buttons, attach buttons evenly and test closure.
- Try the top on before final sewing to fine-tune armhole size or band position.
Enjoy your handmade Ariel Top!