


Make an Adorable Crochet Bracelet — Easy Step-by-Step Pattern with Puff & Bobble Stitches
Make a charming crochet bracelet using simple stitches and lightweight mercerized thread. This easy project uses basic chains, single and double crochet, plus textured puff/bobble and picot details to create a delicate accessory you can finish with a clasp or a tied closure. Suitable for crocheters familiar with basic stitch abbreviations, the pattern below includes materials, stitch notes, step photos, and finishing tips to help you complete a pretty bracelet.
Crocheting an adorable bracelet is a delightful way to add a touch of creativity to your accessory collection! With just a few basic crochet stitches and some colorful yarn, you can easily create a charming piece of jewelry that will brighten up your outfit. Whether you're making one for yourself or as a thoughtful gift for a friend, the process of crocheting a bracelet is not only fun but also rewarding. So, grab your crochet hook and yarn, let your creativity flow, and enjoy the satisfying feeling of completing a cute and stylish bracelet!
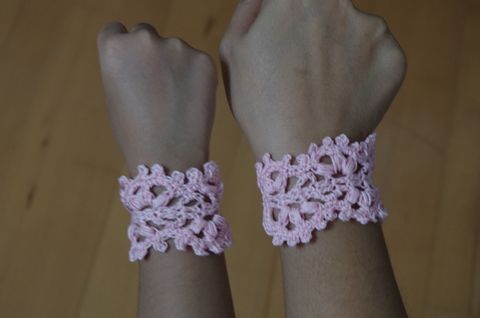
Materials Used
- Thread: Monaco Mercerized Thread
- Stainless Hook: #3 / 2.10MM
Terms Used
- Ch: Chain; Sc: Single Crochet; Dc: Double Crochet
- Sl St: Slip Stitch; Sp/Lp: Space / Loop
Stitch Guide
Bobble Stitch: (Yarn over, insert the hook in specified stitch, pull the hook through the loop) 3 times, yarn over, pull the hook through 6 loops on hook, yarn over, pull the hook through 2 loops. Bobble Stitch made.
Crochet Bracelet Instructions
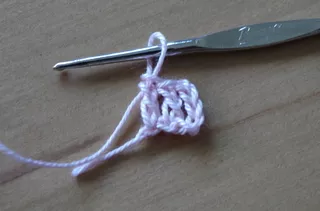
Round 1: Ch7, dc in 6th ch from hook, dc in last ch, (ch5, turn, dc over dc) 9 times.
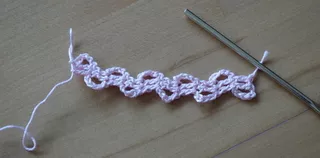
Round 2: Ch5, (puff st, ch4) 2 times, puff st in next 5ch sp/lp, ch2, sc in next 5ch sp/lp, ch1, (puff st, ch4) 2 times, puff st in next 5ch sp/lp, ch2, sc in next 5ch sp/lp, ch1, puff st, ch4, puff st in next 5ch sp/lp, ch3, sl st in the same sp/lp, sl st in next 2 sts. Repeat the sequence on the opposite side.

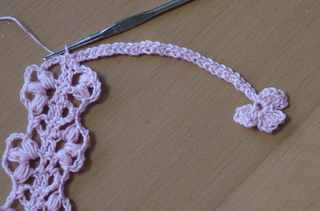
Round 3: Ch1, sc in next st, ch33, 2dc in 4th ch from hook, ch3, sl st in the same st, (ch3, 2dc, ch3, sl st in the same st) twice, ch1, sl st in next ch across, sl st in top of sc, sc in next st, 3sc in next 5ch sp/lp, 3sc in 4th ch of the same sp/lp. Then: sc in puff st, picot in the same st, 2sc, picot, sc in next 4ch sp/lp, sc in next puff st, picot in the same st — repeat this sequence once more. Continue: sc in next 2ch sp/lp, skip sc, sc in next 1ch sp/lp — repeat two times; sc in next 2ch sp/lp, skip sc, sc in next 1ch sp/lp — repeat once more; 3sc in next 3ch sp/lp — repeat once more. End with sl st in first sc.
Fasten off.
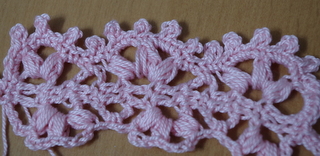
Finishing tips
- Try the bracelet on before fastening to check fit; add or remove chains for a tighter or looser fit.
- Finish with a small jewelry clasp, jump rings, or tie a neat bow/knot using a short length of matching thread.
- Block lightly if needed to even out stitches. Wash gently by hand and reshape while damp to preserve the mercerized shine.
Enjoy wearing your handmade bracelet or gifting it to someone special!