


DIY Crochet Fishnet Hair Bow — Easy Step-by-Step Pattern
Create a delicate fishnet-style crochet bow to wear in your hair. This lightweight accessory is quick to make, easy to customize by color and size, and works well with sport-weight yarn and a 3.5 mm hook. Below you’ll find a full materials list and a step-by-step pattern to make the base mesh, add a neat border, and assemble the finished bow.
Creating a crochet fishnet bow for your hair is a fun and adorable way to add a touch of charm to your hairstyle! With its delicate design, the fishnet pattern adds a unique and stylish flair to your look. Whether you're styling your hair for a casual day out or a special occasion, this bow will surely make you stand out in the best way possible. Plus, the best part is that you can customize it with different colors and sizes to match your outfit perfectly. So, get your crochet hook ready, and let's bring some extra cuteness to your hairdos with this lovely fishnet bow!
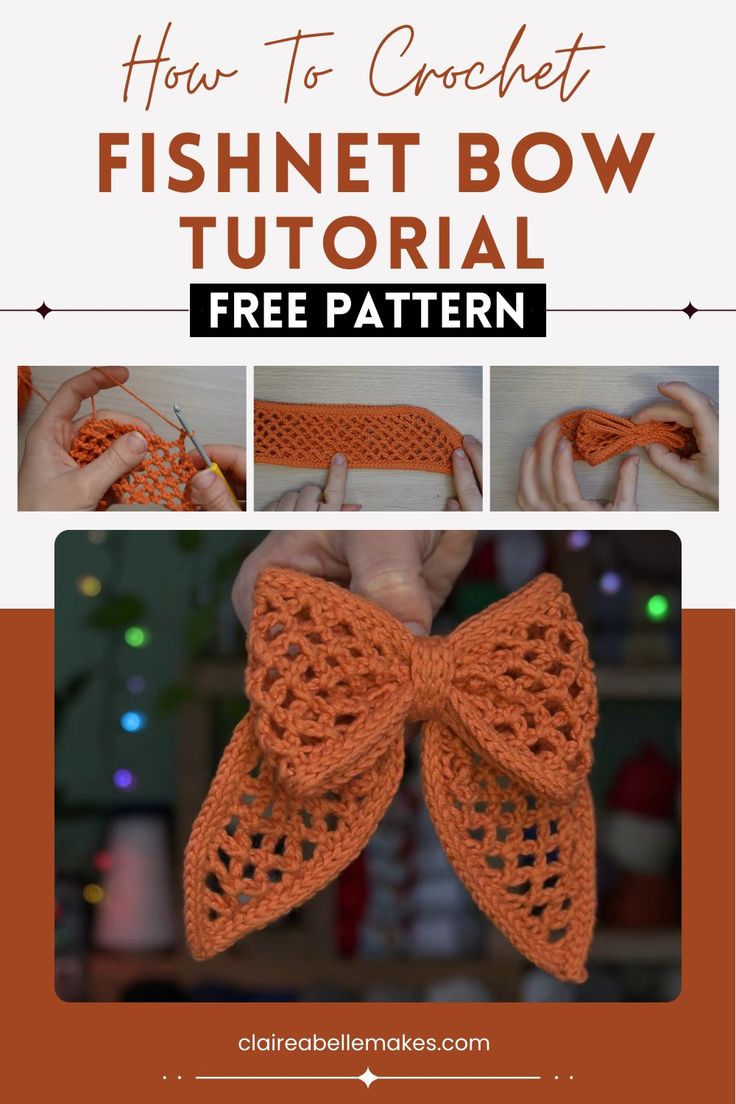
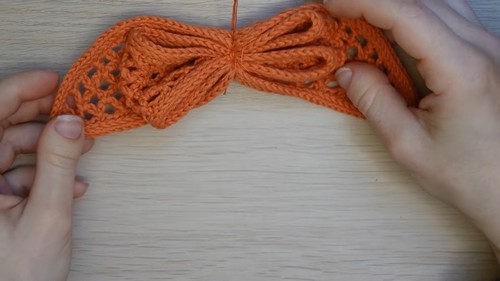
Finished crochet fishnet bow ready to be attached to hair.
Materials Needed:
- 15 g of sport weight yarn (e.g., Drop Saffron)
- 3.5 mm crochet hook
- Sewing needle and thread (or yarn needle)
- 2 stitch markers
Instructions:
Base of the Bow
Slip Knot and Chain: Make a slip knot and chain 100. Ensure the starting chain is a multiple of 3 plus 1 if you customize the bow size.
Row 1:
Chain 4 more (total 104) and turn your work.
Skip the first 7 chains, then slip stitch into the next chain. This creates your first diamond mesh.
Chain 4, skip 2 chains, and slip stitch into the next chain.
Repeat the chain 4, skip 2, slip stitch across until 3 chains remain.
Chain 2, skip 2, and double crochet into the last chain.
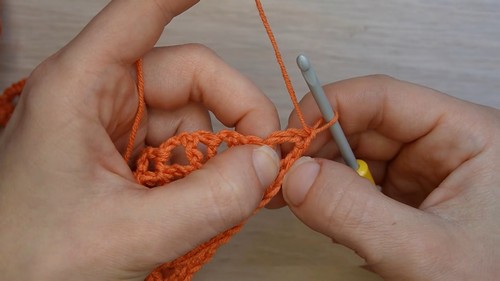
Work-in-progress showing the starting chain and the diamond mesh (fishnet) pattern.
Row 2:
Chain 4 and turn your work.
Slip stitch into the previous row’s chain-4 space.
Repeat: [chain 4, slip stitch into next chain-4 space] until the last space.
Chain 2, then double crochet into the last space.
Rows 3-6: Follow instructions for Row 2 until you complete 7 rows or the base is approximately 5 cm (2 inches) wide.
Final Row of Base:
Chain 2 and turn your work.
Slip stitch into each chain-4 space until the end.
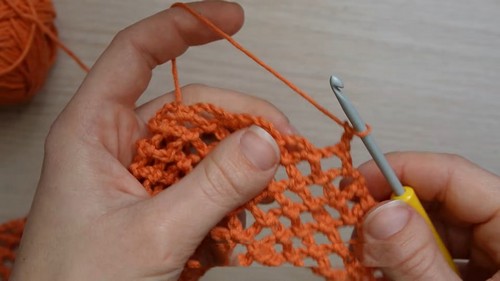
Adding the final row to square off the fishnet base before working the border.
Border
Part 1 (Longest Edge):
Attach yarn at the right corner of the longest edge.
Row 1: Slip stitch into every stitch along this edge, excluding the chain-4 stitches from the starting chain.
Row 2: Chain 1, turn, then slip stitch into the back loops only.
Row 3: Repeat Row 2.
Part 2 (Remaining Edges):
Chain 1 and slip stitch twice into the border just created.
Slip stitch evenly along the slanted and shorter edges. For slanted edges, make two slip stitches in each mesh space and one at each mesh crossing.
Along shorter edges, make one slip stitch in each chain or stitch.
Ensure the same number of stitches along slanted edges.
Chain 1, then make two rows of back loop slip stitches, as in Part 1.
Cut yarn and fasten off.
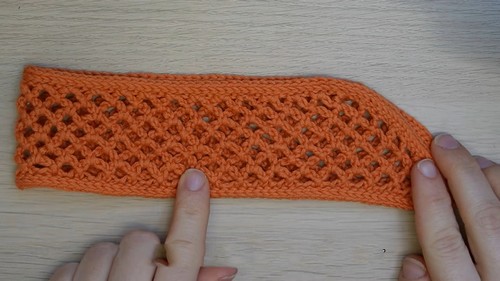
Slip-stitch border worked around the edges to give the bow a neat finish.
Assemble the Bow
Fold and Sew:
Fold the base in half with wrong sides facing, then fold in half again.
Mark top and bottom of the base with stitch markers through both layers.
Sew along the marked line, ensuring stitches align between layers and do not pull too tightly.
Shape the Bow:
Align the center of the big loop with the sewn line.
Fold top to bottom, then tie the center with scrap yarn.
Adjust bow to make it symmetrical.
Center of the Bow
Chain and Slip Stitch:
Make a slip knot, then chain 13 (adjust to fit around the bow center as needed).
Chain 1, turn, and slip stitch in each chain until the end.
Repeat slip stitching in the back loops only for a total of 6 rows.
Narrow crocheted band used to wrap and secure the bow center.
Assemble Center:
Cut the yarn, leaving a long tail for sewing.
Wrap around bow center, covering sewn section.
Sew ends together at the back, adjust as necessary.
Tips: Try the center band on the bow before finishing to check fit. To make the bow larger or smaller, adjust the starting chain in multiples of 3 and add or remove rows from the base.