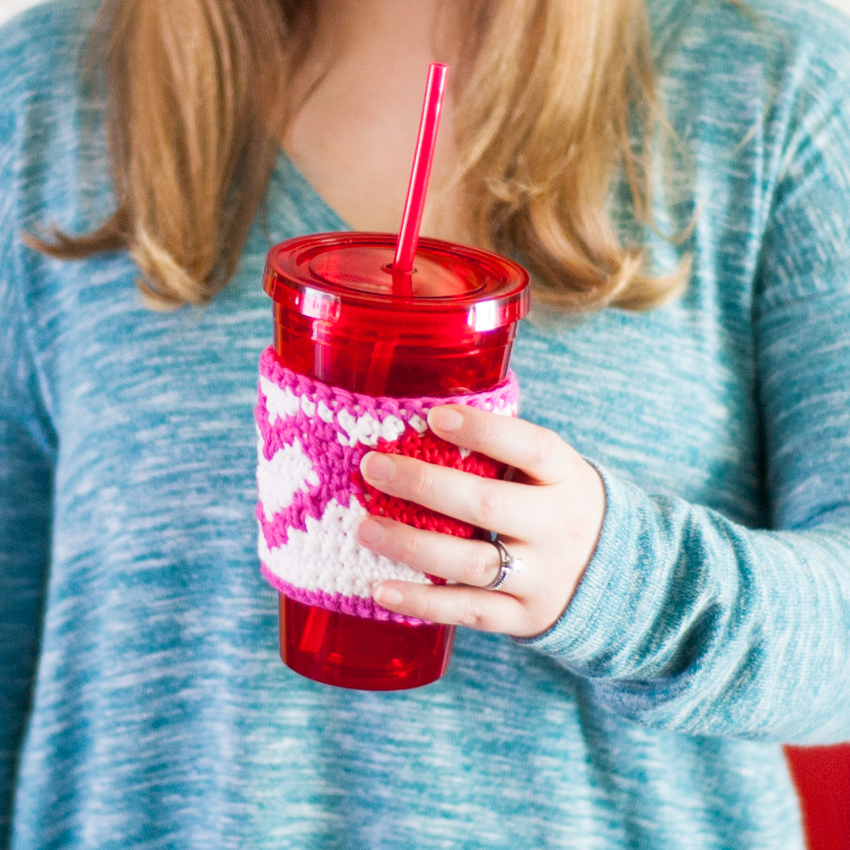
Crochet Heart Cup Cozy
Create a charming cup cozy adorned with a heart design using the art of crochet. This cozy will not only keep your hands safe from hot beverages, but also add a touch of handmade love to your daily coffee or tea routine. By following a simple crochet pattern, you can customize the colors and size of the cozy to suit your personal style and preferences. Whether you are a beginner or an experienced crocheter, this project is a fun and rewarding way to showcase your skills and create a practical accessory for your favorite mug. With just a few basic crochet stitches, you can create a unique and thoughtful gift for yourself or a loved one. Let your creativity shine as you experiment with different yarns and embellishments to make each cup cozy one-of-a-kind. Crocheting a heart cup cozy is not only a fun and relaxing activity, but also a wonderful way to show your appreciation for the simple pleasures in life.

Supplies:
Worsted weight cotton yarn in 2-4 colors
I 5.5mm and H 5.0mm crochet hooks
Tapestry needle
Scissors
Optional (but very helpful): Clothespins or yarn bobbins
Abbreviations:
sc – Single Crochet
ch – Chain
sl st – Slip Stitch
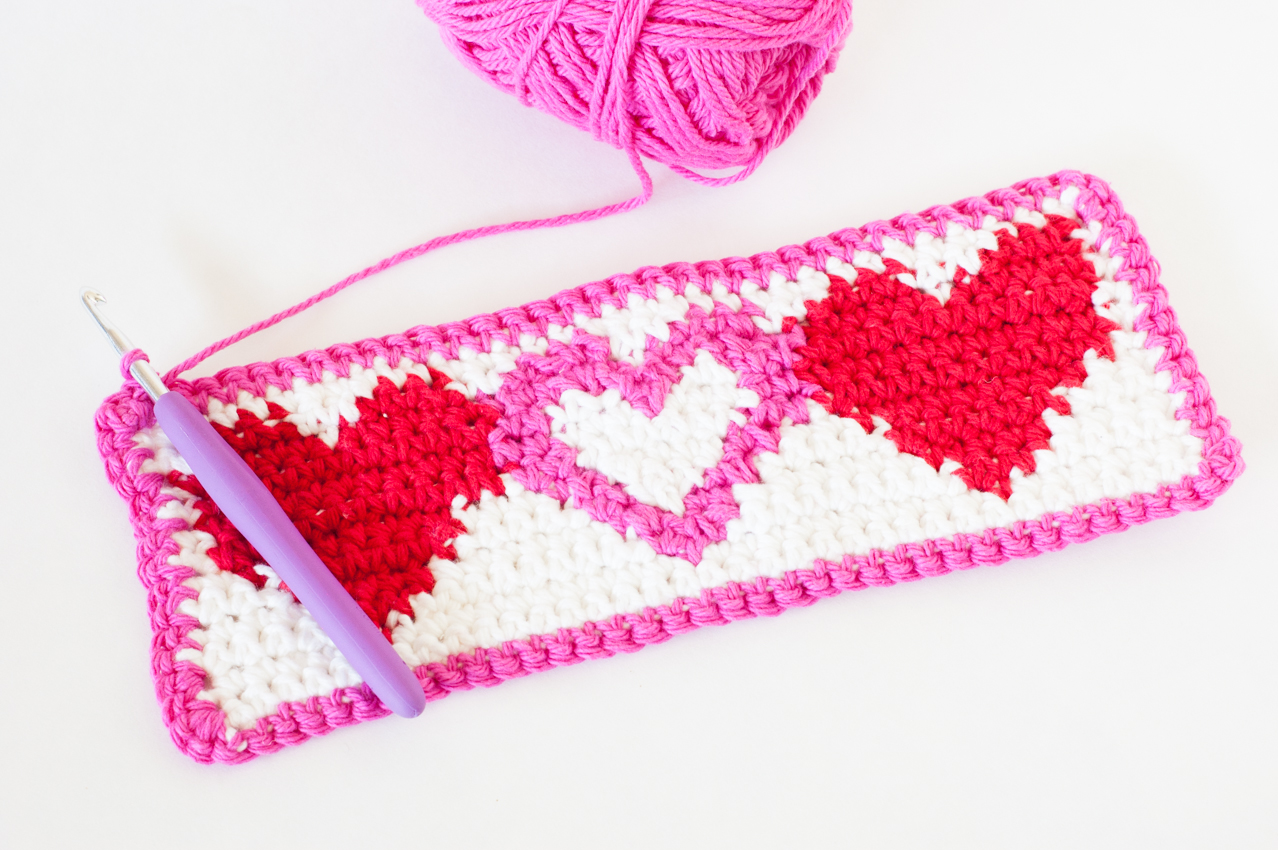
Heart Cup Cozy Crochet Color Chart
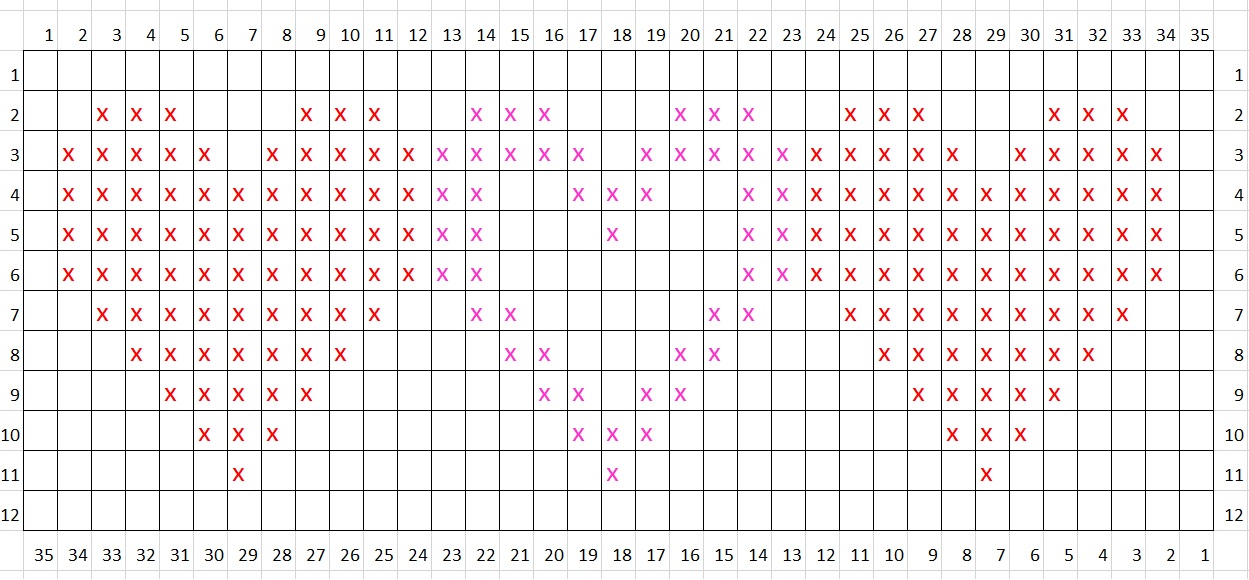
I’ve provided the color-coded graph (above) for those of you that prefer to work from the chart, but if you prefer a written pattern it’s outlined below.
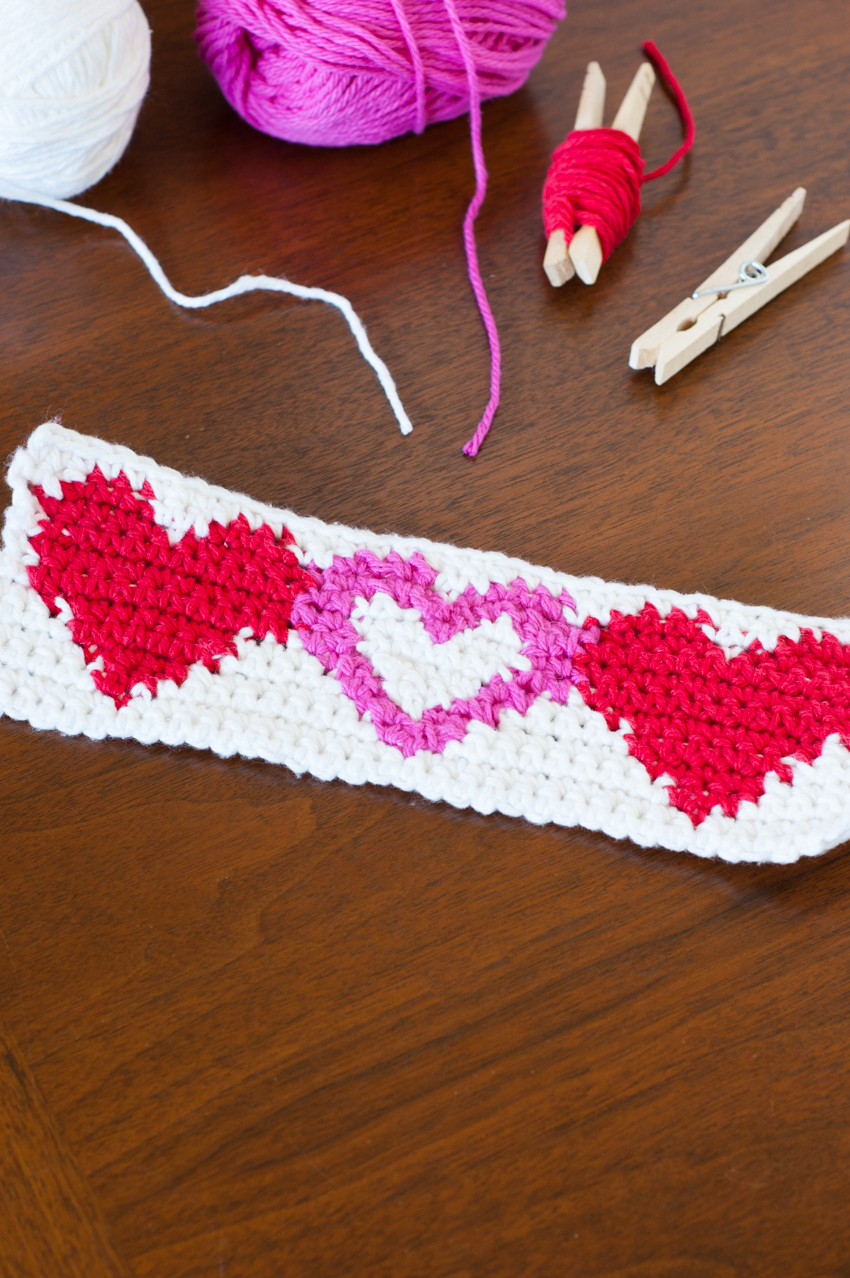
I began by making a yarn bobbin (from a clothespin) for each of my heart colors. In this case, I made two red bobbins and one hot pink bobbin. This helped my to keep my yarn from becoming tangled, and made it so I didn’t have to carry the red yarn through the whole piece. I carried the white throughout the whole cup cozy, but only carried the red in the red heart section, and the hot pink in the pink heart section. Hopefully this makes sense!
Color A = White (background)
Color B = Red (solid hearts)
Color C = Hot Pink (outlined heart)
Body:
Using your I/5.5 mm hook, ch 35 + 1 using Color A
Switch to your H/5.0 mm crochet hook.
Row 1: Using Color A, skip the extra ch and sc in each ch across. (35 stitches)
Row 2: Color A – Ch 1 and turn, 2 sc. Color B, 3 sc. Color A, 3 sc. Color B, 3 sc. Color A, 2 sc. Color C, 3 sc. Color A, 3 sc. Color C, 3 sc. Color A, 2 sc. Color B, 3 sc. Color A, 3 sc. Color B, 3 sc. Color A, 2 sc. (35 stitches)
Row 3: Color A – Ch 1 and turn, 1 sc. Color B, 5 sc. Color A, 1 sc. Color B, 5 sc. Color C, 5 sc. Color A, 1 sc. Color C, 5 sc. Color B, 5 sc. Color A, 1 sc. Color B, 5 sc. Color A, 1 sc. (35 stitches)
Row 4: Color A – Ch 1 and turn, 1 sc. Color B, 11 sc. Color C, 2 sc. Color A, 2 sc. Color C, 3 sc. Color A, 2 sc. Color C, 2 sc. Color B, 11 sc. Color A, 1 sc. (35 stitches)
Row 5: Color A – Ch 1 and turn, 1 sc. Color B, 11 sc. Color C, 2 sc. Color A, 3 sc. Color C, 1 sc. Color A, 3 sc. Color C, 2 sc. Color B, 11 sc. Color A, 1 sc. (35 stitches)
Row 6: Color A – Ch 1 and turn, 1 sc. Color B, 11 sc. Color C, 2 sc. Color A, 7 sc. Color C, 2 sc. Color B, 11 sc. Color A, 1 sc. (35 stitches)
Row 7: Color A – Ch 1 and turn, 2 sc. Color B, 9 sc. Color A, 2 sc. Color C, 2 sc. Color A, 5 sc. Color C, 2 sc. Color A, 2 sc. Color B, 9 sc. Color A, 2 sc. (35 stitches)
Row 8: Color A – Ch 1 and turn, 3 sc. Color B, 7 sc. Color A, 4 sc. Color C, 2 sc. Color A, 3 sc. Color C, 2 sc. Color A, 4 sc. Color B, 7 sc. Color A, 3 sc. (35 stitches)
Row 9: Color A – Ch 1 and turn, 4 sc. Color B, 5 sc. Color A, 6 sc. Color C, 2 sc. Color A, 1 sc. Color C, 2 sc. Color A, 6 sc. Color B, 5 sc. Color A, 4 sc. (35 stitches)
Row 10: Color A – Ch 1 and turn, 5 sc. Color B, 3 sc. Color A, 8 sc. Color C, 3 sc. Color A, 8 sc. Color B, 3 sc. Color A, 5 sc. (35 stitches)
Row 11: Color A – Ch 1 and turn, 6 sc. Color B, 1 sc. Color A, 10 sc. Color C, 1 sc. Color A, 10 sc. Color B, 1 sc. Color A, 6 sc. (35 stitches)
Row 12: Color A – Ch 1 and turn, sc in each stitch across. (35 stitches)
When you finish, leave long yarn tails so that you can correct any imperfections as you weave in your ends. For example, I had some areas where the white yarn I carried could be seen behind my red stitches, so I wove in through that area to hide the white.
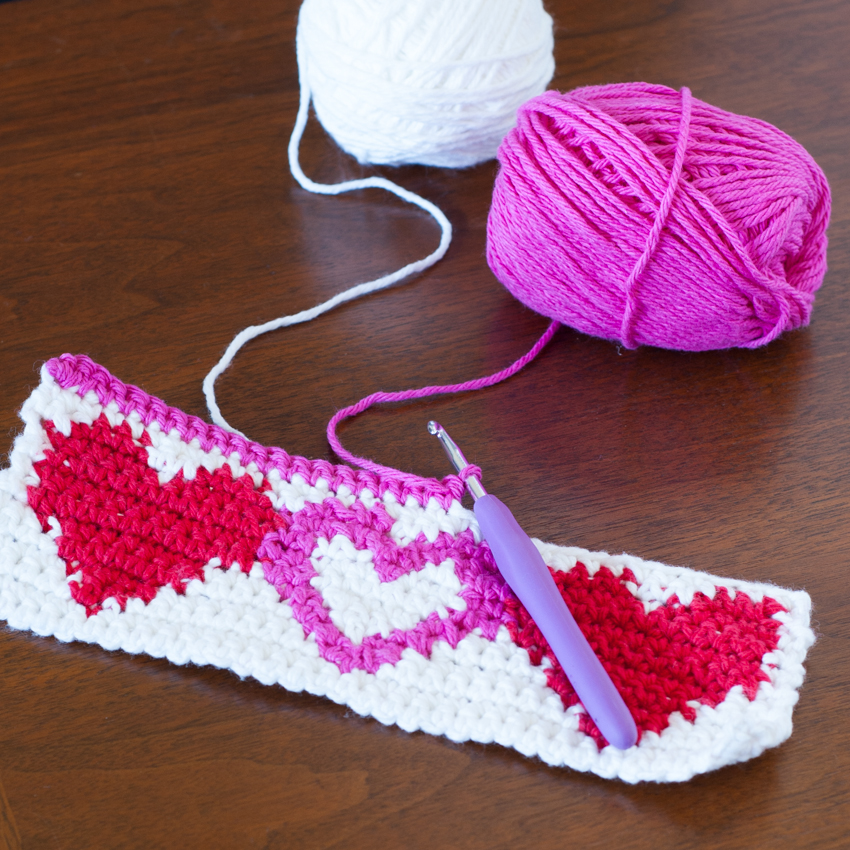
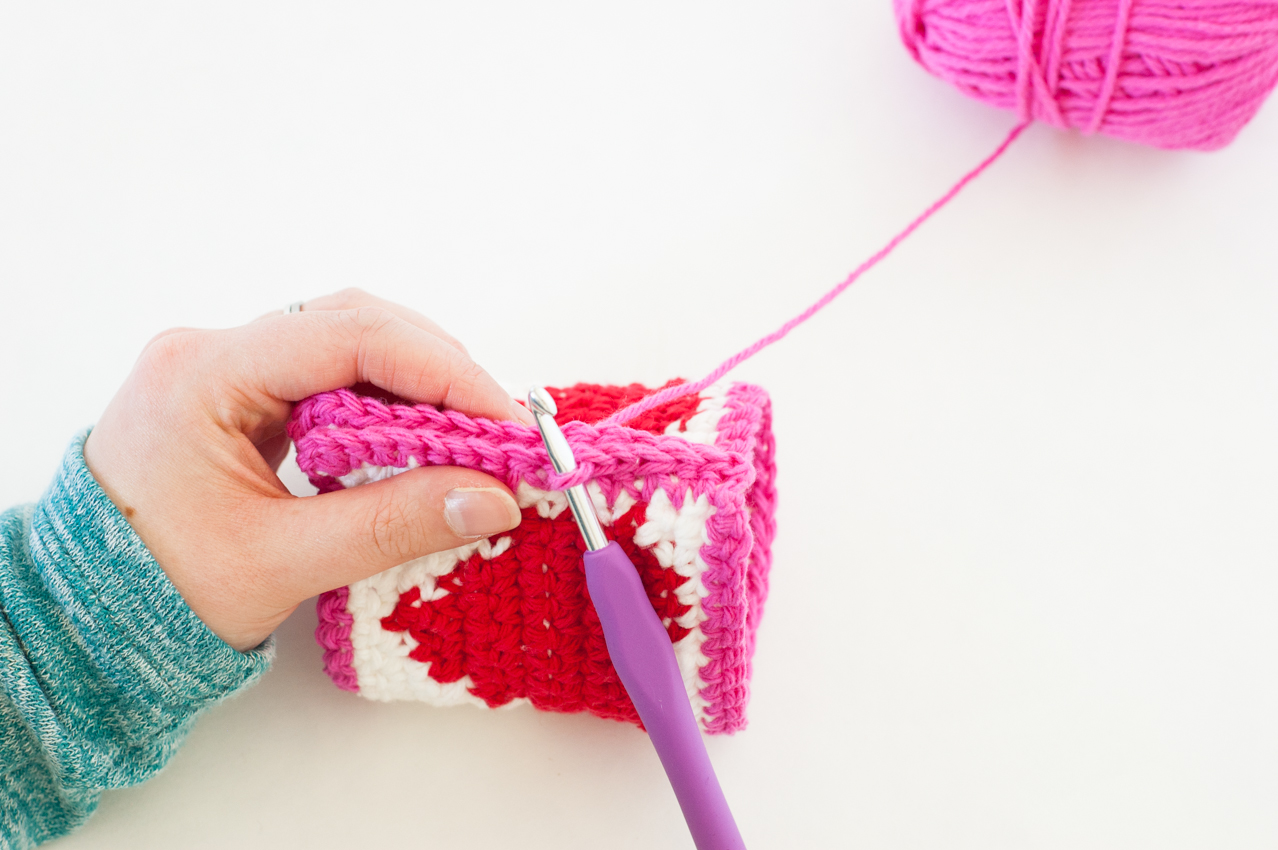
Border:
Connect Color C (hot pink) at a corner and crochet 2 sc. Begin to sc across. In each corner, crochet 3 sc. Unlike my picture, you’ll want to crochet from right to left (my border ended up being wrong-side up and I had gone too far before I noticed it).
When you’ve reached the end of your border, crochet one more sc in the space where you began (there will now be 3 sc in the first corner). Do not tie off yet.
Fold your cup cozy in half and line up the sc stitches along the horizontal border. sl st together. Trim yarn and weave in ends.
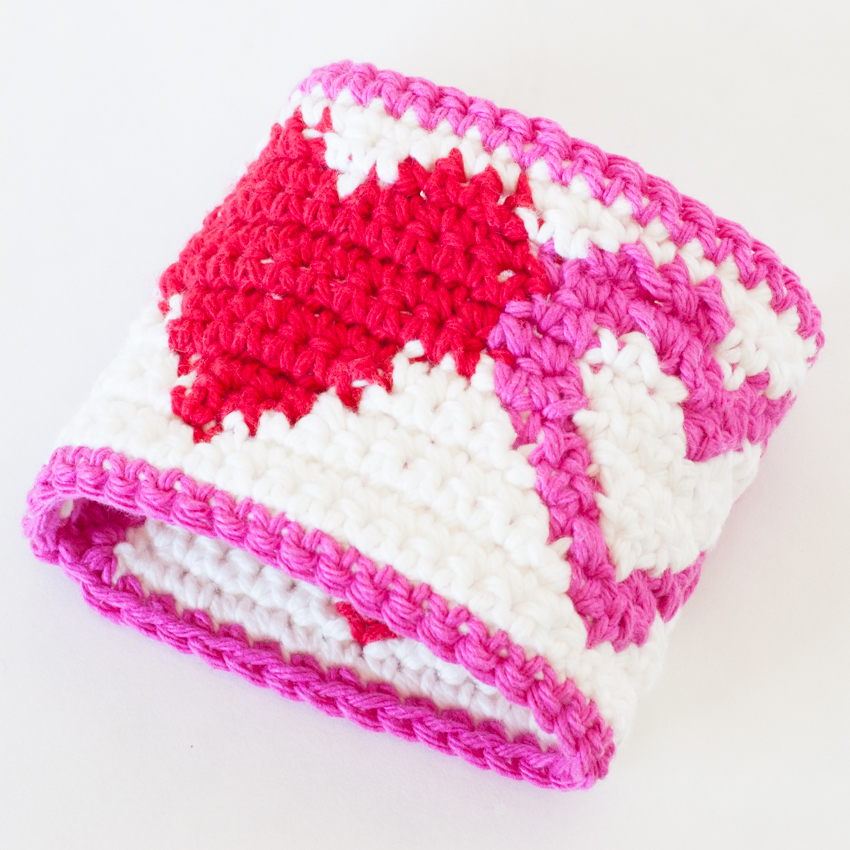
That’s it!!! Pop that bad boy onto your coffee cup and you’re good to go! My finished cup cozy was about 10.5 inches in diameter and 3.75 inches tall. If you need a smaller cozy, you could use a smaller crochet hook, or you can crochet the sc border on the top and bottom, but skip the sides (just slip stitch them together in the border color).