Crochet Amigurumi Coffee Cup
If you're looking to add a touch of handmade coziness to your space, consider crocheting an amigurumi coffee cup! This adorable creation brings a sprinkle of charm to any coffee lover's decor. With its cute design and intricate details, it's sure to make you smile every time you see it. Whether you're a crochet pro or just starting, crafting your own amigurumi coffee cup can be a fun and rewarding project. So why not grab some yarn, a crochet hook, and bring a little coffee cup cuteness into your life? Happy crafting!

Project Level
Beginner to Intermediate.
Yarn Requirements
Cotton 4 ply yarn is used for both the coffee cup and the decorations.
Suggested Yarn
4 ply yarn
Suggested Hook
- 3mm crochet hook for the coffee cup.
- 1.5mm crochet hook for the heart decoration on the cappuccino.
Abbreviations
- ch: Chain
- sl st: Slip Stitch
- sc: Single Crochet
- inc: Increase (make two single crochet stitches into the same stitch)
- dec: Decrease (not used in this pattern but commonly found in amigurumi)
- tr: Triple Crochet
- dc: Double Crochet
Special Stitches
Magic Ring: Technique to start the amigurumi, making sure there is no hole in the beginning.
Single Crochet Increase (inc): 2 sc in the same stitch.
Reverse Single Crochet: Worked in opposite direction, gives a nice edge or border.
Pattern Instructions
Coffee Cup Base and Body
Base
Start with a magic ring.
Row 1: 10 sc into the ring, pull tightly to close, sl st to first sc to join.
Row 2: ch 1, 2 sc in each stitch around (20 sc), sl st to first sc to join.
Row 3: ch 1, 1 sc in next stitch, 2 sc in next stitch repeat around (30 sc), sl st to first sc to join.
Body
Work in the back loops only for the next row to create a base edge.
Row 4-11: Ch 1, 1 sc in each stitch around. Place a stitch marker at the beginning of row 5 and continue in a spiral; do not join rounds.
After 11 rows, the cup shape should be formed.
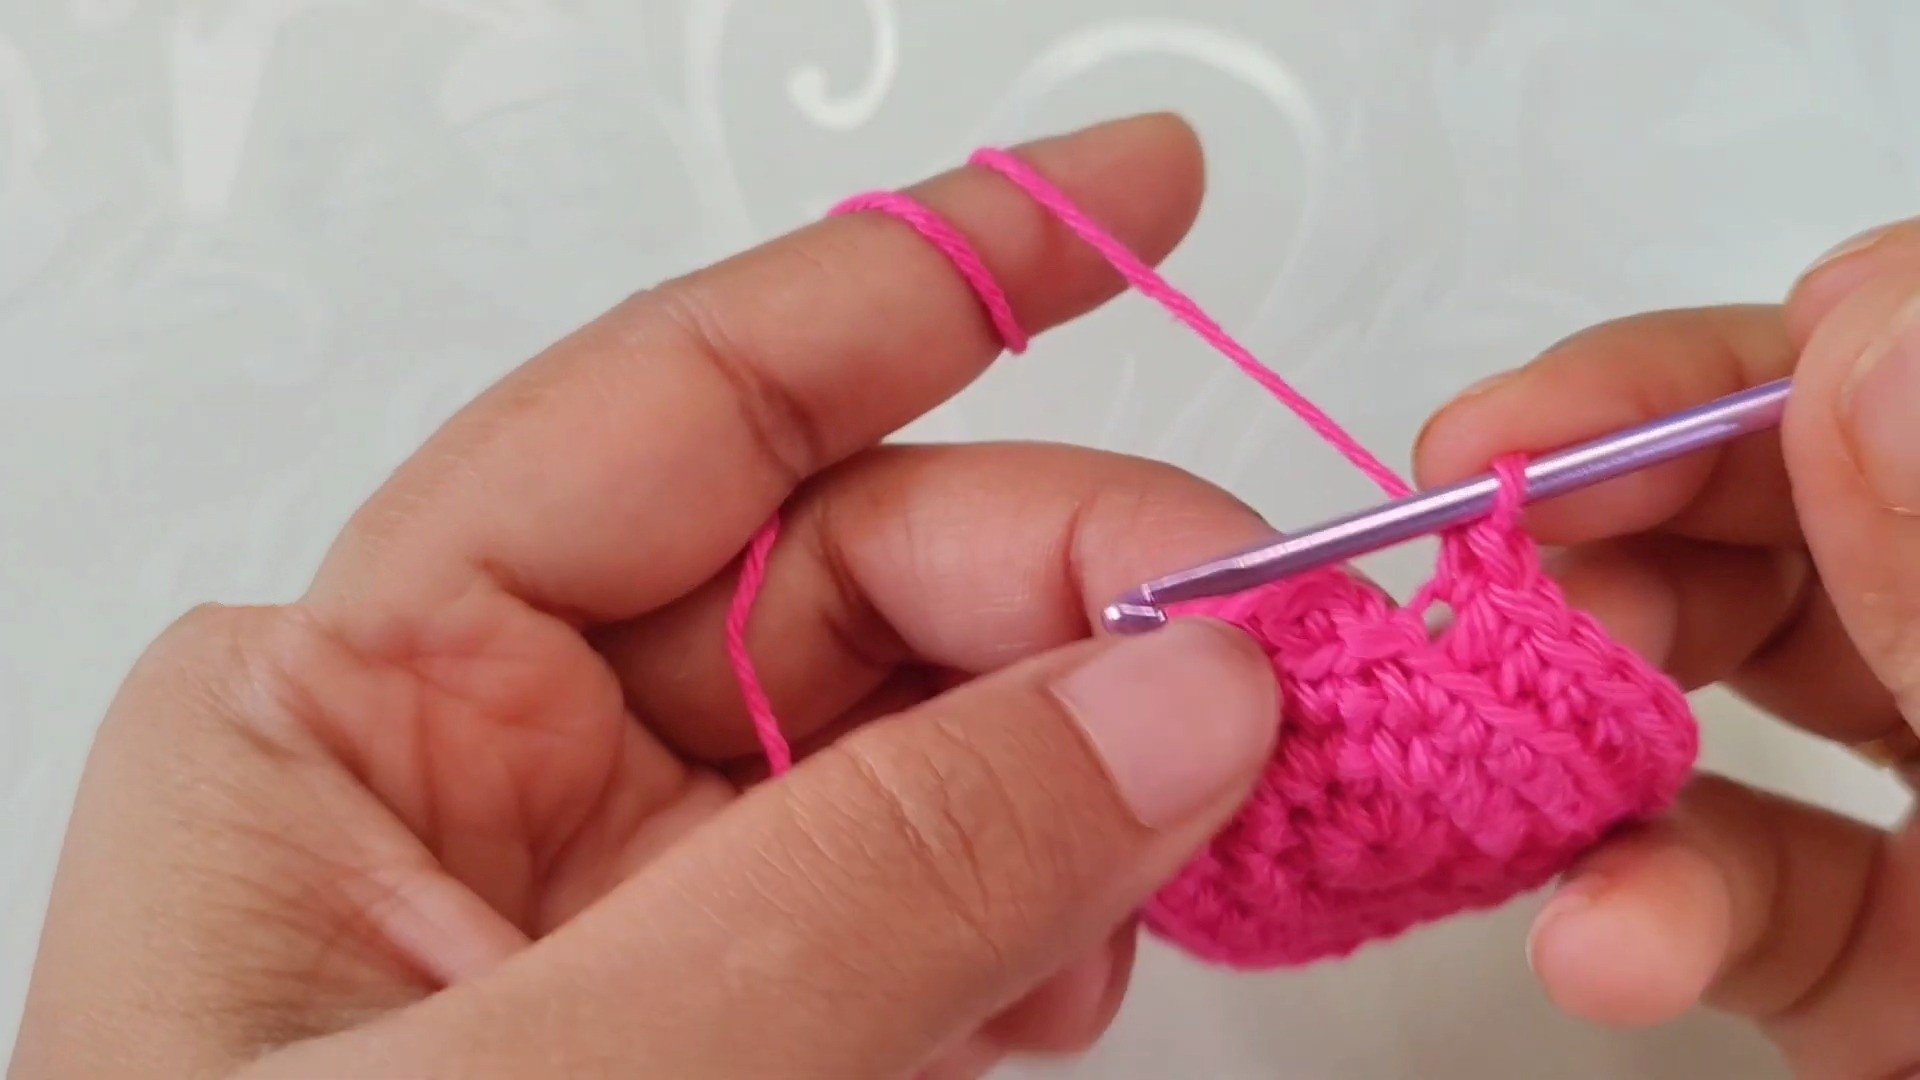
Border/Edging
Row 12: Reverse single crochet in each stitch around, sl st to first reverse sc to join.
Handle
Leave a long tail for sewing before starting.
Work 10 icon stitches (a form of a tight stitch that creates a dense fabric suitable for handles).
Leave a long tail for sewing after finishing.
Sew handle onto cup between the 5th and 11th rows.

Decorating the Coffee Cup
Add facial features with kundans or embroidery for the eyes and mouth. Use fabric glue for the eyes and embroidery thread for the mouth.
Coffee Part
Start with a brown color thread and a magic ring.
Row 1: 10 sc into the ring, sl st to first sc to join.
Row 2: ch 1, 2 sc in each stitch around (20 sc), sl st to first sc to join.
Row 3: ch 1, 1 sc in next stitch, 2 sc in next stitch repeat around, sl st to first sc to join (30 sc).
Row 4: ch 1, 1 sc in each stitch around, sl st to first sc to join (no increase, 30 sc).
Attach the coffee part to the top of the coffee cup, ensuring proper alignment with facial features.
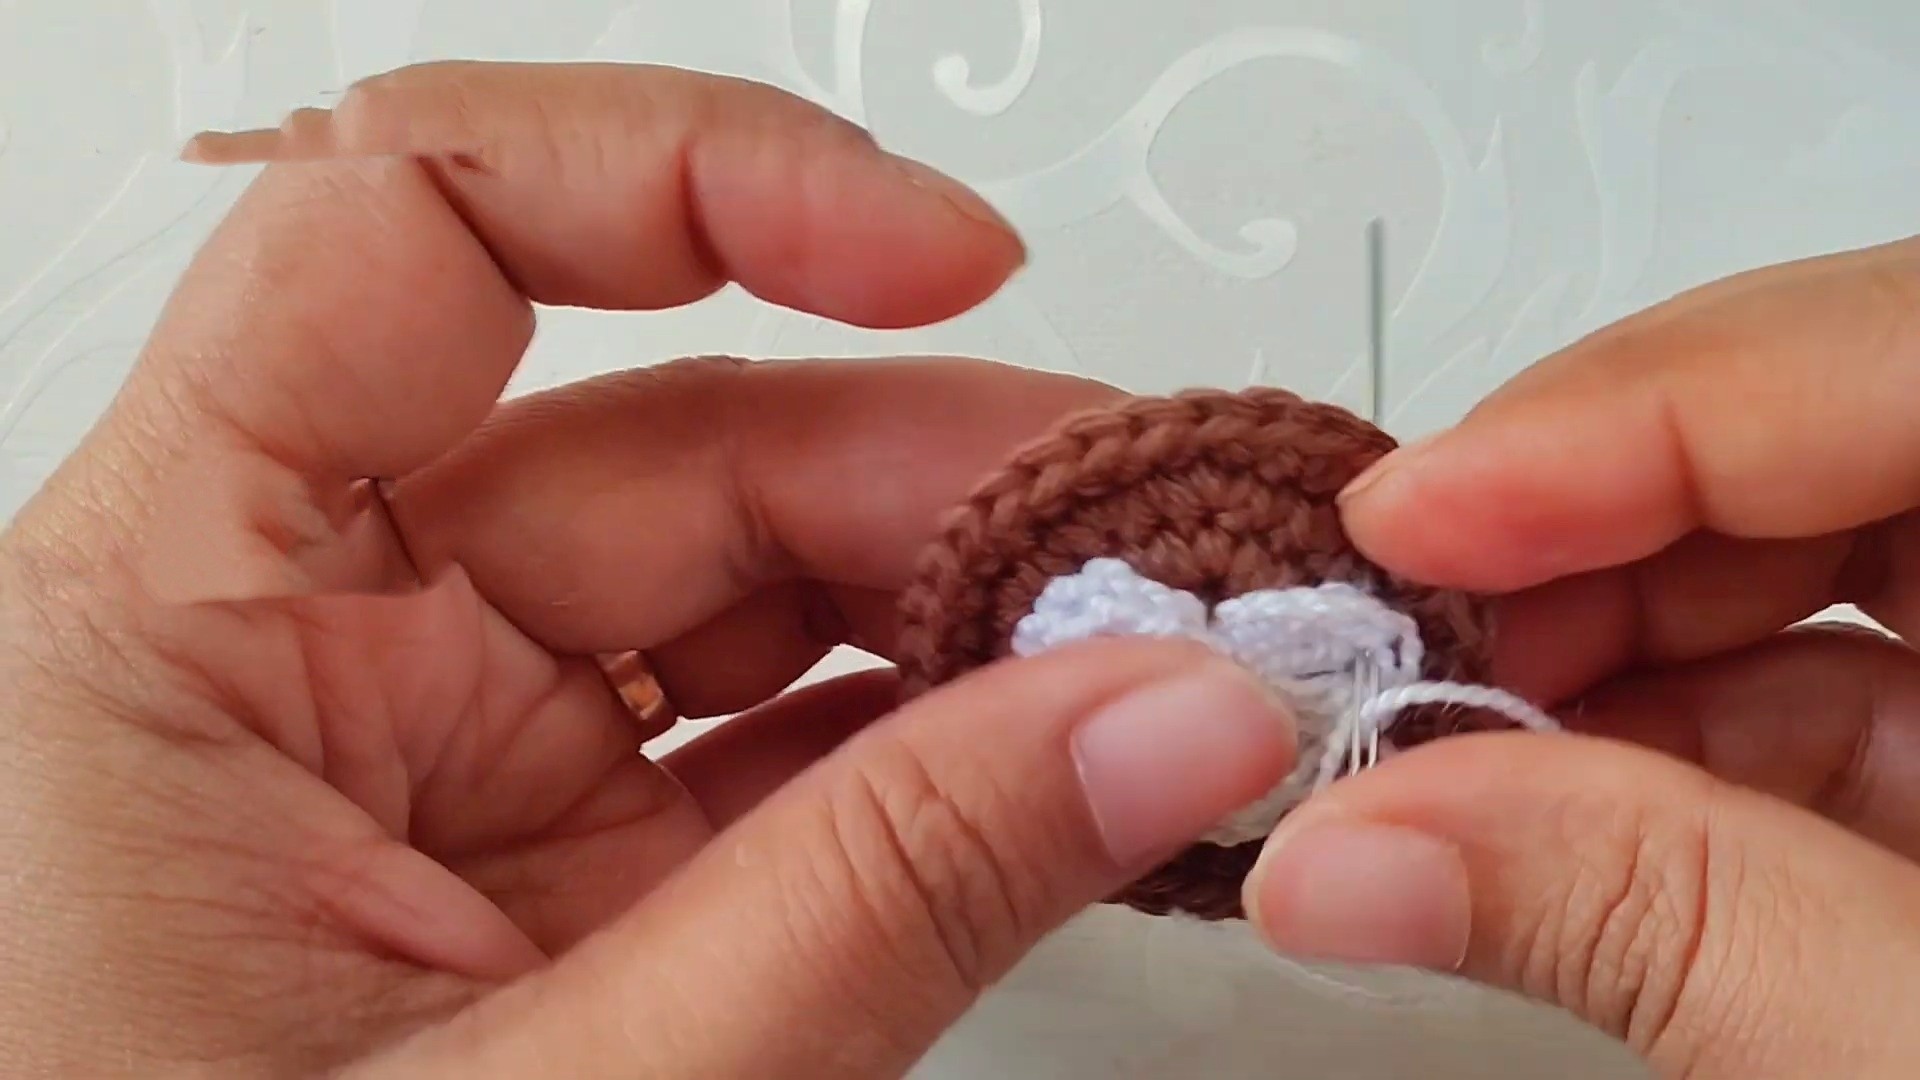
Heart Decoration
Use a smaller hook (1.5mm) and start with a magic ring.
Work a combination of triple crochet and double crochet stitches to form a heart shape, then attach it atop the coffee part to mimic cappuccino foam art.
Assembly
Sew the coffee part to the cup, aligning the heart with the face for aesthetic appeal.
Stuff the coffee cup before completely sewing closed.
Finishing Steps
Weave in all ends, secure stitches, and trim excess yarn.