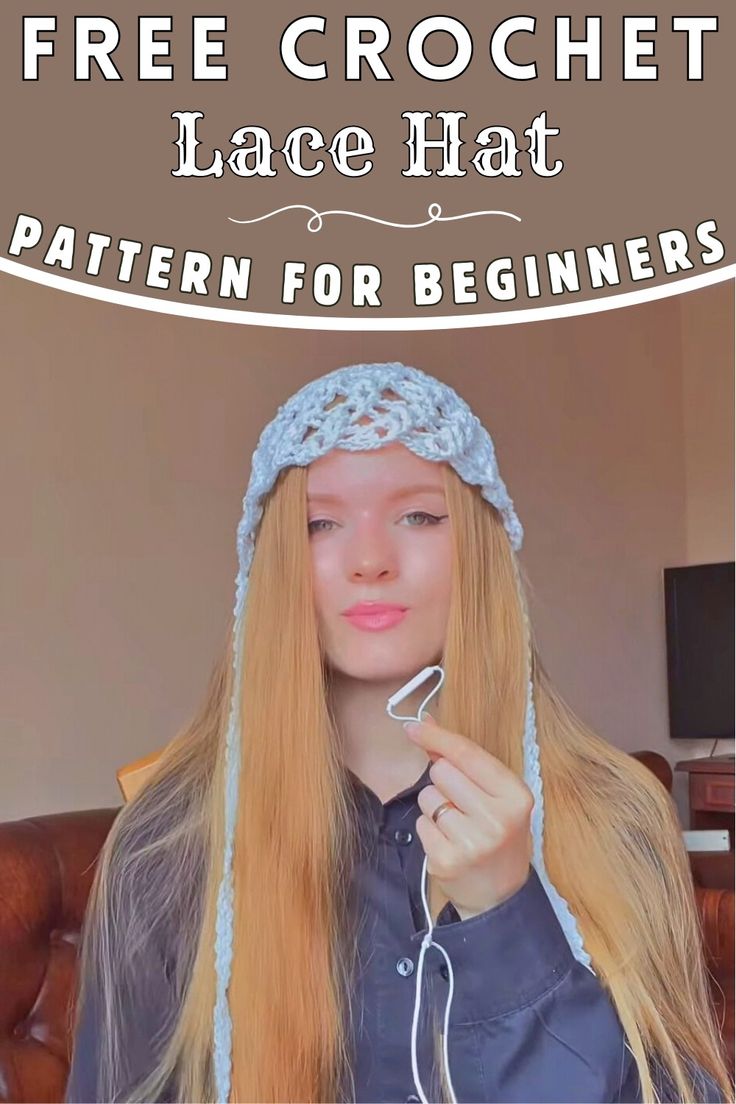
Crochet Lace Hat
Nothing says cozy and stylish like a crochet lace hat! This delightful accessory effortlessly blends charm with warmth, making it perfect for both fashion-forward outings and chilly days. The intricate lace design adds a touch of elegance to any outfit, while the soft yarn ensures comfort all day long. Whether you're looking to add a pop of personality to your wardrobe or keep your head snug during outdoor adventures, a crochet lace hat is a versatile and fun addition to your collection. So go ahead, embrace your unique style and rock that crochet lace hat with confidence!
Materials List
- Yarn
- Crochet Hook
- Stitch Markers
- Scissors
- Yarn Needle
- Measuring Tape
Starting the Ring
Magic Ring Setup
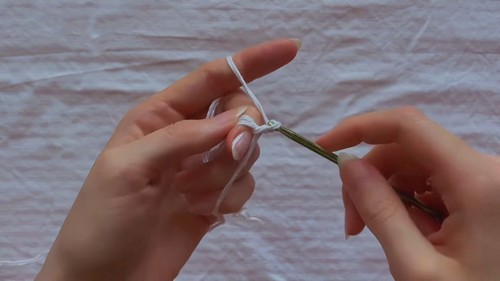
Make a magic ring.
Chain 5, then perform a single crochet into the ring.
Repeat the above step 5 more times.
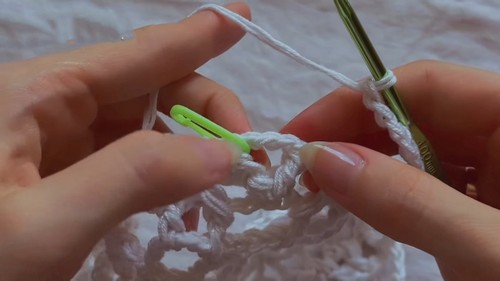
Initial Arches
Chain 2, yarn over, and perform a double crochet into the first air loop.
Continue crocheting in rounds tightening the ring as necessary until 6 total arches are formed.
For the last arch in the round, modify by chaining 2, perform a double crochet into the first air loop, chain 2 again, and then perform another double crochet into the same connection.
Increasing Arches
Row 3: Doubling the Arches
Chain 5. Place a marker.
Single crochet into the connection between arches.
Repeat chain 5 and single crochet alternately into the arch and between arches until there are 12 arches.
Last arch as previously done (chain 2, yarn over, double crochet, repeat).
Row 4: Maintaining Arch Count
Continue with 12 arches following the chain 5 pattern with single crochets into each arch, updating marker placement as needed.
Last arch performed similarly to previous modifications.
For Row 5: Repeat of Row 4
Maintain the 12 arches as established.
Row 6: Expanding to 24 Arches
Double the arches by inserting additional chains and single crochet patterns between each existing arch until reaching 24 arches in total.
Finalizing the Base Hat
Row 7: Concluding Narrow Version
Repeat the 24 arch pattern for individuals preferring a narrow hat.
Optional Extended Rows
Rows 8-15: Continuing with 24 Arches
Simply continue the established pattern for a total of 8 more rows to match the hat size.
Rows 9-11 introduce skipped loops and relief stitches increasing texture and aesthetics, syncing double crochet with chain loops.
Continue by repeating patterns that enhance the relief and leaf-like patterns in the texture, until the desired number of rows or hat height is achieved.
Concluding Rows and Finishing Touches
Row 14: Closure
Begin with a relief single crochet.
Continue with double crochet, chain 2, and double crochet patterns.
End the row with a chain of 2 and join with a slip stitch to finalize the row.
Finishing
Chain 1, cut the yarn and pull through the loop.
Hide yarn ends with a needle. The wrong side will display relief stitches.