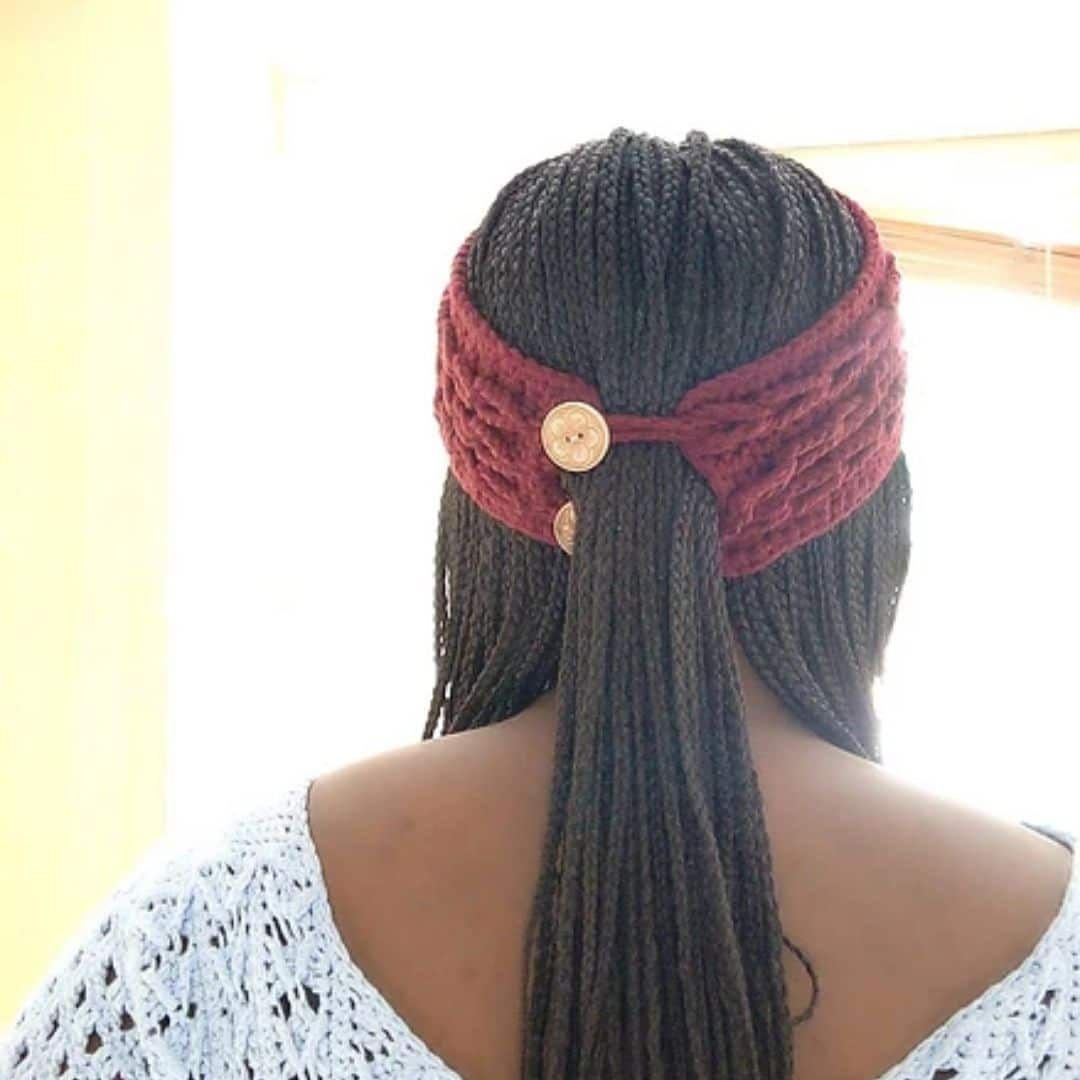
Crochet Headband with Ponytail Opening
Crochet headbands with ponytail openings are the perfect accessory for keeping your hair in place while adding a touch of charm to your outfit. Not only do they serve a practical purpose by allowing your ponytail to peek through comfortably, but they also come in a variety of colors and styles to suit your personal taste. Whether you're heading to a yoga class, running errands, or simply having a bad hair day, these headbands are a stylish solution. Plus, they make a thoughtful gift for friends or family who appreciate both fashion and function. So go ahead, add a crochet headband with a ponytail opening to your collection and elevate your hairstyle effortlessly!
Materials for this crochet headband pattern
Yarn
- Lion Brand hometown, #5 weight, Chunky; 142g/5 oz, 74metres/81 yards):
- Light grey (A), 1 ball/skein,
- Burgundy (B), ball/skein
- For baby size, you need about 60 yards of yarn.
- Toddlers – 80 yards.
- Child size – 90 yards.
- Teens – 100 yards
- Adult size – 110 yards.
Hook
Size US 5 mm or any hook required to get the gauge
Gauge
Chunky yarn – 14 sc over 14 rows =10cm/4”
Finished measurement for the chunky crochet headband
- Toddlers to women’s large
- Toddler – 17” by 4”
- Kid – 18” by 4”
- Teen/Women’s small – 20” by 4”
- Women’s large – 22” by 4”
Notions
- Stitch markers
- Yarn needles
- Scissors
- Tape measure
- Buttons (2 – 4 Pieces – 2.5” each)
Abbreviations
- Chains (chs)
- Single Crochet (sc)
- Slip stitch (sl st)
- Fasten Off (FO)
Crochet Headband Pattern Notes
- Chains at the beginning of the rows do not count as a stitch
- The final Length should be a good fit around your head
- The pattern is for – Toddler, Kid, Teen, Women’s small, and women’s large sizes
- The loop in the pattern refers to chain 12.
- Pattern construction – the pattern is worked in rows (starting chains are the width of the ear warmer).
Instructions for this easy crochet headband pattern with ponytail opening
Working in rows, using A
Chain 11(11, 11, 14, 14)
Row 1: Sc in 2nd ch from hook, sc in each ch across, turn – 10 (10, 10, 13, 13 sc).
Row 2: Ch 1, sc in each st across, turn – 10(10, 10, 13, 13 sc)
Row 3: Ch 1, sc in next 2 sts, *make 1 loop, sc in next 3 sts, repeat from * 1(1, 1, 2, 2) more time(s), 1 loop st, sc in last 2 sts, turn – 10 sc/3 loops (10 sc/ 3 loops, 10 sc/ 3 loops, 13 sc/4 loops, 13 sc/4 loops).
Row 4: Ch 1, sc in each st across, remember to sc into the base of each loop, turn –10 (10, 10, 13, 13 sc).
Row 5: Ch 1, sc in each st across, turn – 10(10, 10, 13, 13 sc).
Repeat Rows 2 – 5; 15(17, 19, 21, 23) more times or till you have a good fit around your head.
Color Changes – after 2 repeats ending with row 4, drop color A, pick up color B, and continue the pattern, color changes can be made as many times as desired.
Edging
Working around the 4 sides, sc in each edge/st, ch 1 at each corner
Do not fasten off.
Braid your loops.
To braid the loops –
Each row is braided separately.
For the first row of loops – start with the 2nd loop i.e. from Row 6, and pass this loop through the first loop (from Row 2). Pass the 3rd loop through the 2nd loop.
Pass the 4th through the 3rd and repeat the sequence with the remaining loops.
Repeat with the other rows of loops
Secure the last loops on separate stitch markers.
Last Row – Ch 1, *sc in next 2 sts, sc through the loop on the stitch marker, to secure the loops repeat from * to end of the row.
Note:
The last loops are used as button holes.
Cut yarn and sew in ends.
Sew in buttons on the opposite side of the band.