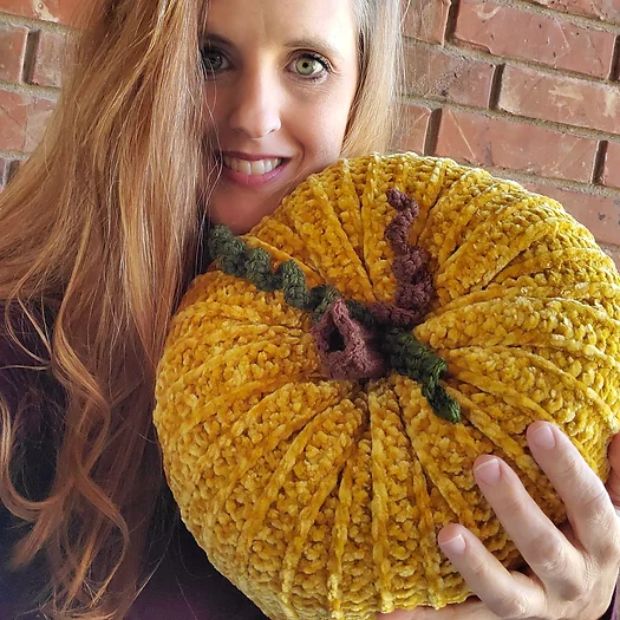
Crochet Velvet Pumpkin
Crochet Velvet Pumpkins are a delightful and cozy addition to your fall decor! These charming handmade pumpkins are crafted with soft velvet yarn, giving them a luxurious and elegant appearance. Whether you place them on your mantelpiece, dining table, or even use them as unique gifts, these pumpkins instantly bring a touch of warmth and whimsy to any space. Their rich texture and beautiful colors make them a lovely accent for the autumn season. Embrace the cozy vibes and add a personal touch to your home with these adorable Crochet Velvet Pumpkins!
Supplies:
- 4.0 mm G crochet hook
- 1 skein Bernat Velvet Yarn 315 yards
- small amount of brown and green yarn for stem and vines
- Large Needle for weaving in ends
- Poly-fil stuffing
Abbreviations:
- Ch: Chain
- HDC: Half Double Crochet
- HDCBLO: Half Double Crochet Back Loop Only
- SLST: Slip stitch
- F/O: Finish off
Free pumpkin crochet pattern
Pumpkin:
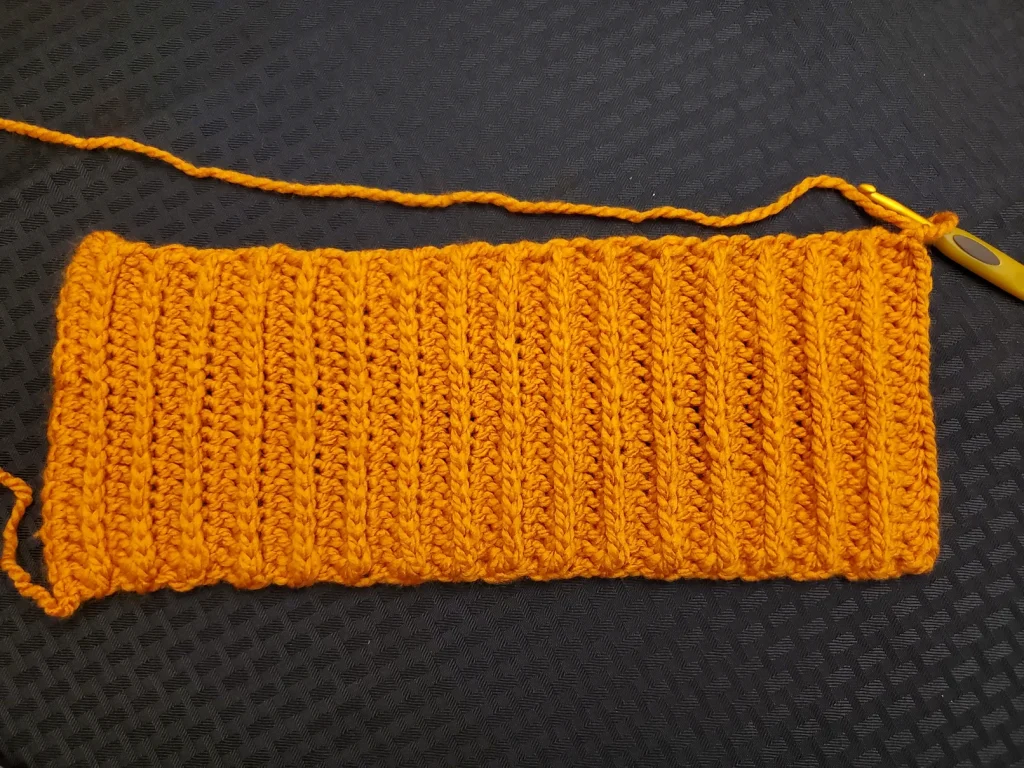
Row 1: Chain 61 HDC in 2nd ch and across, ch1, turn. (60)
For the rest of the stitches you will be working into the loop below the normal top loops of the stitch. I have marked the loops with a yellow dot in the photo below.
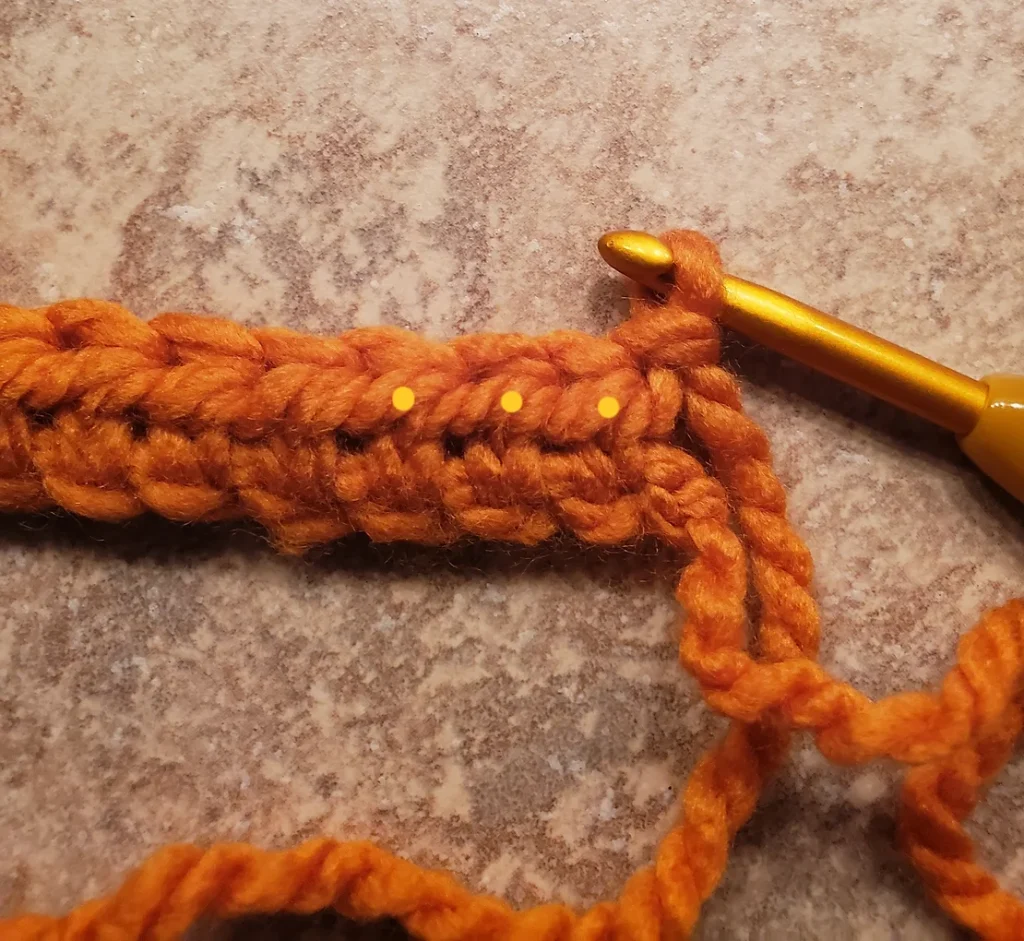
Working into these loops will push the top loops forward and create a rib on the opposite side.
Row 2: HDC 3rd loop across, inserting hook through the loop from the bottom. Ch 1, turn. (60)
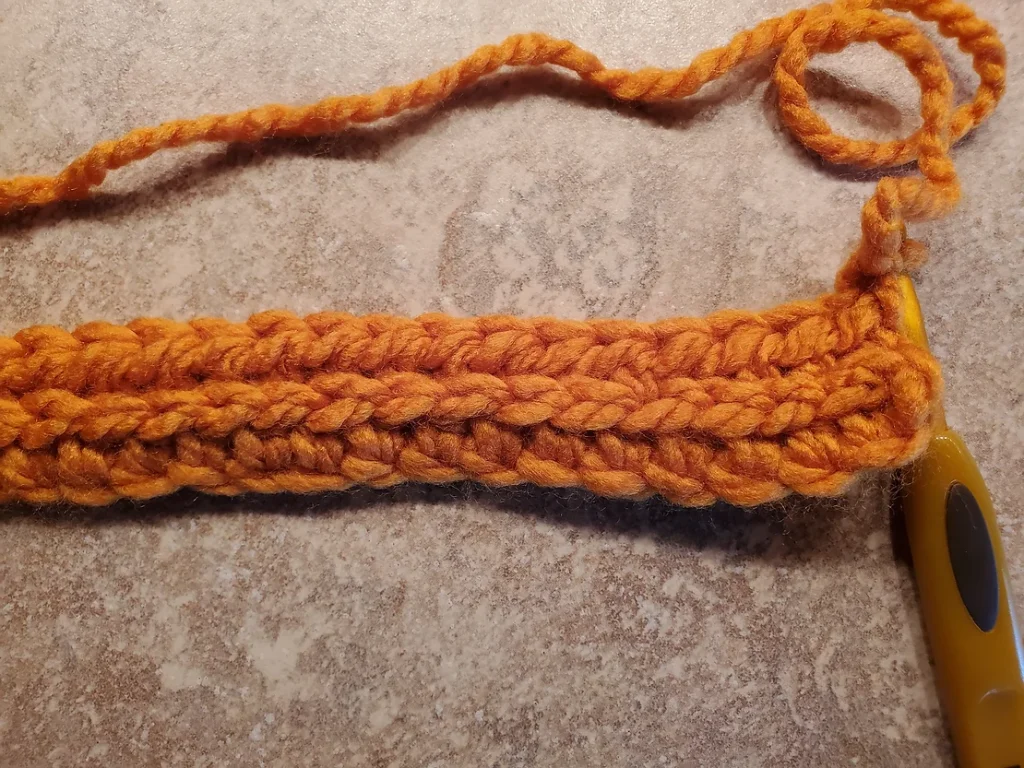
Rows 3– 66: repeat Row 2. Do not chain 1 at end of row 66.
Fold piece in half and SLST the ends together, F/O leaving a long tail, at least 30”.
(Since both sides have ribs there is no right or wrong side.)
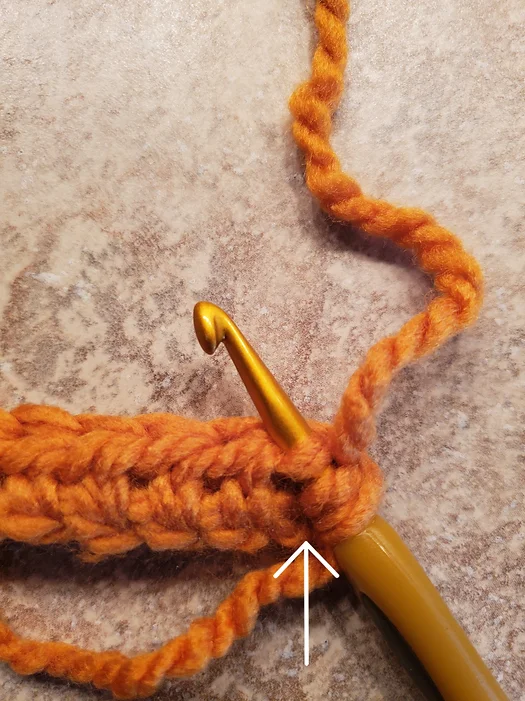
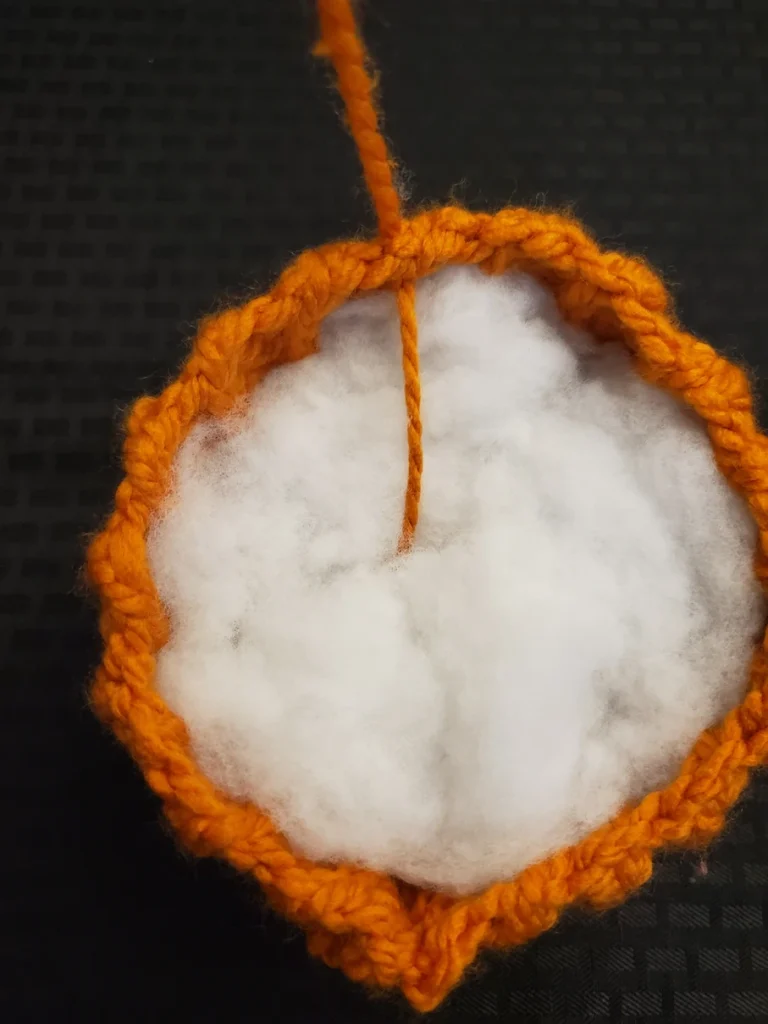
Turn seam from SLST so it is on the inside of the pumpkin.
Thread a large needle onto the tail and begin working the needle through the ribs on the end of the rows all the way around. Pull tight to close. To secure weave tail back and forth across the opening pulling tight.
Insert hook onto the center of the end you just secured and pull through to opposite end. Stuff pumpkin with Poly-fil and repeat instructions to secure second side.
Once your pumpkin is formed, insert the needle through the center of the top of the pumpkin and push through to the bottom, pull to create an indent in the top of the pumpkin, turn and insert needle thought bottom and back to the top. Pull to create indent on bottom. Secure tail.
Stem:
With Brown
Row 1: CH 11, HDC in 2nd chain and across, ch1, turn. (10)
Row 2: HDCBLO across, ch1, turn. (10)
Rows 3 – 8: Repeat row 2. F/O leaving a long tail.
With a large needle stitch Row 1 to Row 8 to form a stem.
Vines:
In Brown, Chain 21, work 2 SC into 2nd chain and across. F/O
In Green, Chain 26, work 2 SC into 2nd chain and across. F/O
In Brown, Chain 31, work 2 SC into 2nd chain and across. F/O
Secure Stem and vines to top of pumpkin with a large needle.