

Make an Adorable Crochet Bunny Ornament Amigurumi — Free Easy Pattern
Create a tiny, lovable Crochet Bunny Ornament Amigurumi with this simple pattern — perfect for holiday decorations, keychains, gift toppers, or a sweet year-round accent. This guide includes the stitch abbreviations and round-by-round instructions for the body, collar, nose and ears, plus finishing tips so your bunny looks neat and secure.
Quick tips: work with a small hook and yarn weight that give you tight stitches so the stuffing doesn't show through. Stuff lightly as you go to keep the shape smooth, and use a tapestry needle to sew pieces together invisibly. Optional: use safety eyes or embroider the face for a fully handmade look.
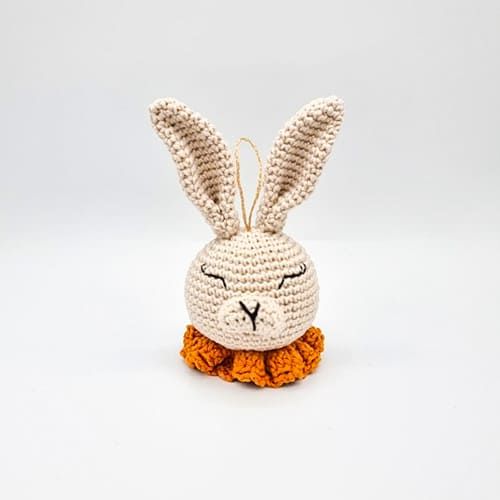
Materials
Yarn in main color and a small amount of yellow for the collar, matching crochet hook for your yarn, fiberfill stuffing, tapestry needle, stitch marker and scissors. Optional: safety eyes or embroidery thread for facial details.
Abbreviations
MR: Magic ring
Ch: Chain
Sc: Single crochet
Hdc: Half double crochet
Inc: Increase
Dec: Decrease
BLO: Back loop only
FLO: Front loop only
Slst: Slip stitch
Stuff as you go along your work.
Rnd 1. 6 sc in MR (6)
Rnd 2. 6 inc (12)
Rnd 3. (1sc,inc)* (18)
Rnd 4. (2sc,inc)* (24)
Rnd 5. (3sc,inc)* (30)
Rnd 6. (2sc,inc,2sc)* (36)
Rnd 7. (5sc,inc)* (42)
Rnd 8. (3sc,inc,3sc)* (48)
Rnd 9-17. 48 sc (48)
Rnd 18. (3sc,dec,3sc)* (42)
Rnd 19. (5sc,dec)* (36)
Rnd 20. (2sc,dec,2sc)* (30)
Rnd 21. in BLO (3sc,dec)* (24)
Rnd 22. (2sc,dec)* (18)
Rnd 23. (1sc,dec)* (12)
Rnd 24. 6 dec (6)
Fasten off and close.
Collar
Take yellow yarn in FLO of Rnd 20.
Rnd 1. 3 hdc in same stitch x 30 (90)
Join the round by making a slst in the first hdc, of rnd 1.
Then, make ch 2 and crochet the first hdc of rnd 2 in the slst.
Rnd 2. 90 hdc (90)
Join the round by making a slst in the first hdc of rnd 2.
Rnd 3. Repeat (ch 3, skip 2 stitches, slst in next stitch)*
Nose
Ch 7- crochet around the chain.
Rnd 1. 1 inc, 4 sc, 3 sc in last st, 4 sc, 1 inc (15)
Rnd 2. (4sc,inc)*2, 1 slst, 1 slst-dec, 1 slst, 1 inc (17)
The slip stitch decrease (slst-dec) will create the shape of the bottom of the nose.
Rnd 3. 11 sc, 1 slst, 1 slst-dec, 1 slst, 2 sc (16)
Fasten off, leave a tail for sewing.
Embroider black muzzle and stuff lightly.
Ears (Make 2)
Rnd 1. 6 sc in MR (6)
Rnd 2. (1sc,inc)* (9)
Rnd 3. (2sc,inc)* (12)
Rnd 4. 12 sc (12)
Rnd 5. (3sc,inc)* (15)
Rnd 6. 15 sc (15)
Rnd 7. (4sc,inc)* (18)
Rnd 8-20. 18 sc (18)
Fasten off, leave a long tail for sewing. Fold the ear and sew both sides together.
Finishing
Sew the nose onto the face and embroider the muzzle and any eye details. Attach ears securely to the top of the head. Add the collar around the neck and weave in all ends. If you want to hang the ornament, sew a small loop or chain to the top before closing the final stitches. Trim any excess yarn and adjust stuffing for a smooth finish.