

How to Crochet a Charming Pixie Hat — Pattern for Child (3–10) & Adult with Heart and Rose Embellish
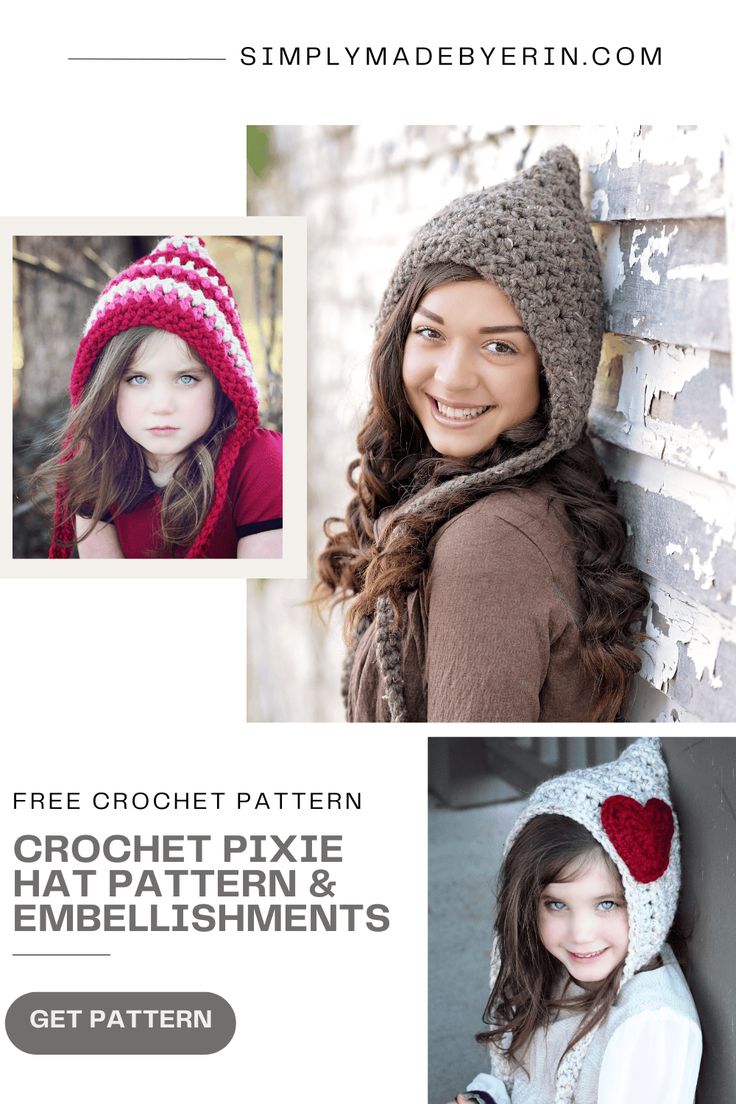
This step-by-step Crochet Pixie Hat pattern creates a whimsical, pointy pixie-style hat. The pattern includes written instructions for Child (3–10 years) and Adult (one size fits most), a materials list, gauge, row-by-row construction, and optional heart and rose embellishments. Skill level: Advanced Beginner — suitable if you know basic stitches and can work in rows.
Skill Level
Advanced Beginner
Stitch Key | US Terms
- beg – beginning
- blo – back loop only
- ch(s) – chain/chains
- dc – double crochet
- hdc – half double crochet
- rnd – round
- rs – right side
- sc – single crochet
- sl st – slip stitch
- st(s) – stitch/stitches
- tr – triple/treble crochet
- ws – wrong side
Materials
- Size 6, Super Bulky Yarn, approximately 90-110 yards
- I prefer Lion Brand Wool Ease Thick & Quick
- P16/11.5mm Crochet Hook (or size to meet gauge)
- J10/6mm Crochet Hook (for heart or rose embellishments)
- Tapestry Needle
- Scissors
- Flexible or Standard Measuring Tape
Gauge
Gauge Working In Rows
5 ¼ rows & 7 hdc = 4”x4” with P hook
Please be sure to check your gauge before starting, as tension can vary greatly from person to person and depending on the yarn used.
Written Instructions For The Crochet Pixie Hat
– Do not ch at the beg of each row, work right into your 1st sc.
– Only work in blo when noted, otherwise work in both loops.
– For the striped version shown, simply switch to a new color after each row. When you get to Steps 1 – 4 use the same color that was used on row 1.
Child 3 – 10 Years
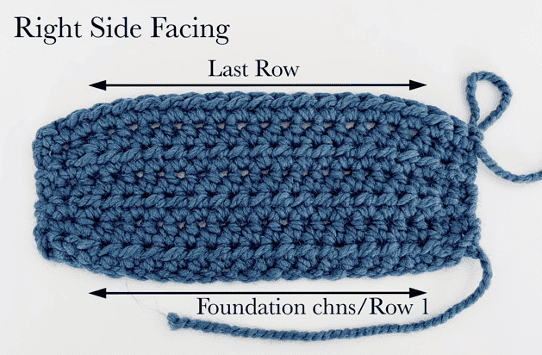
Row 1 WS. Loosely ch 31, working in blo, sc in 2nd ch from hook, sc in next ch, hdc across, ending with a sc in last 2 chs, turn. (4sc, 26hdc)
Row 2-11. Sc in next 2 sc, hdc in each hdc across, ending with a sc in last 2 sc, turn. (4sc, 26hdc) (finished rectangle should measure approximately 17 inches long by 8 inches deep)
– Do NOT fasten off, follow the steps below to finish construction of the hat and ties.
Adult One Size Fits Most
Row 1 WS. Loosely ch 35, working in blo, sc in 2nd ch from hook, sc in next ch, hdc across, ending with a sc in last 2 chs, turn. (4sc, 30hdc)
Row 2-13. Sc in next 2 sc, hdc in each hdc across, ending with a sc in last 2 sc, turn. (4sc, 30hdc) (finished rectangle should measure approximately 19 -20 inches long by 10 inches deep)
– Do NOT fasten off, follow the steps below to finish construction of the hat and ties.
Hat Construction All Sizes
-After completion of the rows the hat will create a rectangular shape. Reference steps below for proper stitch placement.
Step 1.
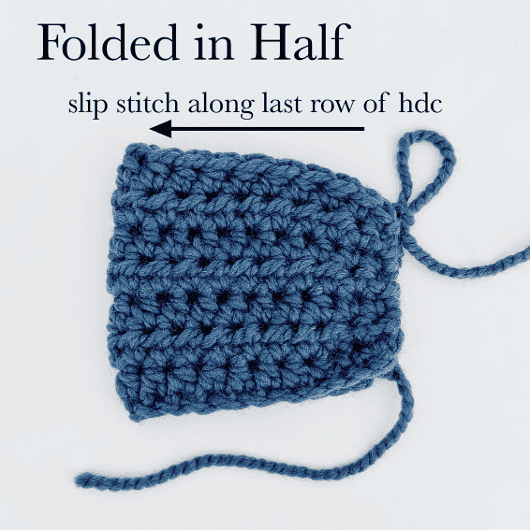
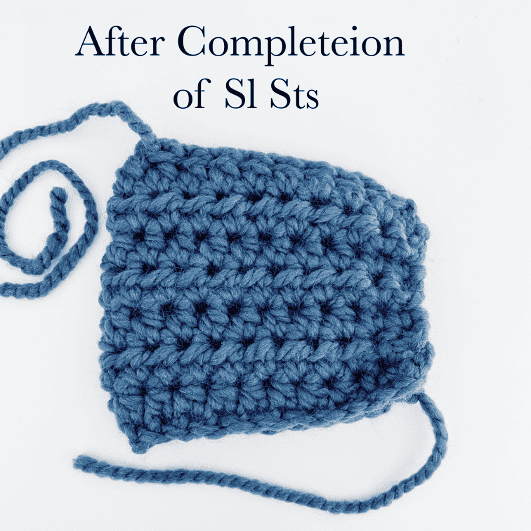
With rs facing you, fold rectangle in half lengthwise, working under all loops, sl st the back closed (you’ll be working along the last row you completed), fasten off, weave in loose ends.
Step 2 (1st tie).
With rs facing out, attach yarn at corner 1 with a sl st, ch 25(child), 30(adult), sc in 2nd ch from hook and remaining chs across, ending with a sl st in corner 1.
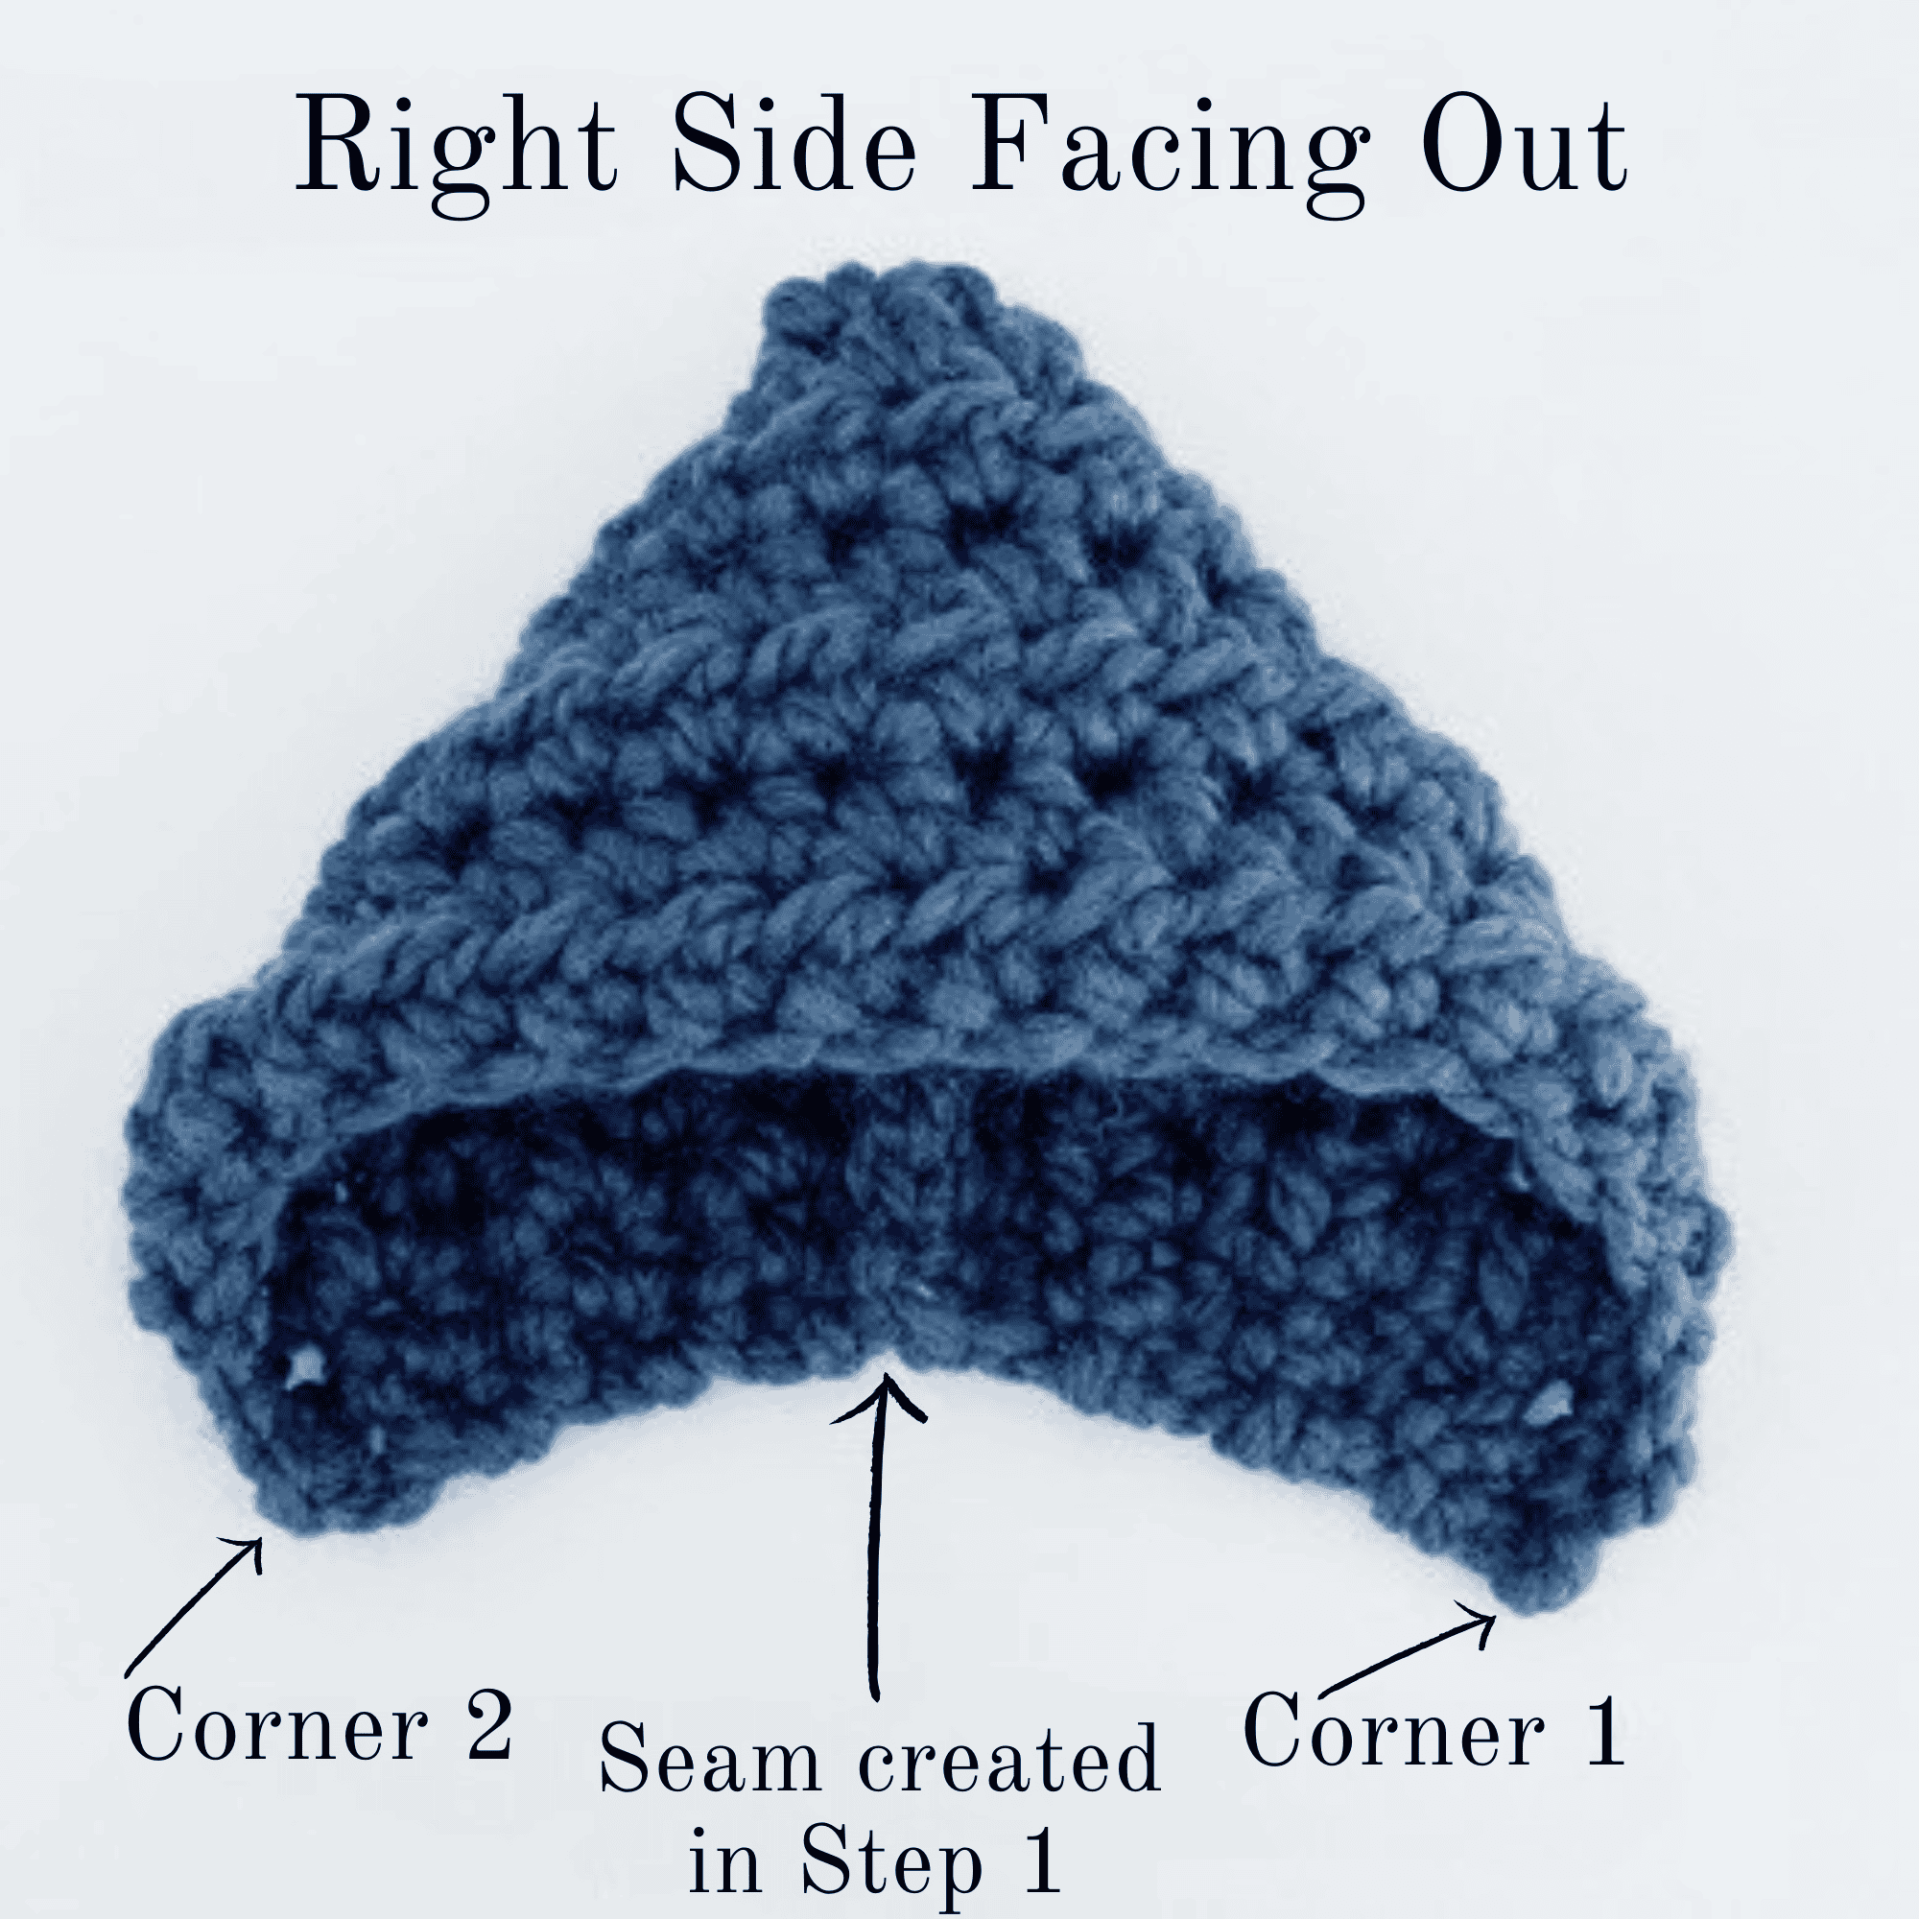
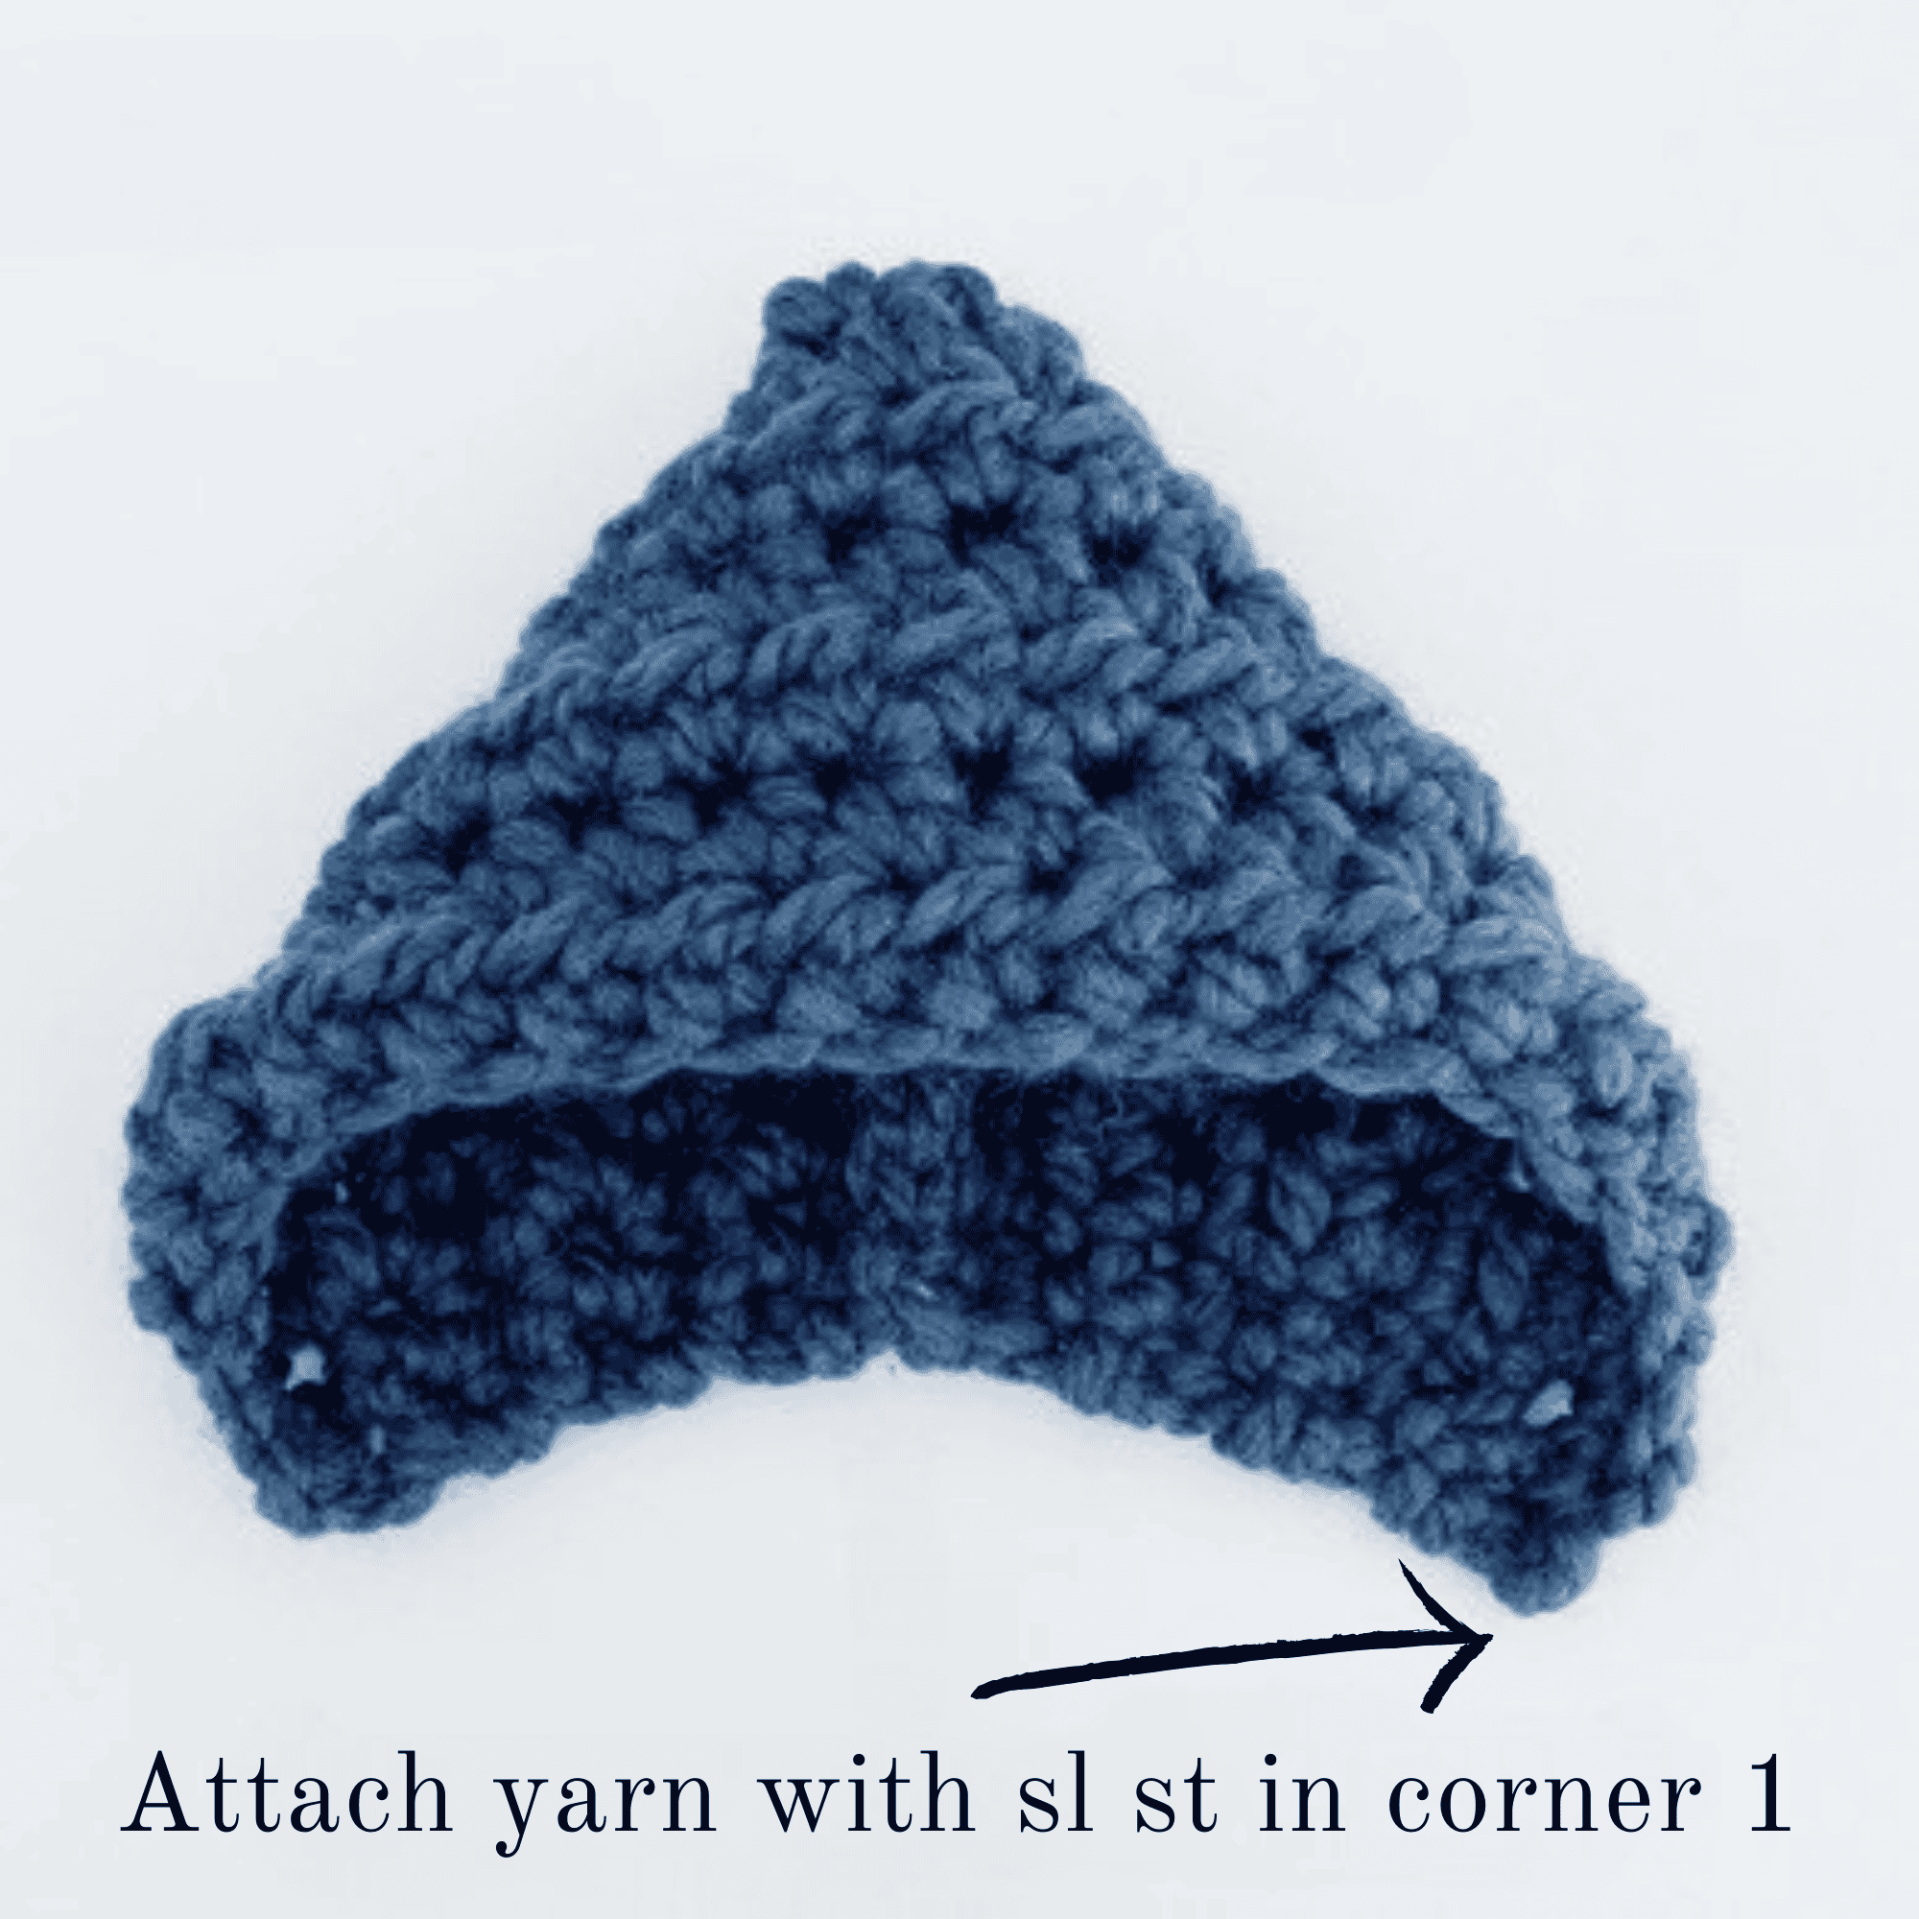
Step 3.
Sc evenly around sides/back of hat (about 20 sc for child size & 24 sc for adult), ending with a sl st in corner 2.
Step 4 (2nd tie).
Ch 25(child), 30(adult), sc in 2nd ch from hook and remaining chs across, ending with a sl st in corner 2.
Fasten Off & Weave in the Loose Ends. Your new hat is now complete, enjoy!!
Heart Instructions

– Do not join at the end of each round, work in a continuous circle around the heart.
– Use a J10/6mm crochet hook
Rnd 1. Create a magic circle, ch3, (working in circle) 2tr, ch1, 3dc, ch1, 1tr, ch1, 3dc, ch1, 2tr, ch3, sl st.
Rnd 2. Sl st in ch1 from beg ch3 of rnd 1.
sc in next ch, hdc in next ch,
dc in tr, ch1, 3tr in next tr, ch1,
2dc in ch, dc in next 3dc,
2dc in ch, 2tr in next tr,
2dc in ch, dc in next 3dc,
2dc in ch, ch1, 3tr in next tr, ch1,
dc in next tr,hdc in ch, sc in next ch,
sl st in last ch, sl st in magic circle. Fasten off leaving the tail end long enough to affix to hat. Weave in beg tail.
Use remaining tail end to sew onto hat. Your new hat is now complete, enjoy!!
Rose Instructions
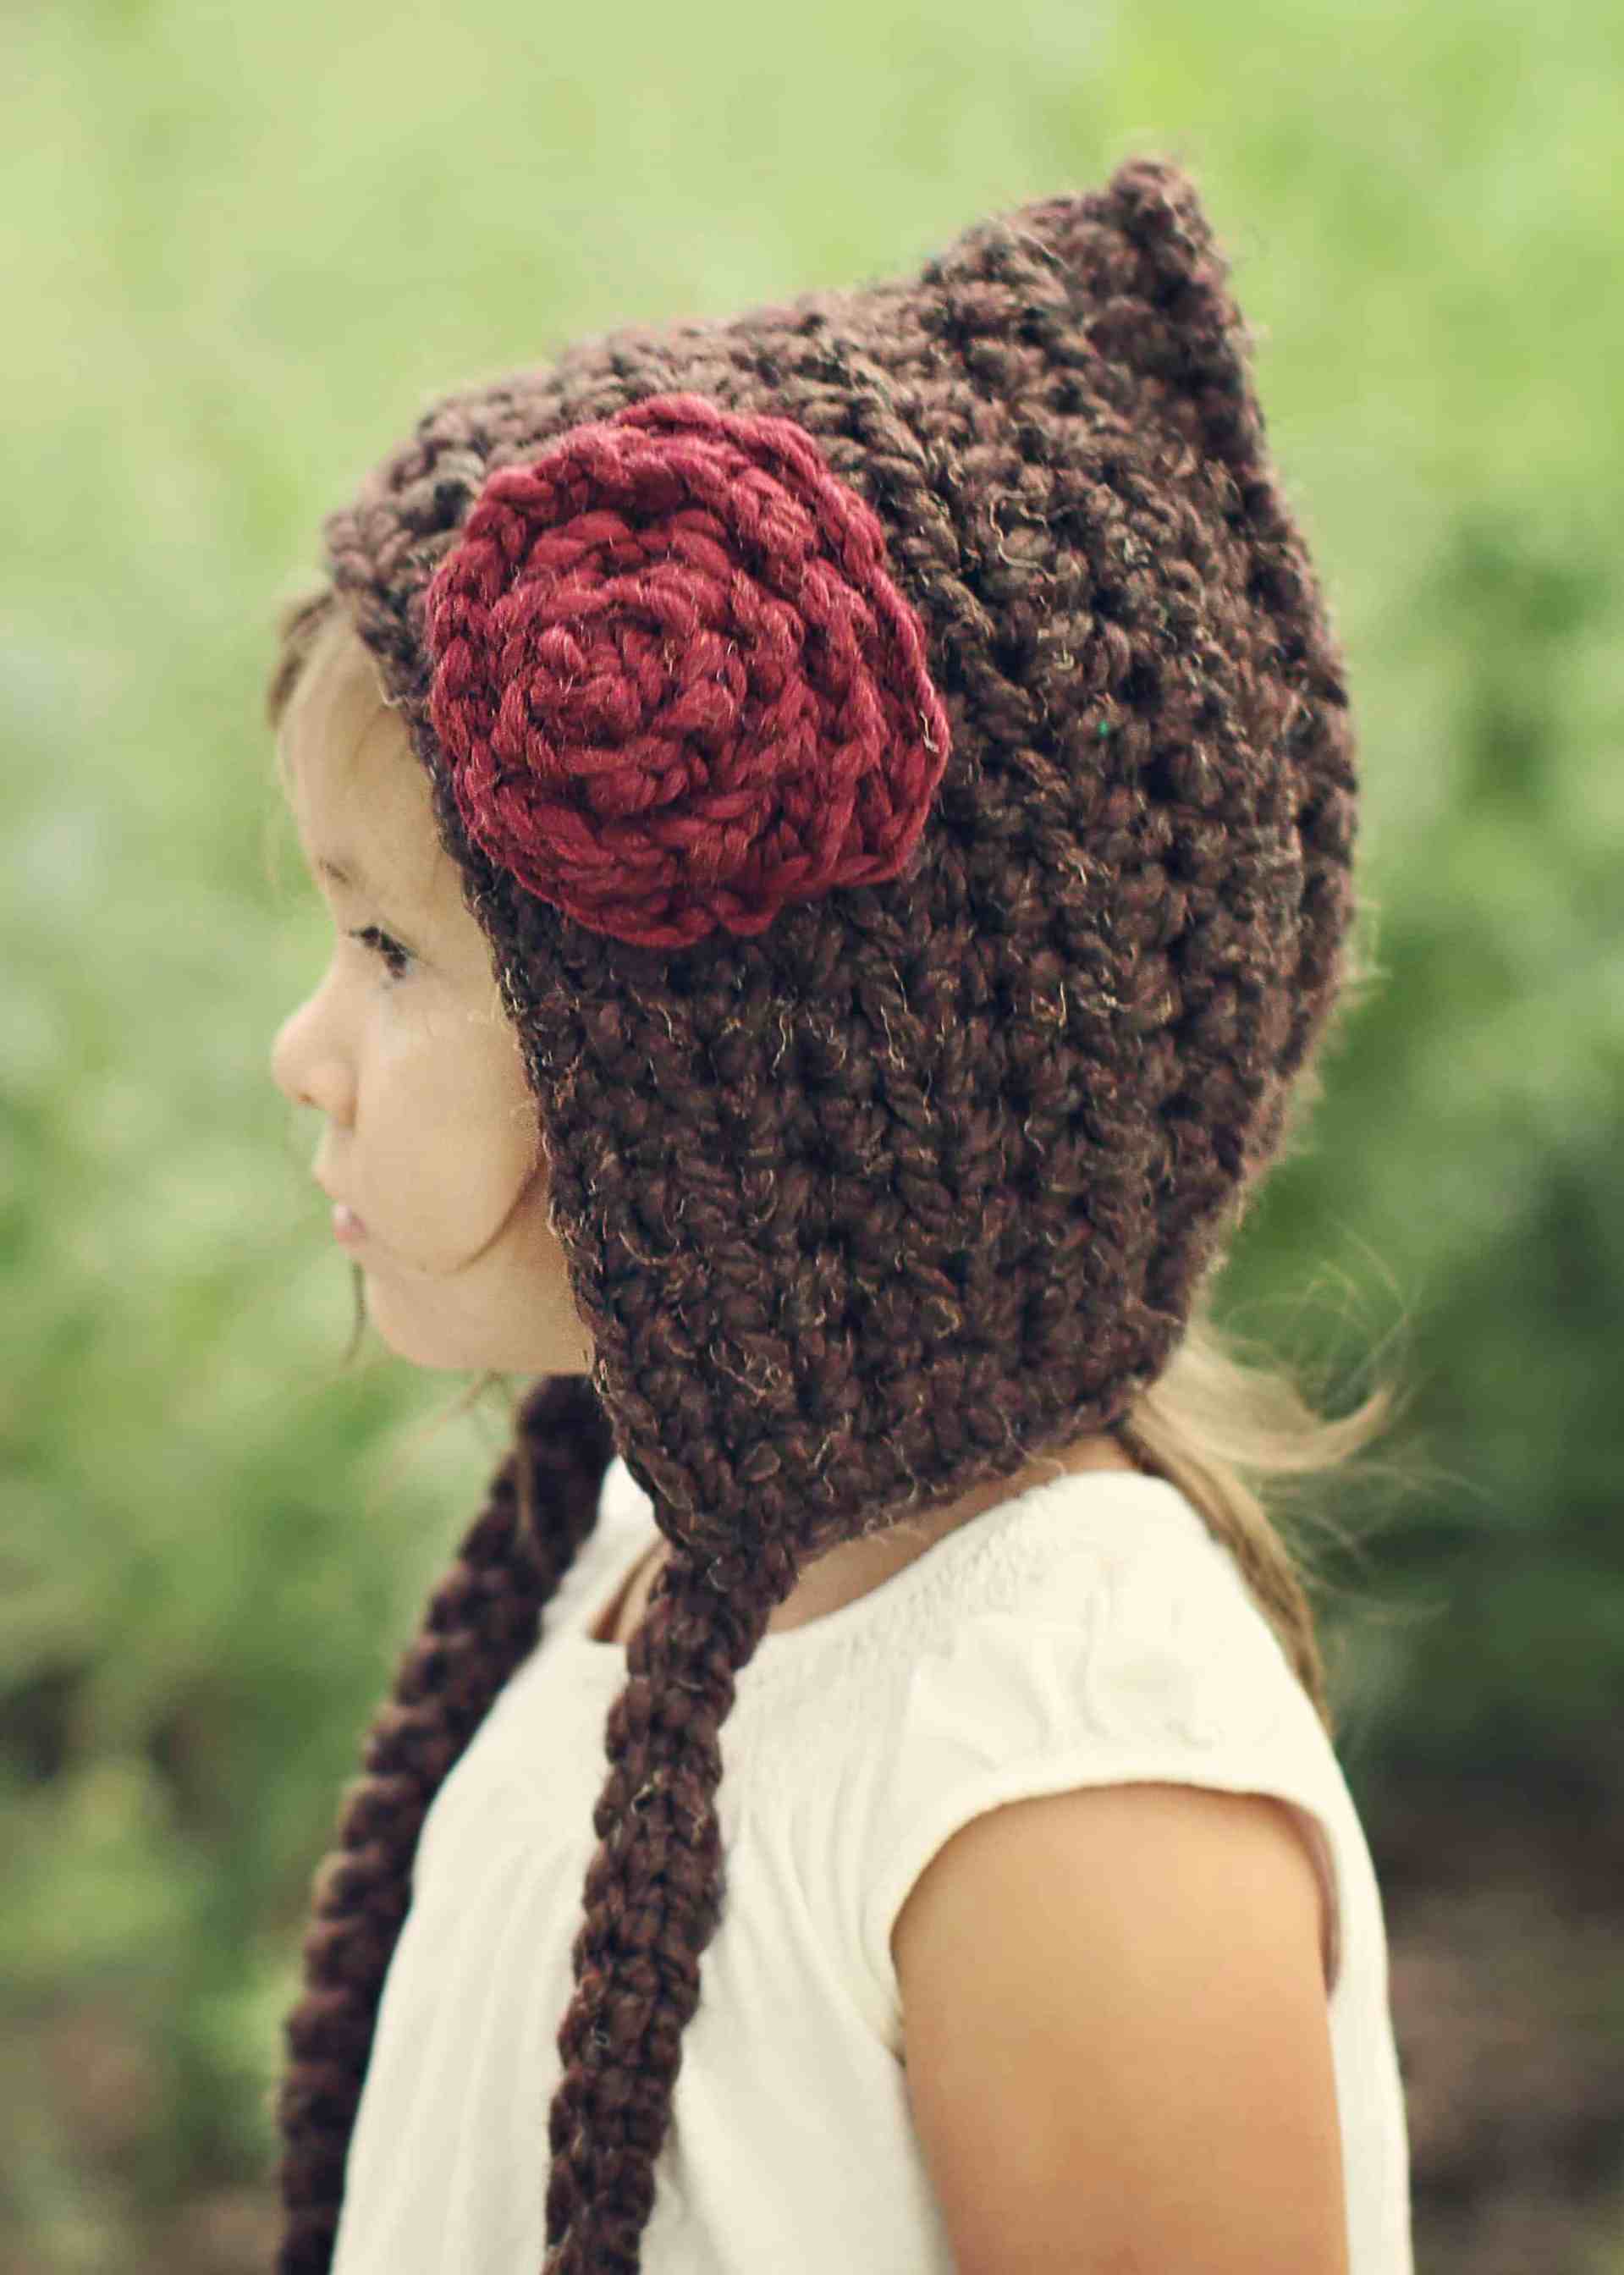
-The roses can be made in any size by adjusting the number of beg chs.
– Use a J10/6mm crochet hook
Leaving a 12-inch beg tail, Ch 40
Row 1. Work a hdc & dc in 2nd ch from hook, and remaining chs across, ending with a sl st in last ch.
Fasten off leaving a 12-inch tail.
Starting at the end with the tails, curl/roll flower into a spiral shape, (the tails should be positioned out of the front side of the flower).
Using a tapestry needle weave one tail end through the front center of the flower (to the backside), weaving it in and out of the back of the flower, through the chs, until the flower is completely intact and in the desired shape.
Use remaining tail end to sew onto hat. Your new hat is now complete, enjoy!!