


Turn Flip-Flop Soles into Stylish Crochet Sandals — Easy Step-by-Step Pattern
Make a pair of unique, comfortable sandals by crocheting directly onto flip-flop soles. This DIY project combines the durability and fit of store-bought soles with the custom look of handmade crochet. The pattern below uses Gloss DK yarn and a 4 mm hook and creates a decorative strap and ankle band with a button closure. Ideal for summer wear, these sandals can be customized by yarn color and stitch variation.
Before you begin: choose a flip-flop sole that fits you well and select a yarn suitable for occasional outdoor wear (cotton blends or acrylics are common). Work the stitches snugly around the straps so the crochet holds to the sole but remains comfortable. Test gauge and strap placement on one sole before completing both sandals.
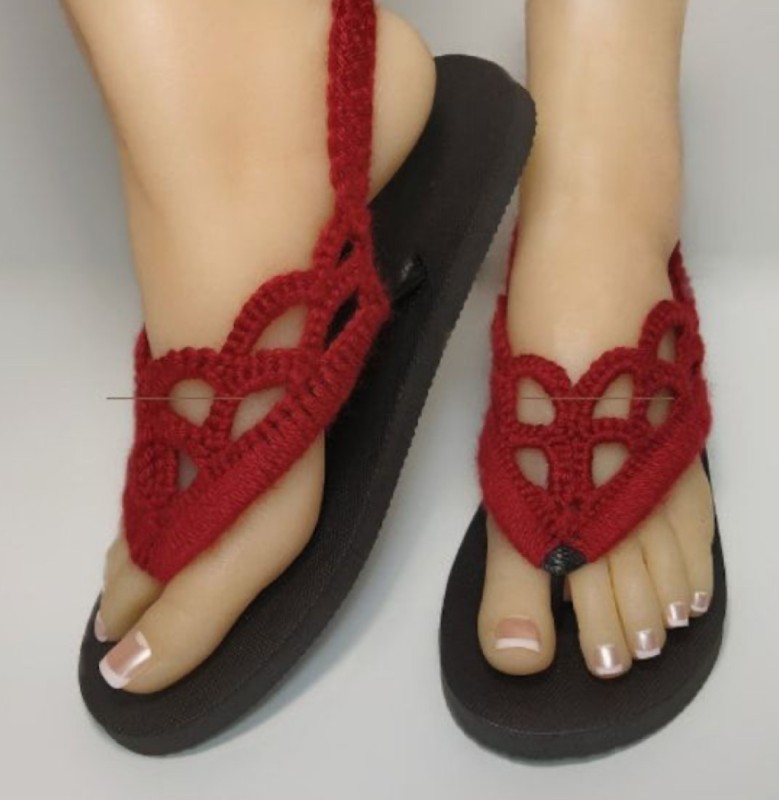
Finished crochet sandal made by crocheting around a flip-flop sole using cranberry Gloss DK yarn.
Materials
- Gloss Dk yarn in the color cranberry
- 4mm hook
Abbreviations (US Terms)
- Ch – Chain
- Sl St – Slip Stitch
- Sc – Single Crochet
- Hdc – Half Double Crochet
- Dc – Double Crochet
Special Stitches
- Sc2tog – *insert hook into next st and pull up a loop, repeat from * 1 more time, yarn over and pull through all 3 loops on hook.
- Sc4tog – *insert hook into next st and pull up a loop, repeat from * 3 more times, yarn over and pull through all 5 loops on hook.
Pattern
Row 1: Attach yarn to flip flop strap. 29 sc across the first strap, 29 sc across the second strap, turn. (58)
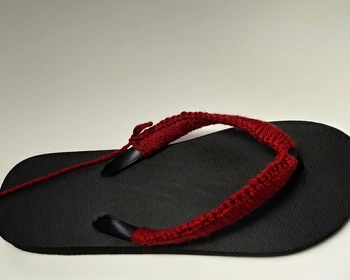
Close-up of crochet stitch detail worked around the flip-flop strap showing the textured stitch work.
Row 2: Ch 1, sc first 2 sts, *ch 5, sk 5 sts, sc next 3 sts, repeat from * 1 more time, ch 5, sk 5 sts, sc4tog 3 times, *ch 5, sk 5 sts, sc next 3 sts, repeat from * 1 more time, ch 5, sk 5 sts, sc last 2 sts, turn.
Row 3: Ch 1, sc first st, *sk 1 st, 9 sc in the ch-5 sp, sk 1 st, sc next st, repeat from * until end of row, turn.
Row 4: Ch 4 (counts as dc+ch-1), sk 3 sts, sc next 3 sts, ch 5, sk 7 sts, sc next 3 sts, ch 5, sk 7 sts, sc next st, sc2tog over the next st and the 11th st from your hook (sk the 9 sts in between), sc next st, * ch 5, sk 7 sts, sc next 3 sts, repeat from * 1 more time, ch 1, dc in last st, turn.
*Here’s how to do the underlined portion in more detail: insert your hook into the next st and pull up a loop, count 10 stitches, you’ll be skipping the first 9 stitches you counted, insert your hook into the 10th st and pull up a loop, yo and pull through all 3 loops on your hook.
Row 5: Ch 1, sc first st, 4 sc in the ch-1 sp, sk 1 st, sl st next st, sk 1 st, *9 sc in ch-5 sp, sk 1 st, sl st next st, sk 1 st, repeat from * until the last ch-1 sp, 5 sc in the last ch-1 sp, sl st into the same ch-1 sp, sl st into the last st of the row below, ch 16 (or until mid back of ankle).
Row 6: Hdc in 2nd ch from hook, hdc until end of ch, remove hook, insert working loop through first arch, reinsert hook onto loop), turn.
Row 7: Ch 1, hdc in each st across, continue without fastening off
Buttonhole: ch 3, sl st into the last st of row 6, fasten off
Opposite Strap: Attach yarn to opposite ch-1 sp of row 4, ch 16, repeat Row 6-7
Button: Attach button to the end of the strap you just completed.
Finishing and Care: Weave in all ends securely. If you expect heavy outdoor use, consider a fabric-safe glue under the crochet edge where it meets the sole for extra durability. Hand wash gently and air dry to prolong yarn life and shape.